OK, you have worked diligently for the better part of an evening tying a Royal
Wulff for the first time. Congratulations on your achievement!
But wait, aren't your wings a bit sparse? Your tail seems to be rather long as well.
Now you have a sinking feeling that perhaps your fly is not as well tied as you had thought.
Pictures in a book can convey a general impression of how a finished fly should look,
but nothing is as good as having the real thing right in front of you for comparison. It is
like painting a beautiful nude while using a picture in a book as an example, possible
perhaps, but certainly not very inspirational.
Of course, using a real live nude model may well get you a subpoena to appear in
divorce court. Fly tying on the other hand may get you some strange looks, but we
get them anyway!
There is however, a lesson to be learned from the artist. That being, the use of a model,
or example, in the execution of our art.
If you have a friend who is an accurate tier, ask him or her to tie you up some 'models.'
If you have no such talented friends a trip to the local fly shop will get you all of the
models you will need. Simply ask your friend there, to help you select well tied examples
of each pattern you plan to tie. (You have made a friend there and have patronized
the shop, right?)
OK, we have our models, which just set us back about $2.00 each, now what? Do we
put them in our fly box and perhaps in the confusion of a hatch inadvertently tie them
onto our tippet and thus lose them? Or, do we just throw them into a box where they
can become matted and twisted? Or perhaps a separate fly box, which we will never
take to the stream and which, contains all of our 'models?'
The later may work, but as usual we have a better idea, don't we?
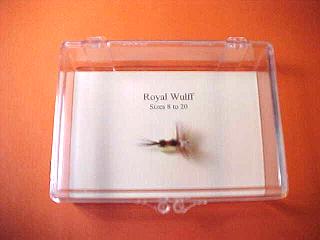
Little clear plastic boxes for each individual fly! Yes, a separate box for each example,
on the bottom of which we have attached a little foam pedestal worthy of our model,
and a label so we don't forget the name. Gee, we might even list a size range, and
ingredients on the reverse of paper in the bottom of the box to which the foam pedestal
is attached. You can be as creative as you like in this, but the core objective is the
preservation of your model.
Plastic boxes of the size we need can be obtained at craft stores, or better still many
of the 'Baseball Card' shops which have sprung up over the last several years. They are
worth about $.50 each, which is cheap. You may also have all of the boxes you need
from having received various items in them, and retaining the box for some future use.
Now, after "mounting" your fly in the little plastic box, you may bring it to the bench
and use it as your model or the "standard" against which to verify the accuracy of your
work, using it to answer your questions about proportion etc.
The box will allow you to see the fly as you tie, without subjecting it to the indignity of
having material clippings and errant contaminants take up residence therein, thus degrading
it's appearance and perhaps value as an example.
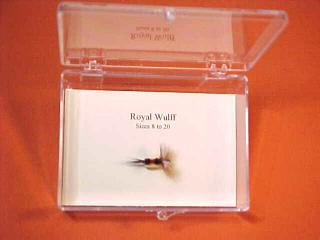
If you need to take a look without the lid being in the way, simply open the box and
check what you need to check, then close the box restoring the protection to the model.
When you have finished your session at the bench with that particular pattern, put it away
in the box and it will be there, just as pretty as ever to serve you the next time the need
arises. Your flies good looks will last forever this way, which is a lot more than we can
say for the nude model which might have caused your divorce. And the one in the box
will not have a couple of black eyes the next time you take it out, like the other one
should your wife discover her in the house!
If you have any tips or techniques, send them along, most of this
material has been stolen from somebody, might as well steal your ideas
too!~ George E. Emanuel
(Chat Room Host Muddler)
|