|
Trucos de montaje
Peacock Chenille
By Steven H. McGarthwaite
By Steven H. McGarthwaite
|


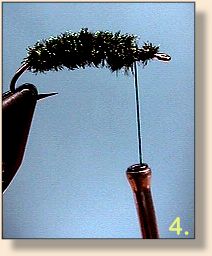
DO NOT try to twist the thread and herl so the whole length is twisted. If you try to twist the whole length the chenille will break at the hook shank where the herl stems are the smallest diameter.
|
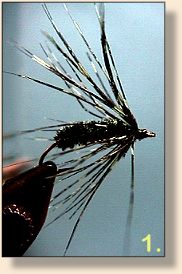
 Start the Chenille construction by tying the herl in
by the tips allows the rear portion of the fly's body
to be of a smaller diameter. This will result is a
tapered body increasing in size as the chenille is
wrapped forward. Creating your own Peacock Chenille
will reinforce the individual Peacock Herls and make
them almost indestructible. ~ Parnelli
Start the Chenille construction by tying the herl in
by the tips allows the rear portion of the fly's body
to be of a smaller diameter. This will result is a
tapered body increasing in size as the chenille is
wrapped forward. Creating your own Peacock Chenille
will reinforce the individual Peacock Herls and make
them almost indestructible. ~ Parnelli