Welcome to Intermediate Fly Tying

Part Fourty-one


Intermediate Fly Tying:

Al's Crayfish

Al's Crayfish

By Al Campbell


Who doesn't know the value of crayfish when it comes to the subject of fish food? I can't think of a gamefish species that won't eat a crayfish if it can fit the crunchy little critter in its mouth. Trout, pike, bass, walleyes and panfish all eat crayfish if the opportunity arises.

I guess that's why crayfish patterns are common fare for bass fishing. But, I don't understand why people don't use them more for panfish, walleyes, trout and pike. The value of this creature has been revealed to me many times in the last few decades, but it took a trip to Deerfield Lake in the Black Hills of South Dakota nine years ago, to rivet the versatility of the fly into my memory.

It was springtime and the ice was just starting to leave the lake. I was casting a small wet fly onto the ice then dragging it off the edge and letting it sink. I was picking up a few fish, but nothing really big.

A few of the fish coughed up small crayfish while I was releasing them.

In fact, the biggest fish coughed up more than one, and some of the crayfish they were coughing up were almost too big to fit in their mouth. A little squeeze on the belly of the next couple of fish revealed they were also full of crayfish.

I might not be the brightest guy in the world, but I'm smart enough to take a hint when it's presented in such an obvious way. I switched to a small sized version of my favorite crayfish pattern and started catching more fish. I also started catching bigger fish.

Eventually I realized that a larger fly might catch larger fish so I switched to a size 4 fly. The next trout I caught was over five pounds, and it had visible lumps in its belly. The fishing continued fast and fruitful with several more rainbows and one splake over five pounds. By the time darkness and cold forced me to quit, I had caught and released over 30 trout, and most of them had visible lumps in their obviously full stomachs.

I've repeated that spring, ice-out trip many times since then. Most of the time the fishing has been good, and a few times it was great; passing up the action of that first trip. Every time, the best fly was that crayfish pattern I developed in 1982 to fool the big browns of the Missouri River in my native state of Montana.

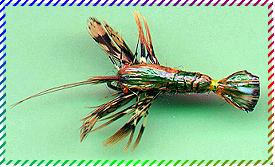
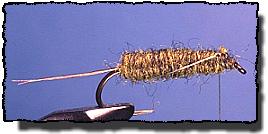
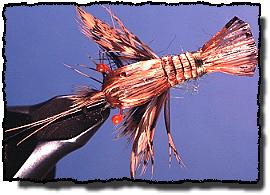
Since I've lived all my life in areas that were rich in grouse and pheasants, I use the feathers of these birds in many of my fly patterns. If the original pattern calls for hen feathers, I'll often substitute grouse or pheasant when I can. That's the case with this pattern too. 
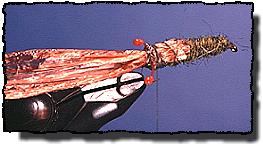
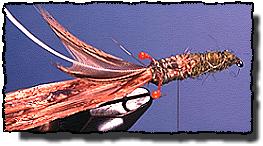
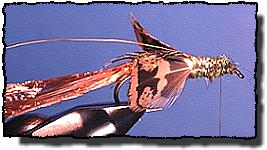
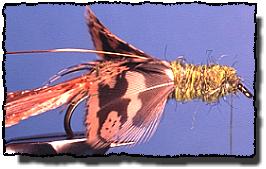
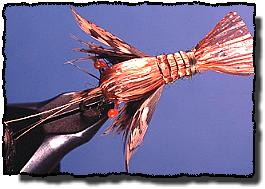
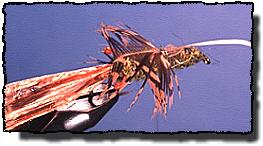
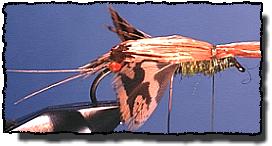
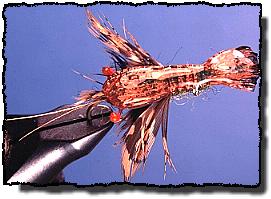
The claws, antennae, legs and front of the carapace (the hard shell over the head of the crayfish) are all created with pheasant and sharptail grouse feathers.

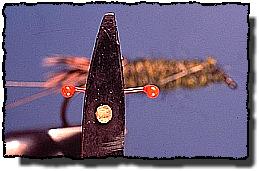
If you don't have access to grouse feathers but do have access to brown hen feathers that are mottled with black, use those as a suitable substitute. I'm certain the fish won't complain if you use something a little different from what I use. After all, the only thing that really matters is that the fish like it.

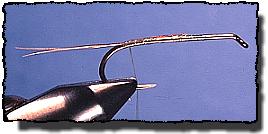
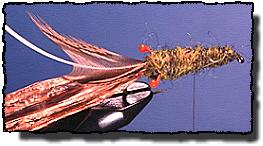
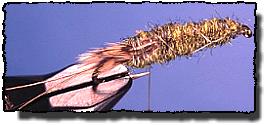
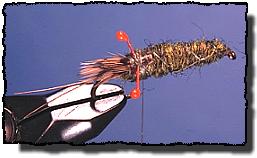
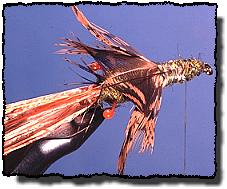
My crayfish pattern has evolved a little over the years. At first, I used head cement to strengthen the back and tail and I didn't color anything with markers. The head cement wasn't strong enough to be durable so I switched to epoxy. Eventually I started adding color to the back and tail to increase the visual attraction of the fly. After I learned about Angler's Choice Soft Body resin, it didn't take me long to start substituting it for the epoxy on my crayfish flies and most other flies that use epoxy.

List of materials: Al's Crayfish

  • Hook: Mustad 9671 or 9672, or any other streamer hook 1x or 2x long with a turned down eye. Sizes 2 to 12.

  • Thread: Olive or yellow 3/0 monocord.

  • Tail: Brown swiss straw, colored with waterproof markers and covered with epoxy or Soft Body resin.

  • Back (carapace): Swiss straw, extends over back, abdomen and creates the tail.

  • Eyes: Heavy monofilament, melted on the ends.

  • Underbody: Olive to tan yarn or dubbing

  • Claws: Grouse feathers.

  • Antennae: Two fibers from a pheasant tail feather.

  • Front of the carapace: Grouse feather.

  • Ribbing: Copper wire.

  • Weight: Medium lead wire.

  • Tying steps:

  • 1.Select two strands from a pheasant tail feather and tie in as antennae.

  • 2. Wrap the rear half of the hook with lead wire. Smash the wire flat with smooth pliers and glue down with super glue.

  • 3. Cover the entire length of the hook shank with a thick coat of yarn or dubbing.

  • 4. Tie a grouse feather over the hook bend to form the front of the carapace as shown. Don't worry about thread wraps that will be buried later. I usually add a drop of head cement or super glue to these feathers to secure them firmly in place.

  • 5. Melt the ends of a thick piece of monofilament to form eyes. I like to use red mono for the visual attraction.

  • 6. Tie in the eyes as shown. Again, a drop of glue will hold them in place.

  • 7.Spread out some swiss straw and tie on as shown.

  • 8. Strip the bottom of a grouse feather to clear the fuzz, fold the fibers back and tie it on top of the body by the tip of the feather as shown. The curvature of the feather stem should be up at this point. Add a drop of glue to the tie-in point.

  • 9. Dub or wrap yarn to about the half-way point on the hook shank to cover the thread wraps and beef up the body.

  • 10. Pull the grouse feather over the back to form the legs and secure with thread. If you take two loose wraps of thread then pull the feather back, then cinch the thread before you tie it down the rest of the way, it will keep the legs firmly in place. Add a drop of glue.

  • 11. Select two grouse feathers to use as claws. Strip the fuzz from the stems and secure them to the sides of the body so the tips extend past the bend of the hook. Add a copper wire and a drop of glue to hold everything in place.

  • 12. From the top, your fly should look like this. We'll adjust the legs later.

  • 13. Dub or wrap yarn over the rest of the body to the hook eye.

  • 14. Move the wire to the bottom of the fly. Pull the swiss straw over the back and secure with thread behind the hook eye. Try to keep the swiss straw spread out so it won't bunch up at the thread wrap.

  • 15. Rib the abdomen to the tail with the copper wire. Tie off and trim the wire; whip finish and trim the thread. Spread the tail out. I usually add a few drops of head cement here to reinforce the tail. Spread the legs out on both sides of the claws.

  • 16. Trim the tail to the proper length and round the corners a little. Color the back and tail with green and black markers.

  • 17. Coat the top of the fly from the front of the carapace to the tip of the tail with Angler's Choice thick Soft Body plastic resin or epoxy.

    If you like, you can tie in the claws before you pull the feather back to make the legs. By now you must realize that these are your flies to modify and tie the way you want them, not just the way I tie them. If the crayfish are getting ready to molt, they might have an orange hue. Experiment a little with different colors and sizes. You can try other tail materials like hair or plastic if you like.

    Every fly tyer develops a signature way of doing things. This is a type of trademark that identifies the fly to the creator of that fly and to the tyer of the fly if he or she isn't the creator. Because this is true, even the most exacting reproductions of someone else's patterns carry the signature of the person who tied them.

    You probably notice the signature of Dave Whitlock and maybe Tim England in my version of the crayfish. That's because they both tied crayfish flies that had an influence in the development of my fly. This fly is really a combination of both their flies rolled into one dynamite pattern. Of course, my own signature is also evident, and yours will be evident when you tie it.

    Until next week my friends, practice and have fun. See ya next week - Remember, I'm always happy to answer your questions, feel free to email me. ~ Al Campbell

    For more on fly fishing for panfish, check Panfish!

    Fly Tying Archives