Welcome to Intermediate Fly Tying

Part Thirty-eight


Intermediate Fly Tying:

Deer Hair Perch


By Al Campbell


How many times have you stood on the shore of a lake, watched the water open up under a wounded panfish, and witnessed the feeding intensity of a truly large bass or pike? Chances are it's happened many times if you fish the right places often. That's nature's way of taking care of sick and wounded water critters so they don't litter the shores of the lakes.

If you spent any time at all watching dying panfish, you probably noticed that they rarely swim upright like a healthy fish. Instead, they usually wiggle along on their side. This is the dinner bell for any hungry predator fish. Why spend any extra energy chasing down healthy fish if there's an easy meal lying on its side in front of you?

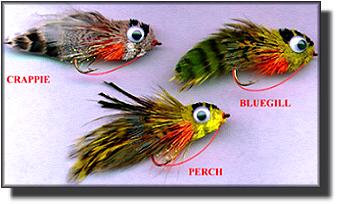
Perch are common in South Dakota lakes. For any number of reasons, many of them get sick or injured and die. Since many of those sick or injured fish become dinner items for larger fish, it makes sense to tie a fly that looks like a sick or injured perch. If bluegills, crappie or sunfish are the predominant panfish in your local lake, this week's pattern is easily adapted to those species as well.

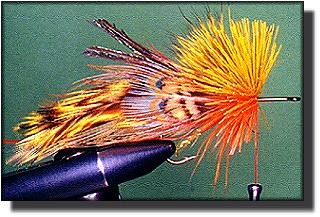
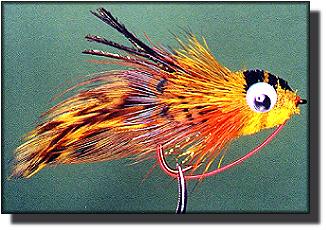
The Shinebou Sunfish and shad patterns developed by Jimmy Nix were the inspiration and guiding light for the deer hair perch pattern of this week's lesson. Although this isn't an exact copy of his fly or the tying steps he uses, the effect is so similar, the fish won't notice the difference.

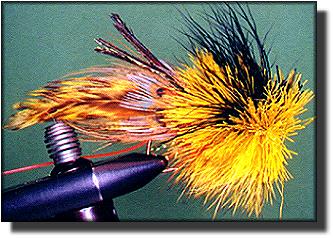
By the time you master this pattern, you'll be able to handle any of the common hair techniques used in bass flies. And, you can adapt these techniques to other flies. For instance, you could use these steps and techniques to tie a crappie or bluegill. All you really need to do is change the colors of the fly and keep the tying steps the same. Instead of yellow grizzly hackle, use green for bluegill or a mix of mallard breast feathers and plain grizzly hackle for the crappie. Change the hair color to match the body. A simple adaptation is all that's needed.

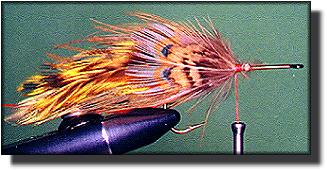
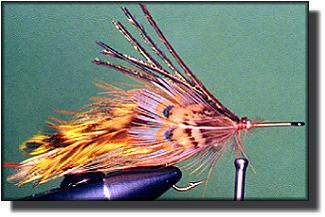
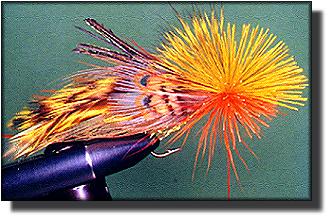
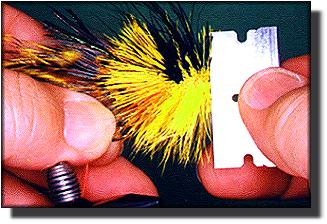
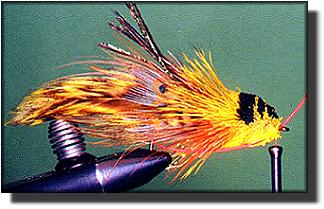
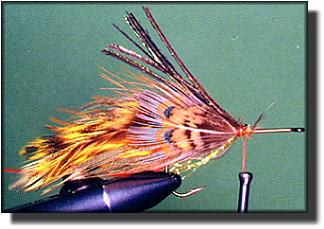
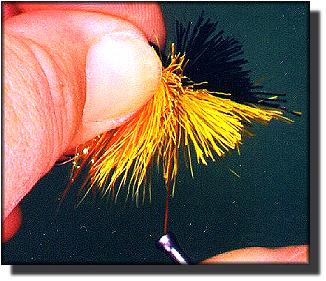
The fly is trimmed to lie on its side like a dying minnow would. If you wiggle the rod tip to cause a twitching motion, it will look a lot like a minnow that's about to expire. Any self-respecting bass or pike will want to hurry that expiration process along. That's reason enough for me to tie and fish this pattern.

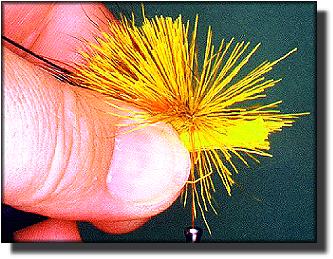
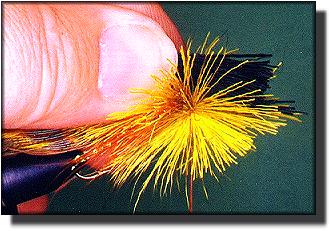
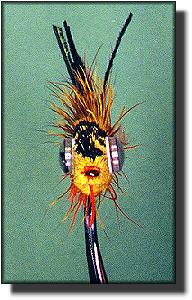
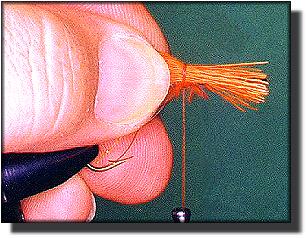
By now you should be getting pretty good at spinning, stacking and trimming deer hair. Personally, I'd love to spend another month showing more flies that use shaped hair for the body and head, but since we've already learned the techniques, that would be a waste of time and would limit some of the rest of the techniques I'd like to pass on to you.

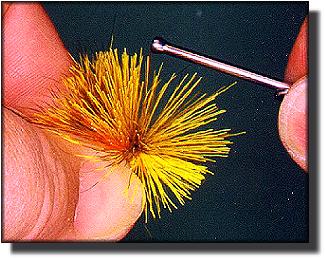
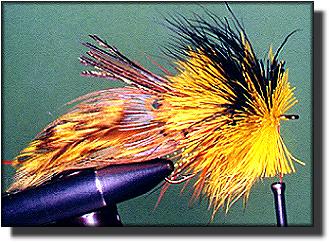
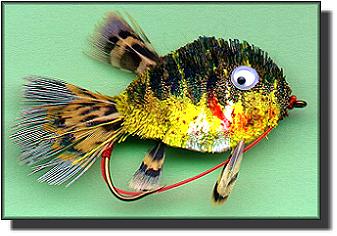
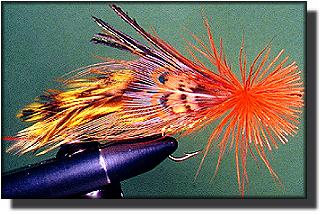
This fly takes advantage of all the deer hair stacking, spinning and trimming techniques we've learned. It looks nice, will get compliments from your friends, and it's as easy to tie as any of the deer hair flies 
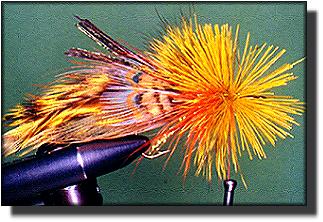
we've tied to this point. It just takes a little longer to tie. So, trim this final deer hair pattern well. You'll need the practice as we progress to new techniques.

List of materials: Deer Hair Perch

  • Hook: Wide gap bass bug hook. Mustad 37187, Tiemco 8089 or equivalent. Size: 3/0 to 4.

  • Thread: Red, olive, yellow, brown or black kevlar.

  • Tail: A mix of four dyed yellow grizzly hackles, two pheasant rump feathers, two pheasant back feathers, crystal flash and peacock herl. The feathers are separated into two identical piles with the butts of the feathers aligned with each other; one bunch tied on each side of the hook.

  • Weed guard: Hard Mason monofilament.

  • Gills: Red marabou.

  • Eyes: 4 to 8 mm doll eyes. Prismatic or painted eyes can also be used.

  • Head: Golden olive, black and/or dark olive deer hair on top; orange, bright yellow and golden olive deer hair on bottom; trimmed to a minnow's head shape.

  • Tying steps:

  • 1.Tie in a weed guard. You already know how to do this, so I won't explain it again. If you wish, some mylar tinsel can be added to the hook for some flash.

  • 2. Split the feathers into two identical piles. Arrange them with one pheasant rump feather on the bottom, two yellow grizzly hackles over that, and one pheasant back feather on top of each pile. Even the butts of the feathers and tie one bunch to the far side of the hook, curvature facing in. Tie the second bunch to the near side of the hook, curvature also facing in so the tips of the feathers meld into each other.

  • 3. Tie five or six strands of peacock herl to the top of the hook over the feathers.

  • 4. Add a short bunch of crystal flash to the bottom for some flash.

  • 5. Add some sparse gills of red marabou tied to the sides of the body as shown.

  • 6. Select a small bunch of orange deer hair, place it on top of the hook with the tips extending over the body a little and make several loops wraps of thread around it.

  • 7. As you cinch the thread, let it start to spin but place your finger on top of the hook to prevent it from spinning back to the top of the hook. This will keep the orange hair on the bottom.

  • 8. Cinch the thread tight enough to flare the hair fully, but keep the hair on the bottom of the hook. If you need to, manipulate the hair by hand, pushing it back down to the bottom of the hook.

  • 9. Next, select a bunch of golden olive hair and position it on top of the hook with the tips extending a little farther over the body than the orange hair did.

  • 10. Wrap the thread over the hair and cinch tightly. Wrap the thread over the hair again and cinch again, all the while holding the golden olive hair on top so it won't spin around the hook. When you have finished it should look like this.

  • 11. Maneuver the thread to the hook in front of the hair and compress the hair with a stacker until it extends vertically from the hook. You should squeeze the hair in the back to prevent it from slipping over the body when compressing it.

  • 12. Spin a small bunch of golden olive deer hair in front of the hair you already have on the hook.

  • 13. Select a bunch of bright yellow deer hair and position it centered directly under the hook.

  • 14. Cinch the thread upward tight, go around the hook with the thread and cinch again.

  • 15. Now position a bunch of black hair directly on top of the hook.

  • 16. Cinch downward on the thread, go around the hook and cinch again.

  • 17. Compress the hair with a hair packer.

  • 18. Repeat steps 12 through 17 until you've filled the hook.

  • 19. Once you've finished spinning and stacking hair, whip finish and trim the thread. Then, start shaping the head by trimming the sides of the head flat.

  • 20. Continue shaping the head with razorblade and scissors until it reaches the shape you want. Shape it flat and narrow on both sides. Notice the shape the stacked hair has after trimming?

  • 21. Install the weed guard. Whip finish but don't cement just yet.

  • 22. Glue the eyes in place with Zap-A-Gap. Then cement the head and soak a little cement into the sides of the fly.

  • 23. From the front, your finished fly should look something like this.

  • Practice will help to make this fly easier to tie. Is anyone totally lost yet? If you are, you might want to review the archives a bit. As with all lessons, this one is built on the things we've learned to this point. I'm still available for questions too.

    Did you notice the stripes of color you created? Those stripes can be any color you want to use. It's in the sequence you tie on the hair that gives each patch of color that special look. Like the islands of color we created last week, the lines of color in this fly are created by looking at the fly from the inside out and placing that color in the right places. The same technique of applying color will produce different effects if you trim it different. Experiment a little to see what other effects you can create.

    Want a challenge? The same steps you used to create the head of the deer hair perch were used to create the body of this fly. The tail and fins are pheasant back feathers. The tail is tied in first, then the hair is stacked and trimmed. The fins are cemented to shape with flexible head cement and pushed into the hair of the fly after trimming, then they are glued in place with head cement. I used waterproof marker pens to add a few (very few) highlights. Stacking the hair in the right places and trimming appropriately creates the colors and markings of the body. It's no harder than the last fly you tied; it just takes a little longer.

    Until next week my friends, practice and have fun. See ya next week - Remember, I'm always happy to answer your questions, feel free to email me. ~ Al Campbell

    For more on fly fishing for panfish, check Panfish and Warm Water!

    Fly Tying Archives