Welcome to Intermediate Fly Tying

Part Thirty-five


Intermediate Fly Tying:

Standard Deer Hair Bass Bug


By Al Campbell


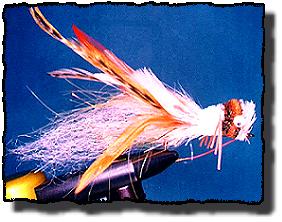
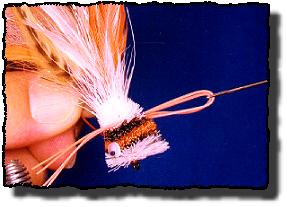
How did you do with the simple bass bug? I hope you practiced a little bit because we'll take off where we left off last time. This time, we'll 
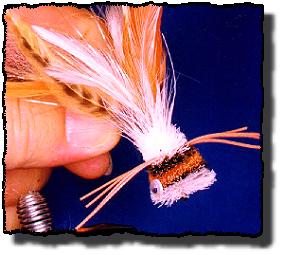
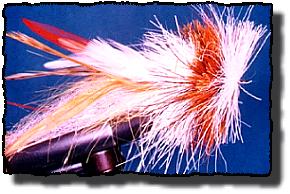
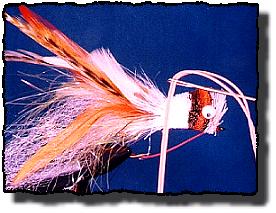
add eyes and rubber legs to our fly. Since standard deer hair bass bugs have these nice additions, so should ours, don't you think?

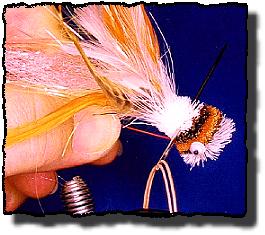
I'm guessing some folks are having a hard time trimming the hair head. A good pair of sturdy, sharp scissors are essential to trimming deer hair. So is a good, sharp razorblade. The scissors I use were purchased at a fabric store, not a fly tying shop. I purchased a pair of Ginger scissors because they are extra sharp and extra strong. Dr. Slick makes some scissors that will work well, but most of the scissors you find in fly tying shops just don't have the strength or hold an edge as well as the Gingers I use. If you're having problems with smooth cuts on deer hair, try to find a good pair of solid, sharp scissors. They make a world of difference when you need to trim deer hair.

I buy razor blades in a small carton so I always have a fresh, sharp blade handy. Some folks like to use double-edged blades because they get twice the cutting edge for fewer dollars. Double-edged blades also flex better so you can contour the head of your fly easier. I'm usually clumsy enough to remove a finger or two during the trimming process, so I use the safety blades. You'll have to make the right blade choice based on your dexterity and bravery.

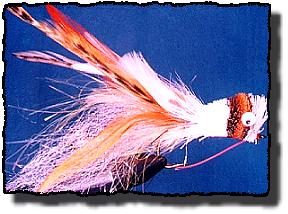
While you're visiting the fabric shop, pick up a large carpet needle. You'll need this needle to sew rubber legs through the deer hair head. Some folks try to tie the rubber leg material in while spinning the hair for the head, but this makes trimming a problem and it's hard to keep the legs where you want them on the head. By sewing the legs through the head and gluing them in place you save time and trouble. And, you can get a better trim on the hair without trying to work around the rubber legs.

Since you're spending so much time in the fabric shop, you might want to look for doll eyes. Most fabric stores I've visited carry some craft supplies too. I've found doll eyes and prismatic eyes in many colors and sizes in the fabric and craft stores near my home. If you don't have a good fly shop near your home, you might find some of the items you want at a craft or fabric store.

I haven't talked about how to fish deer hair bass bugs yet. If you fish with spinning or casting tackle, you've most likely had problems with weeds. One serious problem with conventional bass tackle is that you must reel the lure back after you cast it. That makes fishing pockets in the weeds difficult with conventional tackle.

Deer hair bass bugs don't have to be reeled back to the boat or shore before you can make another cast. With fly tackle, you can cast into an opening in the weeds, twitch the fly a few times, and if nothing hits you can pick the fly up and cast it to a new location without reeling the lure back to you. That makes the deer hair bass bug ideal for heavy cover with pockets of open water. A flyfisher can fish the heaviest cover, hitting all the open pockets where the big boys hide without reeling in one foot of line.

Let those hardware guys flog the water with their metal and plastic lures. While they are casting to water every other hardware guy has fished, you can be probing the pockets where the big boys decided to hide from the noisy stuff the other guys were throwing. And, since your fly floats, you can let it sit there for a while, tempting that old monster with a wiggling and twitching motion he will eventually find impossible to ignore.

Ready for another fly?

List of materials: Standard Deer Hair Bass Bug

  • Hook: Wide gap bass bug hook. Mustad 37187, Tiemco 8089 or equivalent. Size: 1 to 10.

  • Thread: Red, olive, yellow, brown or black kevlar.

  • Tail: Traditionally a mix or marabou, crystal flash or flashabou and saddle or neck hackle. This time I'm using a flashy antron type of material called Widow's Web. Bright colors are common. (Any number of materials will make a suitable tail, including synthetic hair, rubber leg materials and other common feathers.) Hackle feathers usually consist of three to six pairs of bright colored hackles (I'm using orange and white). These are usually several colors separated into two identical piles with the butts of the feathers aligned with each other, one bunch tied on each side of the hook.

  • Body: None. (Tinsel if desired.)

  • Hackle: None of the traditional trout fly stuff. The hackle feathers used here are tied in as part of the tail.

  • Weed guard: Hard Mason monofilament. (Traditionally clear, but red used here to be visible.)

  • Eyes: 4 to 8 mm doll eyes. Prismatic or painted eyes can also be used.

  • Head: Several colors of coarse deer hair, spun and trimmed to a popper shape.

  • Rubber hackle, sewn through the head and glued in place. I used orange, but any combination of colors will work. Try to match at least one color of the tail with the color of your rubber legs.

  • Tying steps:

  • 1. Use a lighter to melt the end of a piece of heavy monofilament creating a bump in the end of the monofilament. Tie the monofilament to the back of the hook. Continue wrapping the monofilament down around the bend of the hook with the thread. Return the thread to the starting point.

  • 2. Tie in the center of the tail using marabou or antron, flashy materials like crystal flash or flashabou and rubber hackle if desired. You can use any color or multiple colors if desired. Try not to make the tail too bulky. A little variety might be wise.

  • 3. Tie in the first group of hackle feathers, curvature facing out. You should tie this first bunch of feathers on the far side of the hook. Two loose wraps of thread should be taken first, then cinch the thread while holding the hackle tight to the hook. This will prevent the hackle from turning around the hook.

  • 4. Tie in the other bunch of hackle feathers on the near side of the hook, again, with the curvature facing out. Cover the ends of the hackle with thread and add a drop of glue to bind the hackle to the hook.

  • 5. Spin a multi-colored hair head like you did last time when tying the simple bass bug. Be sure to use a hair packer so you have a dense, solid head that will hold eyes and legs well. Maybe you'll get bold and try using more colors and more bands of hair?

  • 6. Trim the head to shape with scissors and a razor blade. Experiment with different shapes and sizes if you like.

  • 7. Bring the weed guard forward and tie it in like you did in the last bug. This is a standard procedure you'll become very familiar with before you finish bass bugs. If you like, you can form a pocket in the hair that the eyes will fit into by melting the hair with a soldering gun or wood-burning tool. Glue the eyes on with Zap-a-gap or epoxy. I like Zap-a-gap because it sets fast and holds very well to hair.

  • 8. Select two or three strands of rubber hackle at least 4 times as long as you want the legs to be. You can use multiple colors of rubber hackle here if desired. Thread the rubber hackle through the eye of a large carpet needle. Bring the ends of the rubber hackle together and stretch so that an even amount of leg material is sticking out both ends of the needle.

  • 9. Push the needle through the hair head where you want the legs to be. Try to keep the needle as close to the hook as you can get it. This will bury the rubber legs deep into the head.

  • 10. Pull the needle through the head and continue pulling until you have an even amount of leg material on both sides of the head.

  • 11. When you have the legs even, cut the loop at the needle and remove the needle. A few drops of cement worked deep into the hair will help hold the legs in place.

  • 12. From the side, this is approximately how your deer hair bass bug should look. Notice where the legs are sewn in?

  • I've noticed that bright colors like chartreuse and yellow work well in the spring, and darker colors like green and brown work better late in the summer. I'm not sure if it's that way everywhere, but here in the plains states it seems to be the rule. You might want to have a variety of these gems in different colors to fit the area where you live.

    Pockets in weeds and the edges of weed beds are the best places to use this fly, but it can also be very productive used as a popper near other types of structure. A twitching retrieve with long periods of rest between twitches can usually dissolve the nerves of any nearby bass, triggering a strike.

    Until next week my friends, practice and have fun. See ya next week - Remember, I'm always happy to answer your questions, feel free to email me. ~ Al Campbell

    Fly Tying Archives