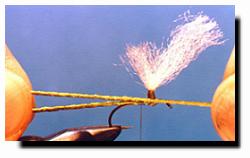
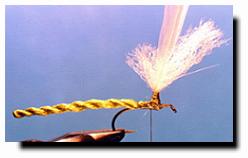
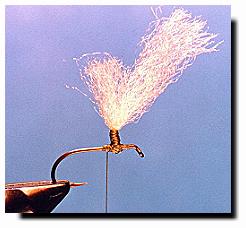
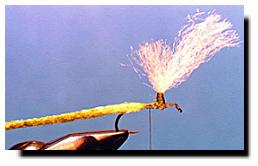
7. Continue to keep twisting pressure on the yarn and tie it off behind
the wing. Secure it with a few tight wraps of thread to prevent it from
relaxing.
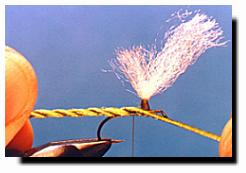
8. Twist the tail tight again, straighten it, and soak it with head
cement. Apply a few drops of head cement to the wing base too. Wait a
few minutes for the cement to dry. This cement will provide structure or
stiffness to the tail without adding so much weight that the tail will
sink.
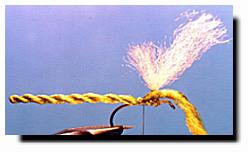
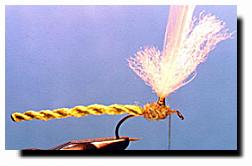
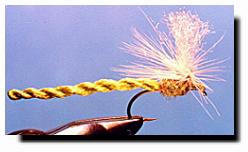
9. After the cement has dried, attach the hackle stem to the base of the
wing. You left the hackle stem 1/8 inch long instead of 1/16 inch to
allow enough stem to thoroughly attach the stem to both the wing base and
the hook. Your hackle should now be extending above the wing, curvature
facing out.
10. Dub a thorax similar in color to the body. Be sure to leave plenty
of room for the head of the fly.
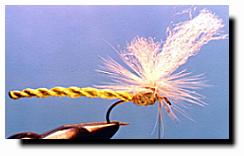
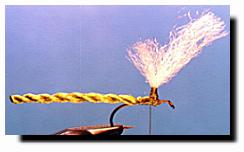
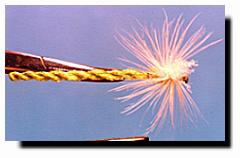
11. Wrap the hackle down the wing base, keeping the curvature of the
hackle facing downward. This will angle the tips of the barbules
downward, causing the fly to ride slightly higher in the surface film
than it would if you wrapped the hackle up then down the wing base. Tie
off the hackle with a couple of thread wraps, trim and secure with a half
hitch.
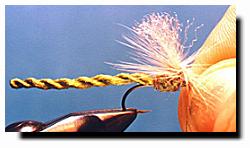 12. Push the hackle back at the front of the fly creating a gap in the
hackle. Grasp one of the strands of yarn you used for the wing (I left
one a bit longer than the other for this purpose), and pull it down
between the gap you created in the hackle at the front of the fly.
12. Push the hackle back at the front of the fly creating a gap in the
hackle. Grasp one of the strands of yarn you used for the wing (I left
one a bit longer than the other for this purpose), and pull it down
between the gap you created in the hackle at the front of the fly.

13. Tie off the yarn at the hook eye. Trim and secure tightly to the
hook. Trim the upright wing to length at this time.
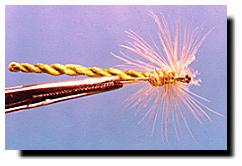
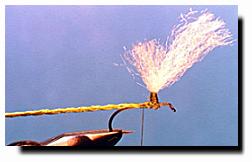
14. Build a head of thread, whip finish and cement. You can apply
another drop of cement to the wing base if desired. Your finished fly
should look like this.
These top and bottom views show how the hackle looks from the top and
bottom. Since it is fanned to the sides and back, but not over the
front, it looks more natural as a damselfly imitation.
Experiment a little with different colors and lengths of yarn for
different insects. You will find that you can do a good job matching
craneflies, stoneflies and caddisflies with this twisted yarn technique.
All you need to do is change the hackle color, and yarn color and length,
and the size and length of the fly.
My favorite statement at this point is one you're probably a little
tired of, but one I can't stress enough to keep you working on the
creative part of this hobby. "It's your fly, tie it the way you want it
to look."
See ya next week - Remember, I'm always happy to answer
your questions, feel free to
email me. ~ Al Campbell
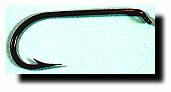
Be sure to read Al's Product Review on Mustad Hooks in
Product Review!
Fly Tying Archives
|

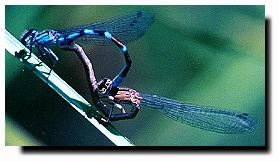
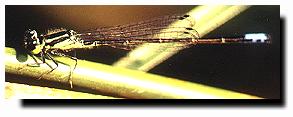
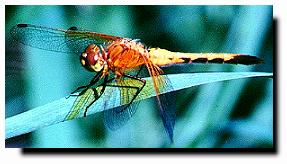 Dragonflies hold their wings to the sides when they
are at rest. This is a more important feature than size or coloration
since both species vary a bit in size and coloration.
When you look at a damselfly that's resting its wings are folded over its
back. Next time you see one of these creatures, look to see if it's a
dragonfly or damselfly.
Dragonflies hold their wings to the sides when they
are at rest. This is a more important feature than size or coloration
since both species vary a bit in size and coloration.
When you look at a damselfly that's resting its wings are folded over its
back. Next time you see one of these creatures, look to see if it's a
dragonfly or damselfly.