|
A lot of people don't understand the significance of parachute flies.
These hackled morsels are a lot more than just another dry fly. They
land, float and look much different to the fisherman than the standard
dry fly. To the fish, they also look much different than a standard dry
fly.
First, the body of a parachute dry fly is suspended in the surface film.
The only time natural insects have their bodies resting fully in the
surface tension or film is during emergence or when they have been
captured by that film and lay dying on the surface. For that reason
alone, this is an excellent fly to use during the hatch when insects are
emerging, and later during the mayfly spinner fall when adult insects
have been captured by the surface film and lay dead or dying in that
film. These are also the two best times for the fish to capture insects
since the insects are most vulnerable at these times.
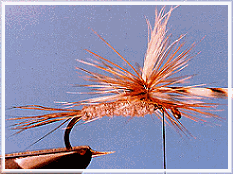
Second, the hackle on a parachute dry fly looks like the legs of an
insect when viewed from the bottom. As an adult insect emerges from its
nymphal body, it extends its legs outward to support its weight on the
surface tension of the water. As it continues to crawl out of its shuck,
it places more weight on its legs until it's free from the shuck. As the
shuck floats away, the adult insect dries its wings and eventually flies
away. Only during the wing drying phase of this emergence does a
standard dry fly look more natural from below than a parachute dry fly.
Again, when the female returns to the water to lay eggs, its wings often
get caught by the surface tension of the water and begin to absorb water.
The female will spread her legs out to provide support for her body as
she dumps her ballast of eggs and tries to rise above the water to fly
away. They are rarely successful in flying away, but their legs and
wings remain splayed out on the surface as they expire and float
downstream. From the bottom, this also looks a lot like a parachute dry
fly.
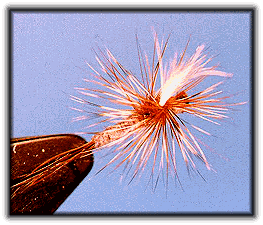
Finally, the post type wing of a parachute dry fly is easy for the
fisherman to see. This is very important during heavy hatches and heavy
spinner falls. If your fly looks exactly like all the other flies on the
water, it's often lost in the crowd and missed strikes are the result.
That's a good reason to use a visible post on your parachute flies.
I think you can see the significance of this type of fly. Later, we'll
look at several other flies that look similar from below, but for now
let's look at the dry fly that seems to gently float to the surface of
the water.
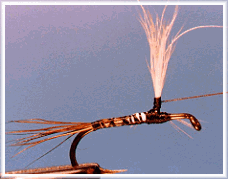
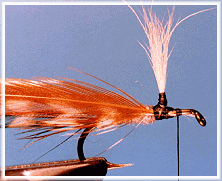
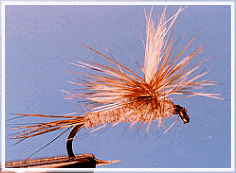
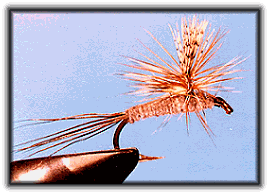
Like the standard version, the Parachute Adams is probably the most
productive and absolutely the most popular of all parachute dry flies. I
suppose that's reason enough to use this fly as the example for parachute
flies.
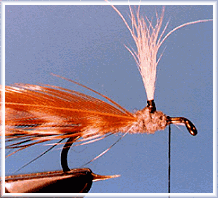
List of materials: Parachute Adams
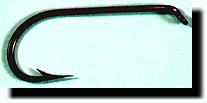
Hook: Standard dry fly; Mustad 94840, Tiemco 100, Eagle Claw L059,
Daiichi 1180. Size 10 - 22.
Thread: 3/0 to 6/0 Gudebrod or equivalent, black or colored to match
the under-body.
Tail: Moose body hair, hackle fibers, antron or other synthetic
fibers.
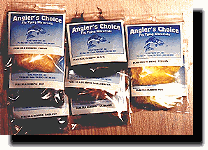
Body: Angler's Choice pure silk dubbing, muskrat under-fur, any fine
gray dubbing.
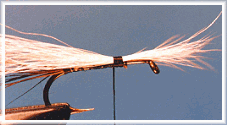
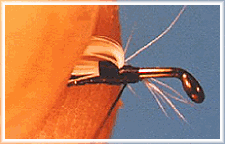
Wing: Calf tail or body hair (traditional), antron, other natural or
synthetic hair, white is the most common color.
Hackle: Quality brown and grizzly neck or saddle hackle, webby parts
removed and 1/16" of the remaining stem stripped of barbules.
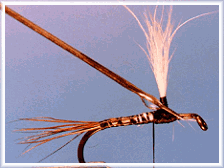
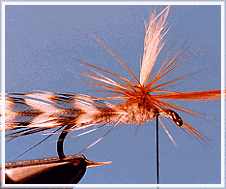
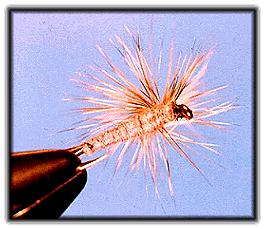
Tying steps:
1. Create a tail of hair, hackle or synthetic fibers. You can use a
split tail if desired.
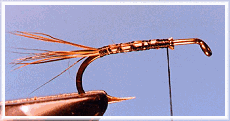
2. Select a patch of hair to use for the wing, remove the short hairs,
even the tips, measure it for length (about 1 1/2 times the hook gape),
and tie it to the hook approximately 1/3 hook shank back from the hook
eye.
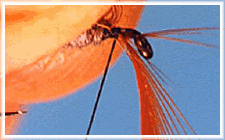
3. Gently pull the wing back and wrap the thread tightly in front of the
base of the wing.
|