|
Elk hair is hollow. The air trapped in the elk hair (or deer, caribou,
antelope or moose) will cause a fly to pop to the surface even after
it breaks through the surface tension of the water. This buoyant quality
of the elk hair aids in the floatation qualities of the Humpy in turbulent
water. Coupled with the extra heavy hackle, this is one of several flies
that are ideal for fast water.
For the individuals who asked how to tie the Humpy, this fly's for you.
I suspect those who have tried to tie a Humpy and failed had a slight
problem with thread tension control. Most problems with hair wings
and bodies result from too much tension on the thread while working
with the hair. Too much thread tension while working with hollow hair
results in flaring or cutting of the hair. It also results in breaking or
bending the wings, or in some cases, the thread consistently slips off
the wings.
It doesn't take a lot of thread tension to accomplish a properly tied fly.
Since fly tying thread stretches, even a slight amount of thread tension
will result in a tight fly body. If you insist on using killer thread tension
on your flies, use it in areas where flared or cut hair won't impact the
structure of the fly, like under the dubbing. Any place else, use gentle
thread tension.
It's wise to practice careful thread tension control all of the time if
you wish to consistently produce quality flies. Most of the time,
problems with materials twisting around the hook, not standing
upright or laying down properly or thread breakage are due to
improper thread tension. And, almost always, new tiers use too
much thread tension.
This said, there is one place on a humpy where extra thread
tension is needed. At the start and tie down points for the
humpy back, you need to add a couple of wraps of thread
with a little more tension than you use on the rest of the body.
This will cause the hair to flare slightly creating the 'hump' on
the back of the fly.
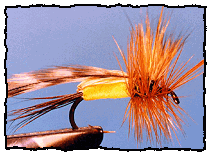
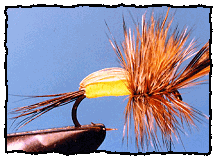
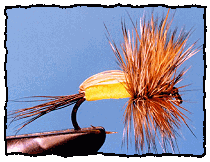
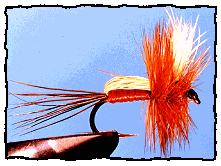
Tied with a yellow under-body, the Humpy is a productive hopper
pattern in fast water. Change the under-body color to red and you
have a fly that will fool the fish into thinking they are observing a
stonefly coasting by. In fact, the under-body can be tied in as many
colors as you like to match anything on the water. Like the SHWAPF
we tied earlier, this is a versatile fly. Unlike many flies we tied earlier,
the success of this fly is usually limited to fast water.
I can't think of a better fly to use in the pockets of water behind boulders
in a fast flowing mountain stream. It's also my favorite fly for the current
seams below small waterfalls and heavy rapids. If you want a buoyant fly
to use as a strike indicator for a small nymph, this would be a good choice.
Need I say more about the benefits of a buoyant fly?
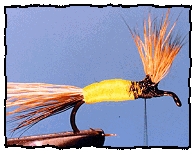
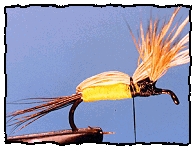
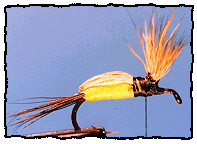
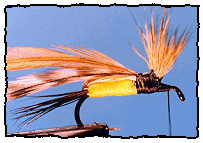
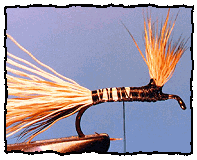
List of materials: Humpy
Hook: Standard dry fly; Mustad 94840, Tiemco 100, Eagle Claw L059, Daiichi 1180. Size 10 - 22.
Thread: 6/0 to 10/0 Gudebrod or equivalent, color to match body or
black.
Tail: Moose body hair. (Traditionally elk hair.)
Underbody: Angler's Choice super floss, poly yarn, antron or dubbing, color as desired.
Overbody: Elk hair tied to form the humped back that gives the humpy its name.
Wings: Elk hair.
Hackle: Quality brown neck or saddle hackle, webby parts removed
and 1/16" of the remaining stem stripped of barbules.
Tying steps:
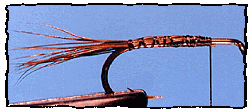
1. Create a fairly heavy moose body hair tail (12 to 16 hairs). You can use
elk hair if desired, but it is more brittle and tends to flare or break easier.
2. Select a medium sized bunch of long elk hair and comb out the short
hairs and fuzz. When you only have long hairs left, drop them tip first in a hair
stacker and even the tips of the hair. Then measure the wing for length (a little
more than 1 1/2 times the hook gap) and tie down with a few loose wraps of
thread. Continue wrapping the hair down to just short of the tail. Do not trim
the hair.
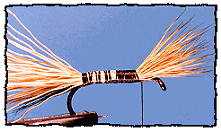
3. Gently pull the wing back and wrap the thread tightly in front of
the base of the wing. Separate the wings, define them and position them
like you did in the Royal Wulff. Add a drop of head cement to the thread
at the base of the wings to secure them.
|