
Stripwing Flies
|
Lesson 2 - Gold & Red Strip Wing
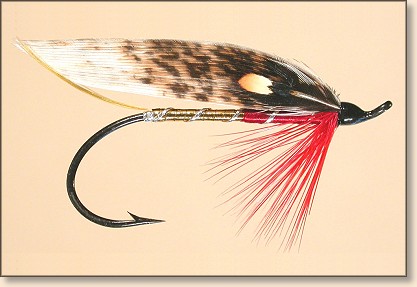
Gold & Red Strip Wing
Pattern by Greg Scott Hunt |
Instructions: Gold & Red Strip Wing
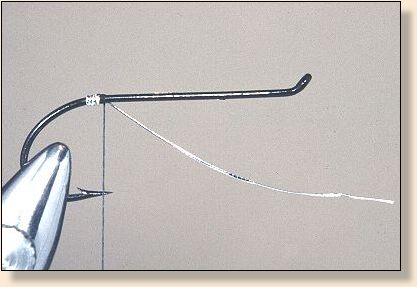 Attaching tinsel. 1. Attach tinsel tag.
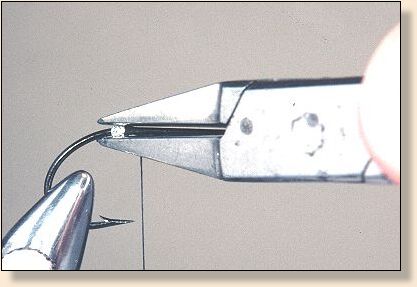 Flattening tinsel with pliers. 2. Using smooth face pliers, flatten the tinsel to provide a flat mounting surface for the tail
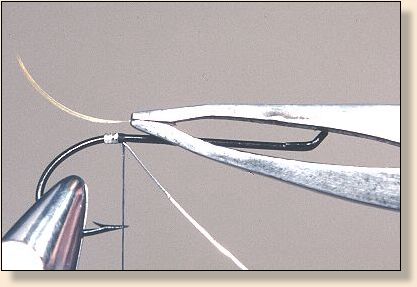 Flattening tail. 3. Select a Golden Pheasant crest feather that is somewhat straight, strip the fuz from the base and up to the length you want the tail to be and flatten the feather shaft (rachis) so it will sit flat on the top of the tie in position. Notice that I bent the shaft down slightly. This will hold the tail down after it's tied in.
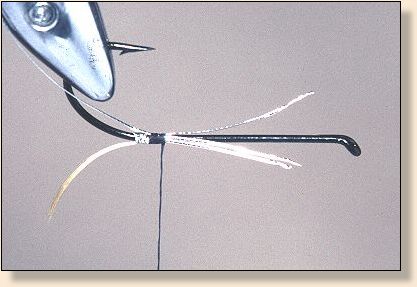 Tail, tag, rib tied in. 4. Tail and rib tied in. Tinsel is tied in at about 5:00 when looking at the hook eye. This is slightly to the bottom rear of the shank. When the rib is applied, the rib will pull down to the 6:00 position and start at the rear and bottom of the body. Generally we want the rib to begin at this position and end on top at 12:00. Counter-ribs will be just the opposite.
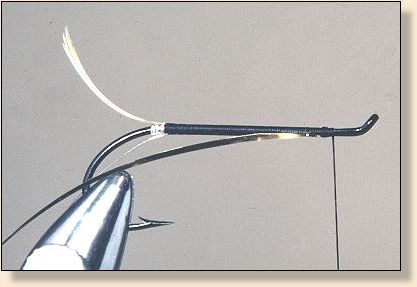 Tying in body flat tinsel. 5. Advance the thread in flat (untwisted) close turns to the tinsel tie in area, all the while binding the prior materials on the rear of the shank. Flatten any bumps with smooth pliers. You must be careful not to apply too much pressure using the pliers since it is easy to cut the materials. Attach the flat body tinsel underneath the shank and a ways behind the eye. We want to keep as much unnecessary bulk from the wing/head area as possible. Try to tie on and off as many of the materials in this area either to the rear, bottom or front of the shank.
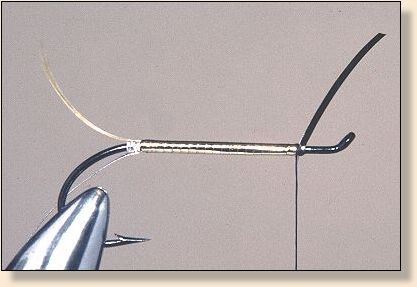 Flat body tinsel applied. 6. Apply tinsel in close turns to the tail and back to the tie in area.
 Attaching and flattening floss part of body. 7. Cut waste end of tinsel and attach the floss to the bottom of the shank and flatten the floss.
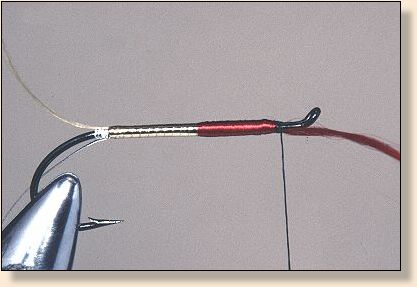 Floss body applied. 8. Apply floss in flat close turns to the mid-body and back. Flatten any bumps with smooth face pliers and/or your floss burnisher, cut waste end of floss.
 Rib applied and tied off 9. Advance the rib in five even turns and tie off underneath shank.
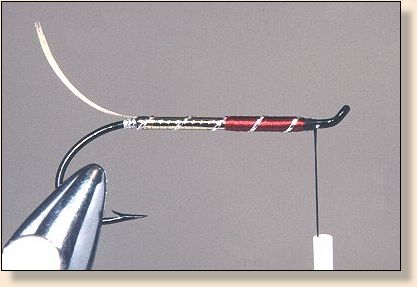 Tinsel trimmed. 10. Rib complete.
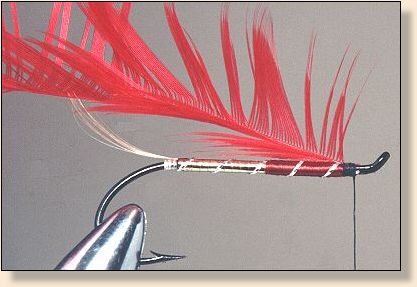 Folded hackle attached. 11. Fold or strip one side of a hackle and attach by the tip on the reverse side of shank with two or three turns of thread.
 Applying folded hackle. 12. Take one or two turns of hackle, tie off in front of the shank at about the 11:00 position with one or two turns, cut waste and take a turn or two more over cut end.
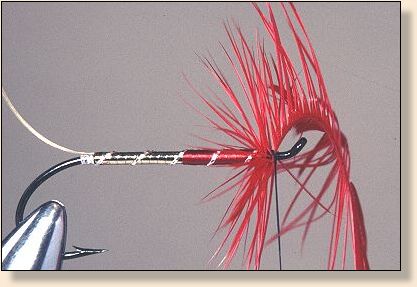
 Applying wing. 13. Selecting and preparing feathers for simple strip wings showing the leading edge where we will take the sections of the feathers for strip wings. Make sure you have matched the feathers well. These are Turkey secondary wing feathers but, other feathers such as Turkey tail, Peafowl, and many other similar feathers can also be used. 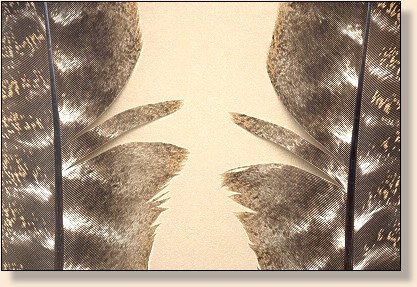 Two matched Turkey wing feathers. Reshape the barbs by "humping" (no, this is nothing "off color" here) them as shown. You can either do this before cutting them free from the feather shaft or, after. Put the concave sides together with the tips of the feathers meeting. To set the wing in, hold it with your left thumb and index fingers at the tie in spot, take one soft turn up and around the wing, on the next turn, pull up to pull the soft loop tight, take one more tight turn next to the last. You can now let go with your left hand to see how the wing looks. If it is what you like, hold the wing again with the left hand and lay down a few more tight turns one next the other towards the eye. If you weren't happy with the wing shape/position, simply try again. You ought to be able to reposition the wing several times if needed. Do not cut waste ends yet.
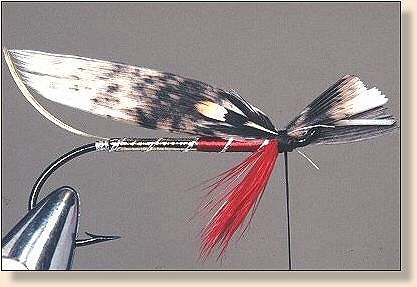 Applying Jungle Cock. 14. Tie the Jungle Cock in with them over the wing as shown. You may need to flatten and twist their shafts to get them to stay where you want them.
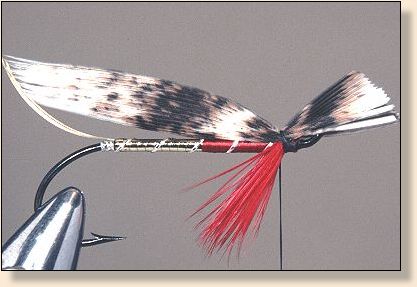
 Finished fly prior to head cement. 15. Finished fly prior to head cement. I like black nail polish for heads on my display flies in particular. Your head cement will fill the voids in the thread. It is better to apply two or three thin coats rather than one thick one.
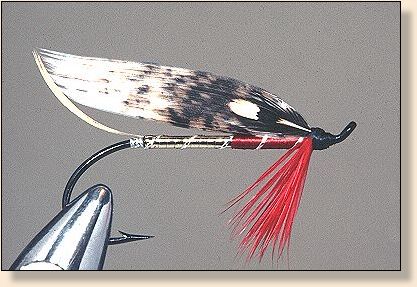
Finished fly. 16. The finished fly with head lacquer applied.
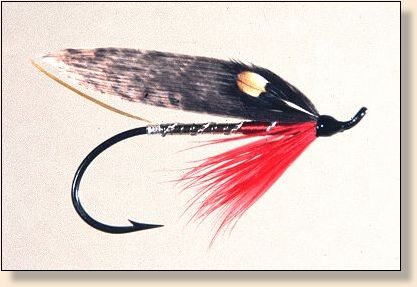 Finished fly. 17. Same pattern with different wing.
|