So, let's get tying!
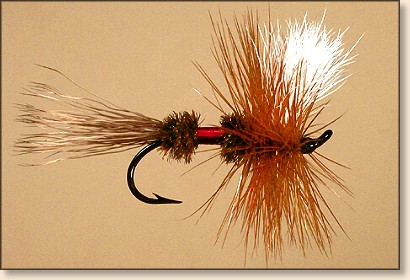
Royal Wulff by Lee Wulff
Tied by Ronn Lucas, Sr.
Hook: Light wire of choice, I used Partridge Single Wilson.
Thread: Black.
Tail: White Deer hair or white calf tail.
Body: Rear 1/3 herl, next 1/3 red floss, next 1/3 herl.
Hackle: Brown, very heavy.
Wing: White Deer hair or white calf tail. I used
white calf body.
Instructions: Royal Wulff
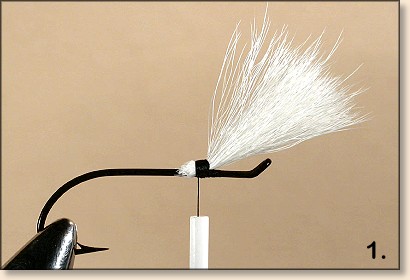
1. Lay down a tight thread base on which to secure the
wings. This will help keep the wings from rotating. Take
a pretty good size bunch of wing material, in this case
calf body just because it is much easier to stack than
the tail. Remove the short under fur and stack. Using
the
EHC wing technique, secure the bundle
of wing material to the hook shank a fairly good distance
from the hook eye. The wing should be situated in the
middle of the hackle on the completed fly. Be sure to
leave enough for the wings when they are stood up. While
holding the butts of the wing above the hook shank, trim
them at an angle as shown. This will help provide a nice
taper to the body. Note that I trimmed it a little steeper
than I should have. Yes, I goof up on occasion!
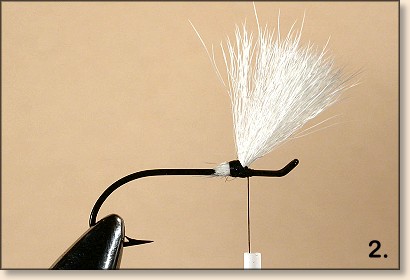
2. Lift the wing and crimp the front base with a fingernail
and lay down a little thread to help prop the wing up.

3. Separate the wing into two equal bunches and do a couple
figure 8 turns of thread between them to separate them. Take
two or three tight turns around one of the wings base and run
the thread through the butts as shown to pull the wing up and
into position. Do the same to the other wing and lay a couple
turns around the thread turns in the butt.
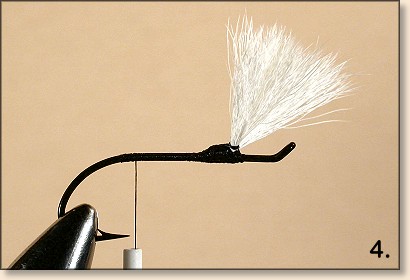
4. Advance the thread in tight flat turns to the rear of the
hook ending at the beginning of the bend.

5. Stack a fairly good size bunch of Deer hair for the
tail, cut the butts at a slight angle. Leave the tie in
area on the tail butts the same width that the herl will
be. This will leave a bare hook for the floss section to
be on to make a very smooth body section. If you prefer,
you can tie in the tail butts behind the tapered wing butts
and bind them all the way to the rear of the fly. This
method is a little harder to get a smooth floss section
but, not too hard.
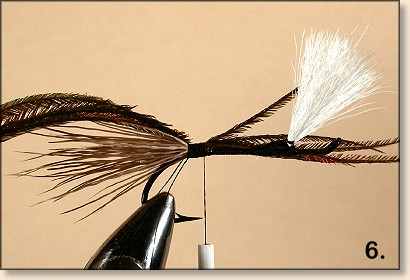
6. Attach a bunch of herl by their tips and form a thread loop.
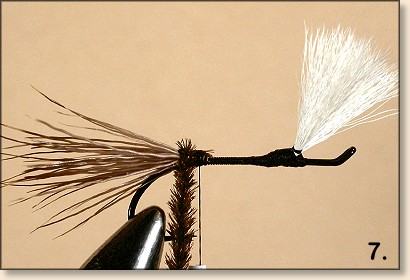
7. Advance the thread. Twist the herl and thread loop
rather tightly but not so tight that the herl tips break.
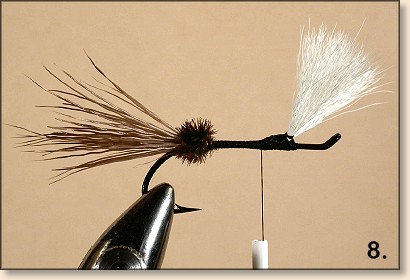
8. Wrap a couple turns of the herl "rope," tie off and trim.
Note; if the Deer hair tail had flared more than you wanted,
you can take one loose turn of herl over the tail to "bind"
it a bit. Advance the thread in flat close turns to the rear
of the wing.
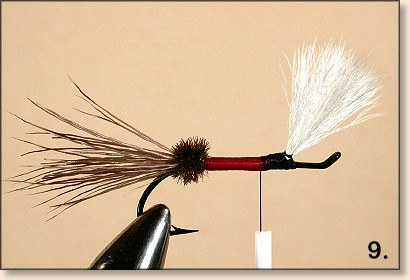
9. Apply the red floss and trim waste. I made two trips
to the rear of the floss section and back to the front to
build up the body and hold the color a little better than
once. You could even lay a bed of flat silver tinsel under
the floss to really brighten it up and retain the color
when wet.
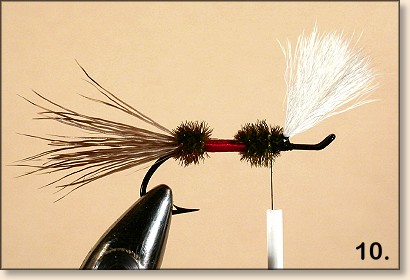
10. Apply another herl component as you did at the rear
of the fly, tie off and trim.
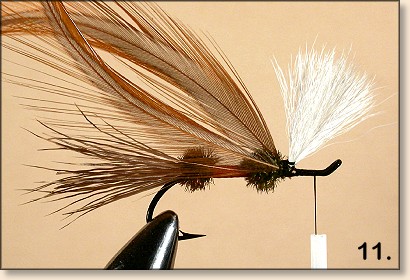
11. Attach two (or three if you prefer) hackles convex
sides together. Advance the thread to the front of the
ly but not too close to the eye. Or, you can tie one
hackle on each side as I did here.

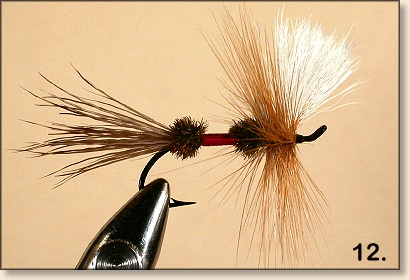
12. Advance both hackles, one at a time, tie off, trim
and apply the head. You see here that it is possible to
get a tiny head even when using fairly bulky neck hackles
if you just use two turns to hold each in place plus the
whip finish. This is one reason I use the UNI-Thread 8/0,
it doesn't build bulk like larger threads.
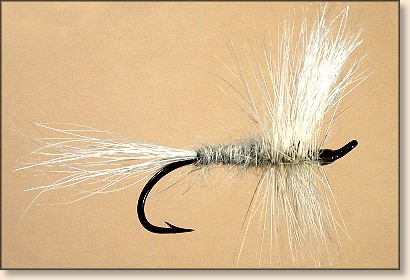
White Wulff
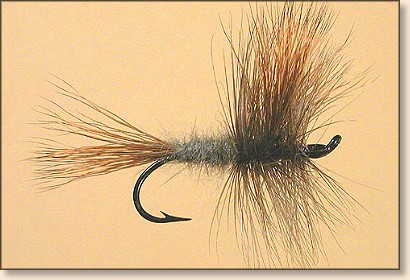
Grey Wulff
Royal Wulff
As always, I am happy to answer any questions you might have
about these patterns. You can reach me at
rlucas@cybcon.com or 503-654-0466.
Also, I will be happy to accept any flies you would like to tie
and send to me for inclusion in this series. I will need the
fly, it's recipe, any pattern info and, a short personal bio.
I will try to include every fly we get in the appropriate
section. The only limitation is that the patterns used must
be for Salmon and/or Steelhead. This includes the display
flies too.
Happy Trails! ~ Ronn Lucas, Sr.
Back to Index
