It's important to know where to fish the Klink, (on the
edge of the rip). If one wishes to apply a flotant, do
not use on body. I have used other low water hooks with
success as long as they are bent at 20 deg as shown below.
In fact they are lighter and less costly.
All the best, Marc
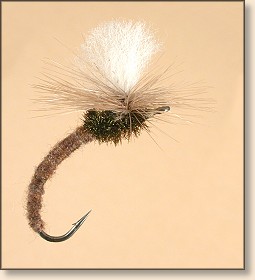
The Klinkhamer Special
Hook: Partridge GRS15 ST, #8 - #18 for Grayling
and Trout, CS54, #6 & #4 for Salmon.
Thread: UNI-Thread 8/0 Grey or tan for body,
Spiderweb for parachute.
Body: Poly II dubbing, any colour of preference.
Wing: One to three strands of white poly yarn
depending on hook size and water to be fished.
Thorax: Three to six herls.
Hackle: Blue dun, dark dun, light dun, chestnut,
all good colours matched to body.
Note: For flies tied on the CS54, I double the
amount of poly yarn, herl and hackle windings. Hans
Instructions: The Klinkhamer Special
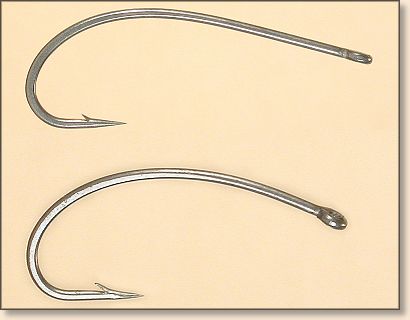
1. If you use the CS54 hooks, it is necessary to
reshape the hook shank. Slightly curve the straight
part of the shank to more closely resemble the GRS15 ST.
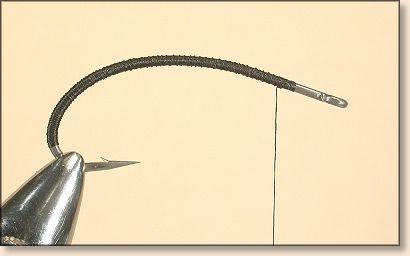
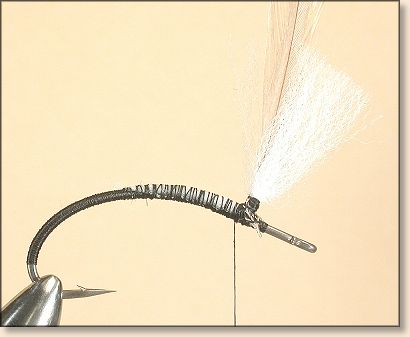
2. Wrap the shank of the hook with tying thread as
shown. This provides a stable base for the wing and
keeps it stationary when fishing the fly.
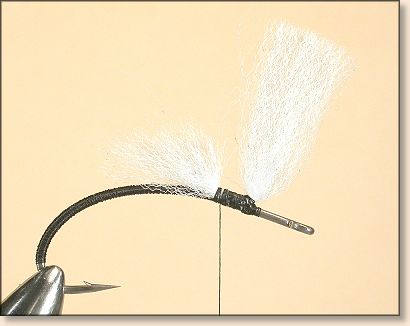
3. Take a length of poly yarn the appropriate length
for the hook size and taper the end. This is to ensure
that the body will be as slim as possible and somewhat
tapered. Tie the wing to the top of the hook as shown.
4. Wrap the thread over the end of the wing butt
and back to the base of the wing. Strip the bottom
of the hackle, attach it to the wing and take tight
turns around the wing and hackle to provide a base
on which to apply the hackle later. (I tie my hackle
up the post after the herl is attached. It gives
more support for many turns. Marc)
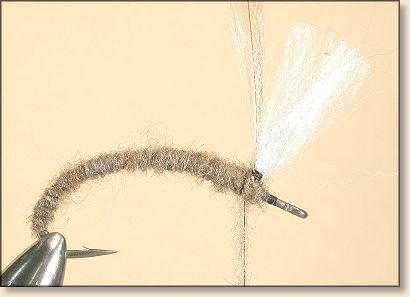
5. Wrap thread to the end of the body; apply just
enough dubbing to cover the hook as shown.
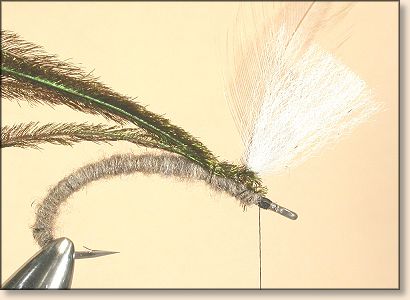
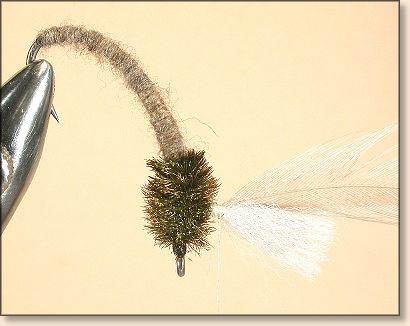
6. Tie in the herl by the tips as shown. (Neither
Marc nor Hans do this but, I normally make a loop of
my tying thread to incorporate with the herl. Then
simply attach hackle pliers to the ends of the herl
and thread loop and twist them fairly tight. Ronn)
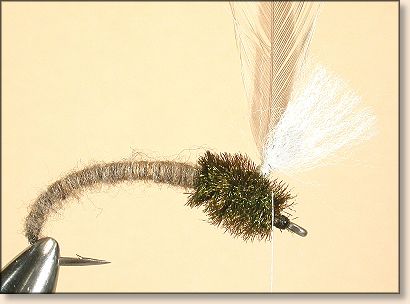
7. Apply the herl, tie off and finish the head as
shown. Attach the Spiderweb thread and cover the
base of the wing to receive the hackle.
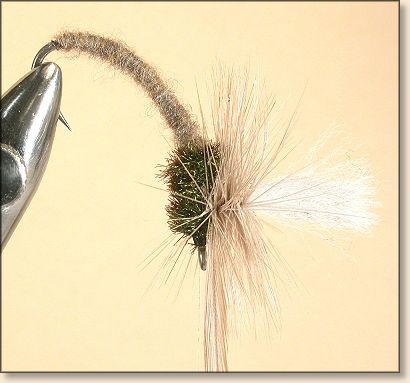
8. Reposition the hook as shown. (One must pay
attention when repositioning the hook in the jaws
of the vise not to cut the thread/dubbing! Marc)
9. Wrap the hackle from the top to the bottom with
many turns. A lightly hackled fly will not support
the heavy hooks. This fly has 12 turns of hackle.
Secure well with a few wraps around the base of the
wing and hackle between the wound hackle and the herl
and whip finish there also. Use a little head cement
on the hackle tie off and finish area. (Tying off
and finishing the fly/parachute hackle this way is
much easier than the more common way of tying off
the hackle at the eye. Hans)
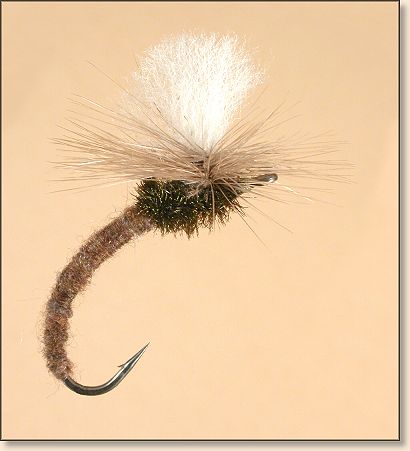
10. The finished fly.
As always, I am happy to answer any questions you might have
about these patterns. You can reach me at
rlucas@cybcon.com or 503-654-0466.
Also, I will be happy to accept any flies you would like to tie
and send to me for inclusion in this series. I will need the
fly, it's recipe, any pattern info and, a short personal bio.
I will try to include every fly we get in the appropriate
section. The only limitation is that the patterns used must
be for Salmon and/or Steelhead. This includes the display
flies too.
Happy Trails! ~ Ronn Lucas, Sr.
Back to Index
