Cheap Atlantics
|
Cheap Atlantic, lesson two, .43 cents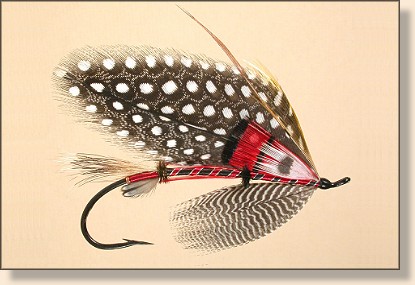
.43 cents |

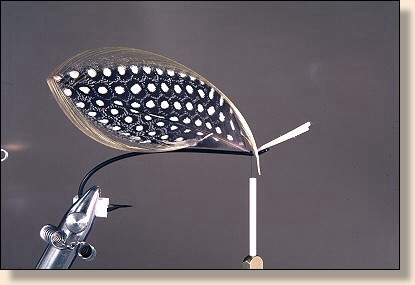
1. With the wing selected, start to determine its length and shape.
 2. Selecting a tail and topping. While this combination looks pretty good as wings go. I ultimately decided not to go with the GP tail and full topping. The reason being the feathers have a nice edge that is not made up of married tips. It has a "wispy" look to it that I like and did not want to hide.
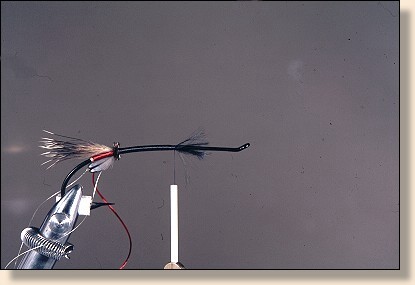
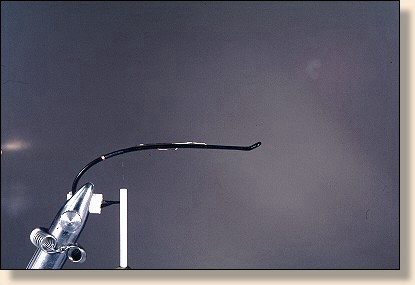 3. Tie in and apply the copper wire portion of the tag. Wire is a nice look for tinsel and, I suspect just about every Tyer has some in his/her materials stash. It is one material that my pliers will have little effect on though so, some planning as to where the ends go is advisable.
 4. Apply the floss part of the tag.
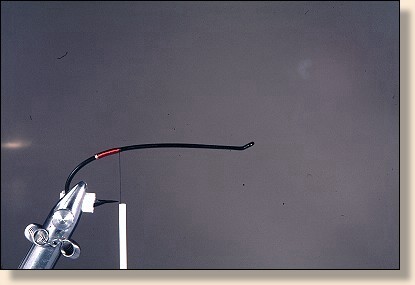
 5. Select a pinch of hair for the tail. I have used Ground Hog that was given to me by my friend Ed Gallop. You could use Fox, Squirrel tail, Wolf, and any number of other hairs. I did not stack the hair much since I like a fairly uneven look. I also left some of the underfur in which gives the base of the tail a slight glistening appearance and a tan color.
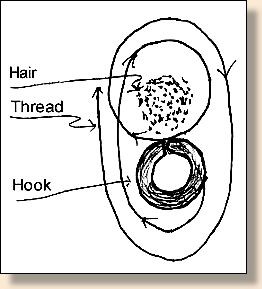
 6. Tie in the hair with three or four very tight flat turns of thread with what I call the EHC Wing Bundle Technique.
 7. Attach the herl.
 8. Apply the butt and secure with two very tight turns. Trim the hair butts as close to the butt as possible.
 9. Using solid hair for a tail will result in a bit of a bump in that area where it was trimmed. Build the area up a bit with thread.
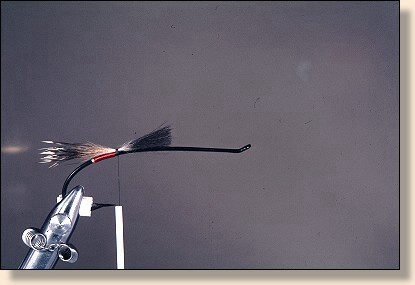
 10. Attach the ribbing as shown.
 11. Advance the thread in flat, close turns binding the ribs along the back side of the hook to the point of the body joint. Apply the floss body. Note: if we used a light-colored floss here, it is likely that there would be a noticeable irregularity back at the butt where the hair was trimmed. Using a dark color, in this case, black floss, the bump will not be as noticeable if is at all visible.
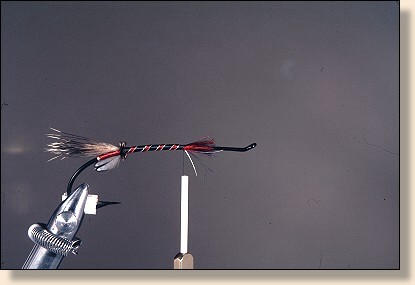 12. Apply the rib as shown. Start with the first oval tinsel that comes directly on the bottom. Next wrap the other oval tinsel leaving an even space between for the floss which is done last.
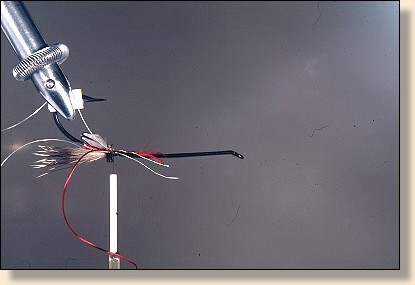
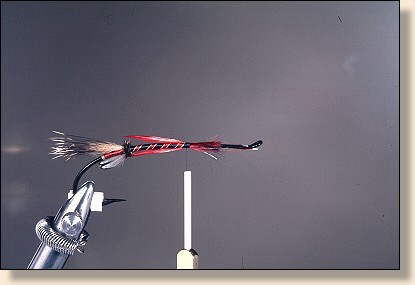 13. Flatten the top and bottom of the body and tie in the veiling. You will find that flattening the feather shafts with pliers to be useful. Also, rather than strip the bottom end of the feathers, trim them with scissors. The stubble helps hold the feathers in place. You want the veils to lay parallel with the body and close to it as well. You can see here that the bottom veil is just right while the top one sticks up a bit. I left it this way because I know that the wing will press it down exactly where I want it to end up. Also, the slight pressure the veil will exert on the wing will help hold the wing in place as well. The edge of the wing resting in a dense butt or joint also helps hold the wing position.
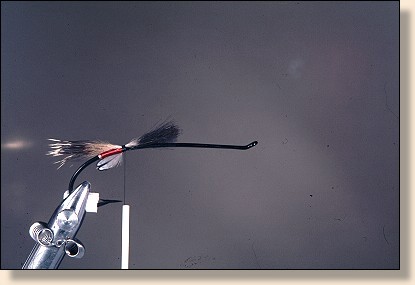
 14. Apply the body joint and trim the waste as close as possible. Of course, you have been trying to have as much of your waste ends end up distributed around the back side of the hook as we have been tying haven't you!
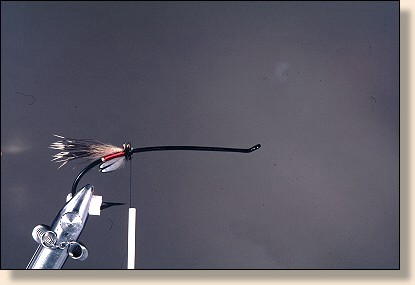
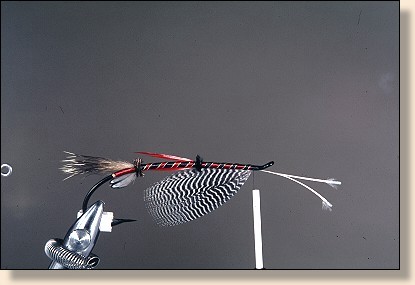
 15. Set the wing in place just to check everything. We can now see the pattern taking on its final look. Still at this point I have no idea how it will end up other than a hunch based on this view.
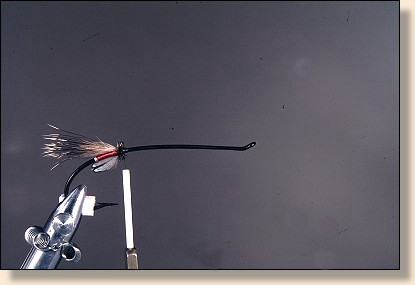
 16. Temporarily set wing and select the Teal throat to see if the fly and materials are "working."
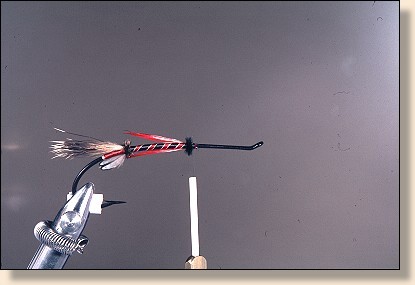
 17. Apply the front Ẅ of the body as the rear but with the new color scheme.
 18. Attach the Teal throat.
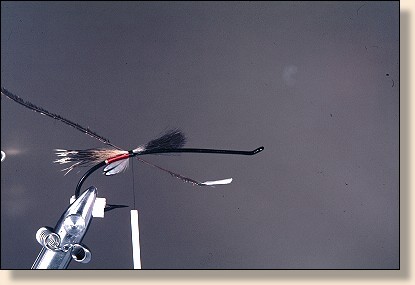
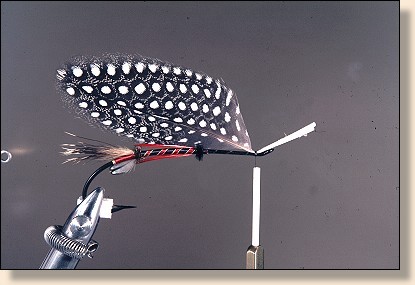
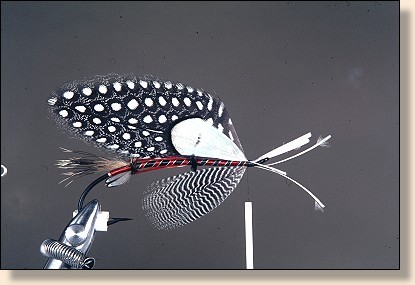
 19. Attach the wing.
 20. Potential cheek.
 21. Potential cheek.
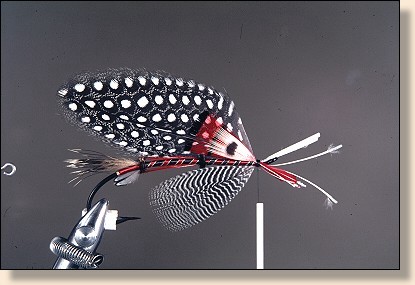 22. Attach the cheek. Set the first two feathers (dyed red GP tippets in this case) first. I usually do the one on the near side first and then the far side. You may have to flatten the stem and twist it with your pliers to get the feathers to press against the wing. Then set the second feathers (Wigeon breast in this case) in the same way as the first.
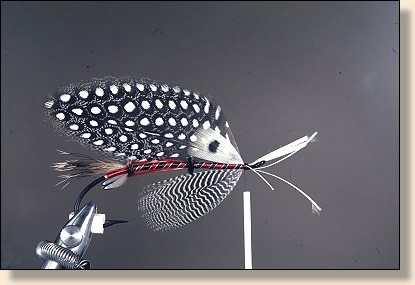
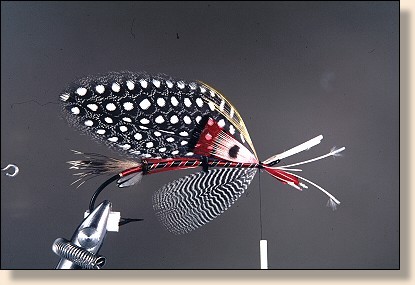 23. Attach the topping. In this case I am using a short GP topping on the wing's leading edge only.
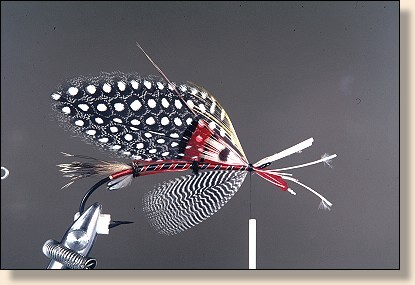 24. Attach the horns. Lay the horn where you want it and take two separated turns of thread to secure each side. The separated turns will securely hold them in place.
25. The finished fly.
|