Welcome to ADVANCED Fly Tying

Advanced Fly Tying:
Virtual Stonefly
Virtual Stonefly

By Al Campbell


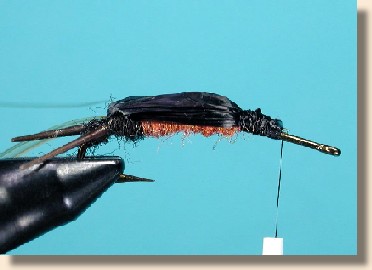
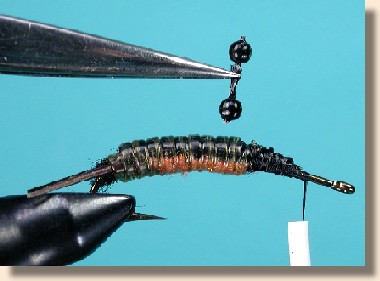
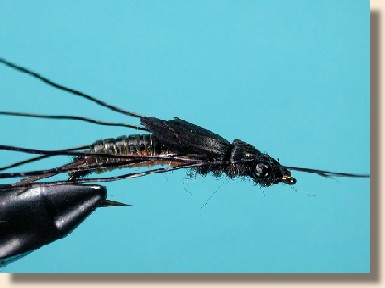
This isn't the type of fly you'll want to tie dozens of just to lose them to trees and the bottom. It's not the type of fly to leave laying around the house if your spouse has a weak heart and hates bugs. However, it is the type of fly you might want to put on display in a case to show off a little. After all, how many people do you know who can tie a fly that looks like it could crawl away on its own power?

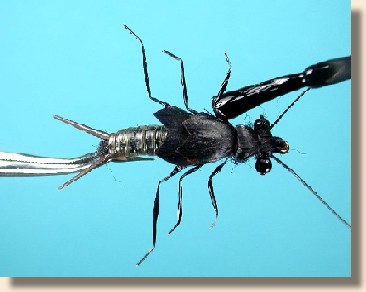
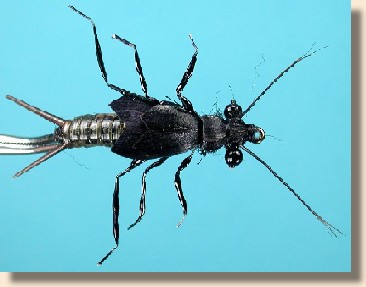
If you're a new fly tyer, don't try this at home. In fact, if you haven't at least progressed to the intermediate stage, you're going to have some trouble with this fly even though I have a lot of step-by-step pictures to help you out. Some things take a little practice. Like pro baseball, this is beyond the little league.

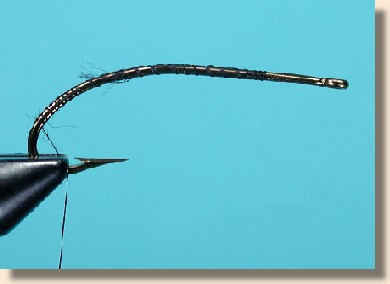
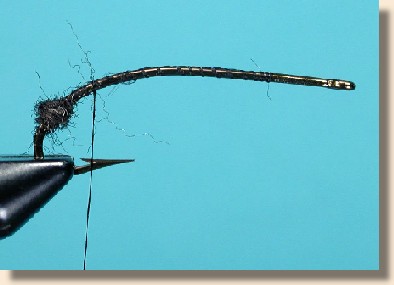
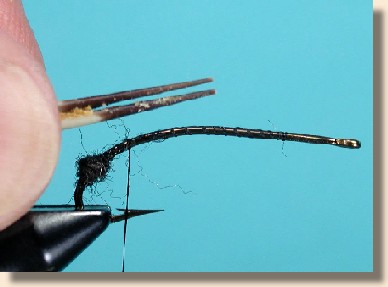
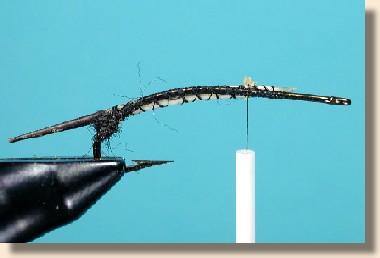
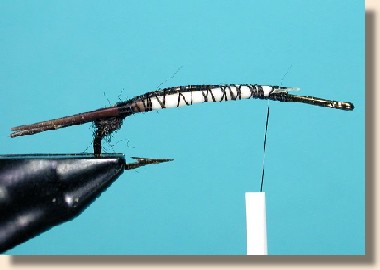
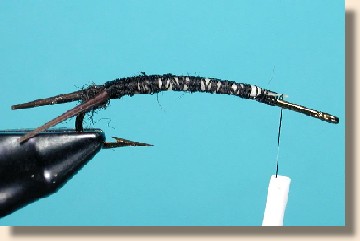
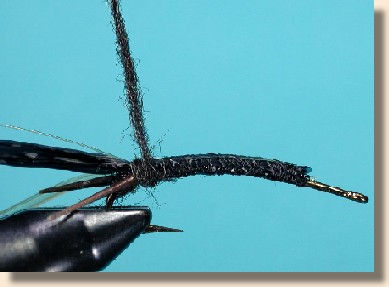
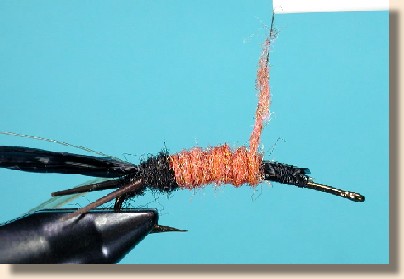
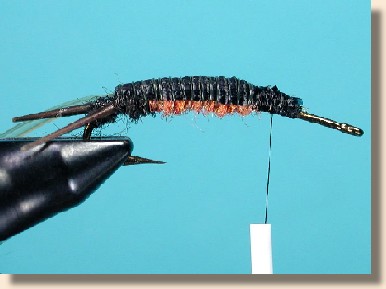
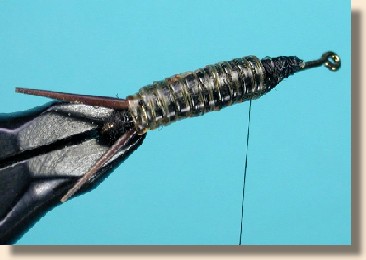
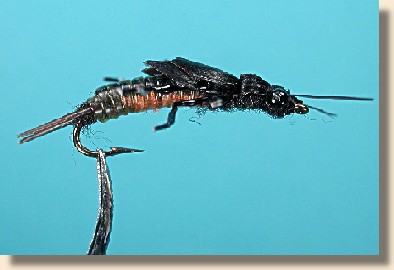
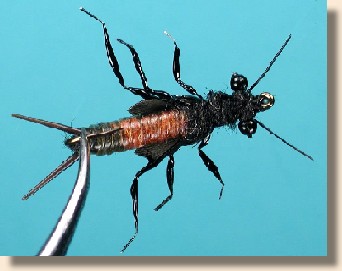
Much of my tying style has been influenced by several old timers named Pott and Grant. The earliest records I can find that shows the basic techniques I use to create the body of this fly belong to George Grant. In his book, The Master Fly Weaver, George shows and describes a method of creating a body that is dark on the top and light on the bottom. Both George 
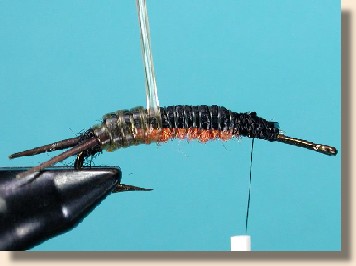
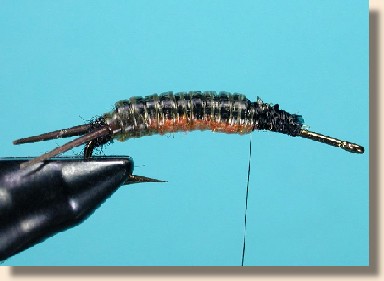
Grant and Franz Pott used this technique to create stonefly bodies. They covered the body with various applications of monofilament fishing line to 
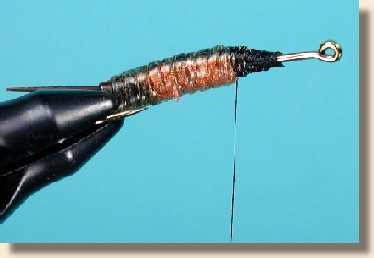
make it durable. Although I tie my bodies differently than they did, their influence on my tying style and techniques is clearly visible.

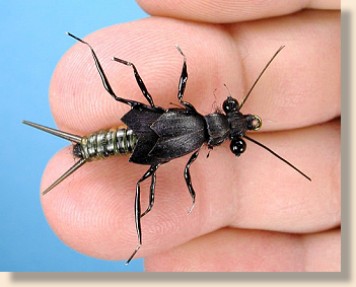
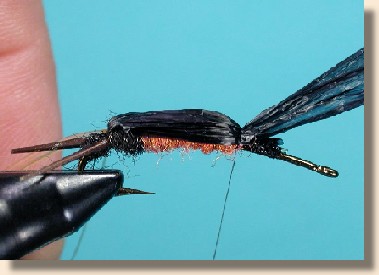
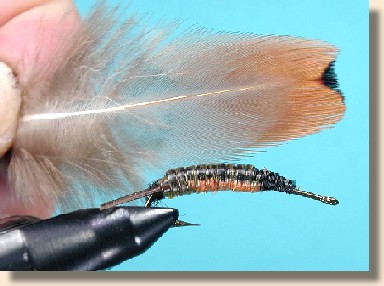
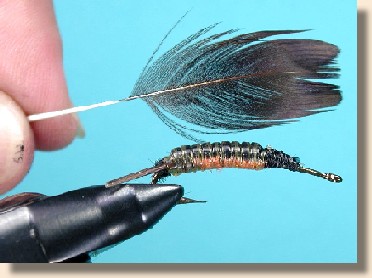
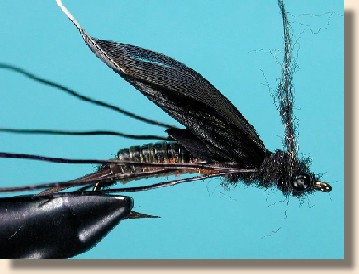
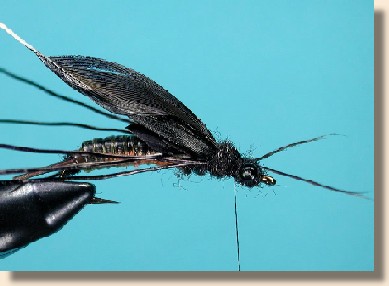
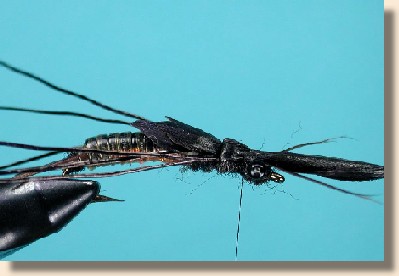
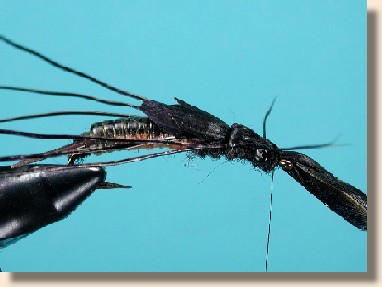
Although you will be learning a specific pattern, the steps used to create this fly can be extended to other patterns that imitate damselfly, dragonfly and mayfly nymphs. You may need to change a few of the materials I use in this pattern because they are difficult to find. Not many people have a supply of porcupine quills and collared peccary hair in their fly tying stash. Dyed or painted hackle stems are a reasonable substitute for these items.

I have a feeling Mr. Rapidian and Ol' Rupe are going to enjoy this one. Let's get started.

Virtual Stonefly

  • Hook: Nymph, Mustad 80050BR; Tiemco 200R; or equivalent. Size 4 to 8.

  • Thread: 6/0 or 3/0, black.

  • Tail: Black porcupine quill tips (sharp points trimmed for safety reasons).

  • Under-body: Black and orange dubbing topped with black swiss straw.

  • Under-rib: 4lb test monofilament.

  • Outer-body: Light amber Larva-Lace.

  • Thorax: Black dubbing.

  • Wing cases: Pheasant body feathers dyed black (waterproof marker), then covered with Anglers Choice Soft Body and trimmed to shape.

  • Legs: Black collared peccary hair coated with black nail polish after bending to shape.

  • Eyes: Black plastic craft bead string.

  • Antennae: Collared peccary hair.

    Tying steps:

  • 1. Start the thread on the hook, wrapping to the bend. Watch out for the hook point, it frayed my thread and will cut it in a heartbeat.

  • 2. Wrap a small ball of dubbing near the hook bend. This will be used to keep the tails separate.

  • 3. Select two porcupine quills to use as tails and trim the sharp points for safety reasons. I needed to clean these before I could use them.

  • 4. Bind one quill to the far side of the hook as shown.

  • 5. Bind the other quill to the near side of the hook. Try to keep the quill points even.

  • 6. Bind both quills securely. I used needle-nose pliers to squeeze the quills to the shape of the hook.

  • 7. The quills should be positioned on the sides of the dubbing ball to keep them separate.

  • 8. Secure the Larva Lace tubing to the far side of the hook. (This will increase the width of the fly to make it look more natural.).

  • 9. Run a fine bead of super glue on top of the hook and let it dry. This will secure the quills and lace so they won't migrate around the hook.

  • 10. When the super glue is nearly dry, tie in the swiss straw on top of the hook. The super glue will secure this too, if it hasn't fully dried yet.

  • 11. Secure a strand of 4lb-test monofilament line to the top of the hook. (I'm using dark monofilament so it will be visible for the camera, but you can use any color you wish.)

  • 12. Using the black dubbing you started with, dub a short section of the body.

  • 13. Finish the body with orange dubbing.

  • 14. After you have the body dubbed, pull the swiss straw over the body and secure it as shown.

  • 15. This picture will show you the approximate proportions you should have.

  • 16. Use the monofilament to rib the swiss straw down securely. This will keep the swiss straw from turning on the hook and give the body a firm foundation to wrap the Larva Lace around.

  • 17. The body should now be firm and there should be a defined line of dark material on top and lighter material underneath.

  • 18. Wrap the Larva Lace over the body as shown. This will produce the segmented body common to stonefly nymphs, and will give the body a translucent look common to all nymphs.

  • 19. Your body should now look like this. Notice how the under-body colors show through the Larva Lace but are dulled somewhat like a natural nymph would be?

  • 20. Here's a bottom view of the finished body.

  • 21. And a top view. Does your body look like this?

  • 22. Select 3 pheasant body feathers like the one you see here. Hen saddle feathers or grouse feathers will also work as long as the fibers of the feather are long and straight.

  • 23. Strip the fuzz from the feathers and dye them black. I used a black permanent marker to dye mine. Once you have the feathers dyed, coat them with some sort of plastic or acrylic coating like Anglers Choice Soft Body or clear acrylic sealer. While the sealer dries, we'll work on the fly a little more.

  • 24. Prepare a set of eyes for your fly. You can melt monofilament eyes if you want, but I used black plastic craft beads that come on a string. I smashed the middle bead off the string with smooth jawed pliers to increase the width between the eyes.

  • 25. Secure the eyes to the hook with a series of figure 8 wraps and glue them down with super glue so they won't turn on the hook.

  • 26. Use a black waterproof marker to dye four pairs of collared peccary hairs to use as legs and antennae. When the ink has dried, tie the first pair in as shown to serve as a pair of legs.

  • 27. Wrap a small amount of black dubbing over the leg tie-in point. Don't get carried away with the dubbing; you just need enough to cover the thread that secures the legs.

  • 28. Select one of the feathers you previously dyed and plastic coated, then trim it like this. This will be the first wing case.

  • 29. Place the feather on top of the hook like this. It should extend slightly over the body.

  • 30. Secure the wing case to the hook; then trim the excess.

  • 31. Tie in a second set of legs.

  • 32. Dub over the thread that secures the legs and add the second wing case like you did the first one.

  • 33. Now add the third pair of legs and the last prepared feather; but this one you trim flat on the end and tie in by the top of the feather as shown.

  • 34. Dub over the thread used to secure the feather and dub between the eyes. A figure 8 wrap of dubbing should fill in the space between the eyes nicely.

  • 35. Tie in the last pair of peccary hairs as antennae, securing them behind the eyes.

  • 36. Pull the feather over the dubbing and secure it behind the eyes to form a carapace common to stonefly nymphs.

  • 37. Now pull the rest of the feather over and between the eyes and antennae; then secure it behind the eye of the hook.

  • 38. Trim the feather, whip finish, set the antennae back in place, then cement the head and thread wraps.

  • 39. Now, trim the legs to length, bend them to shape with needle nose tweezers and begin adding bulk to the middle of the legs by painting them with black fingernail polish. This will take several coats to make the legs look right.

  • 40. Ok, my wife could probably do a better job of painting the legs, but she won't touch this thing. I think she would rather smash it than paint it. The legs do look better at a distance.

  • 41. Trim the antennae to length. Hey, it doesn't look too bad from the side.

  • 42. From the bottom you can see the orange abdomen common to giant stoneflies.

  • 43. Your finished fly should look somewhat like this. Can you do a smoother job of painting the legs?

  • I enjoy pointing out the flaws in my creations. It keeps me working for better results. However, at a distance greater than two inches this fly looks like it could crawl under its own power. I put it in the fly vise case at the fly shop where I work and several people asked if it was a real insect. The greatest compliment I got however, was when my wife refused to touch it and asked if I had been collecting insects again. "You better not have any more of those things crawling around the basement!" was her comment before I showed her the hook protruding from the underside. She still wouldn't touch it even after I showed her it was artificial. She just doesn't like bugs the way I do.

    I wonder what would happen if I had a few of these attached to the wool patch on my fly vest? Nope, I probably shouldn't do that; the beating my vest would take every time my wife saw it would probably wear it out.

    See ya next month - Remember, I'm always happy to answer your questions, feel free to email me. ~ Al Campbell

    ADVANCED Fly Tying Archives