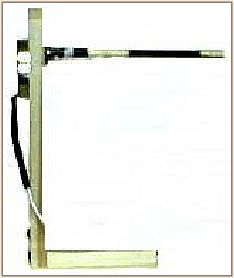
I have often been asked how to make a drying motor,
and have also found this to be a frequent question
on various web site bulletin boards. As a result I
felt it may be of some use to put together instructions
on how mine was done. A drying motor can be constructed
with the basic around the house tools at a cost of about
$25.00.
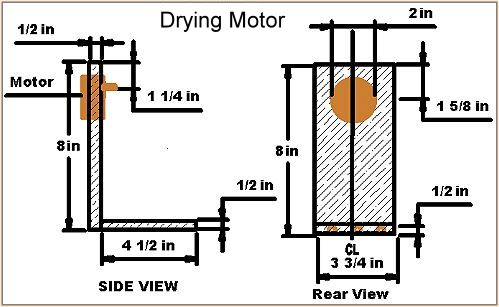
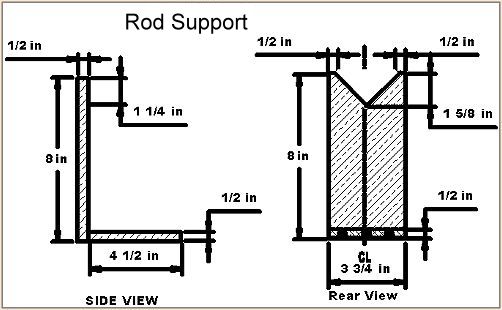
Required Tools
Materials list
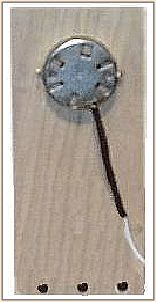
1. 36 RPM drying motor $12.95 (Jann's Netcraft)
2. Wood stock 4in X 2 ft X 1/2in 1 each (I use poplar from the local
lumber yard $2.49 Each).
3. Electrical cord $1.95.
4. Screws.
5. Self stick felt.
Instructions
The instructions for this are straight forward.
The stock that I use comes sized for length and width
at ˝ inch thick and is available in Pine, Oak, Poplar
and Ash. By purchasing the material in this manner all
cuts can be made with a Back Saw and a Miter box.
The V cut on the support is accomplished with the back
saw. The cut for the motor was done with a hole saw
and the motor has its own mounting flange.
For a cord a replacement cord was used and the
connections were covered with small shrink tubing.
An on/off switch can be added if one wishes. The
spindle on this motor will accept a self-centering
chuck if one wishes.
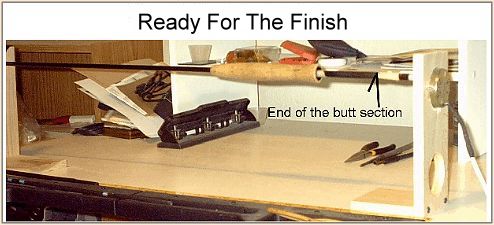
When building a rod the last step for me is to secure
the reel seat. Making this my last step accomplishes
two things. First I do not have the weight to deal
with and second I use old blanks cut to various lengths
to secure the rod to the motor thus saving about $22.95.
I pick up the old blanks for $5.00 at the pawn shop.
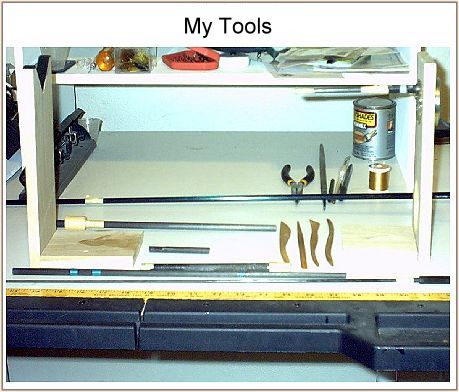
For an Epoxy I use U-40 LS Supreme (Dura Gloss) and
apply it with Box Wood modeling tools. Replacement
syringes can be purchased at a farm and ranch supply
for about $.29 each.
I hope this Drying Motor works as well for you as it
has for me and that the cost is within a range that
you can accept. Since all things can be improved.
If you find a modification that makes for better
operation, let me know so it can be shared with all.
~
Brian Ahern (Rovercat)
|