Rattan Handle Process
Section 1
Specs: 6-1/2" length, turned down the worst cork I had laying around, 2.5mm Rattan from Rockler, approximately 12' required (I actually forgot to keep track, not normal for an engineer, but it happens, and that is why there is a splice included in this tutorial), Red Gudebrod size '00 silk thread wrap.
Side Note: This stuff is indestructible and adds almost no weight to the handle. This is a fairly easy process, just takes a bit of time to complete.
Rattan Type Flat/ Round Rattan, which is Flat on one side (the side toward the cork), rounded on the other. The strips used on this handle were not as round as I would have liked which you will see in some of the pictures where it almost looks like it is stair stepping. Once finished, it is just fine.
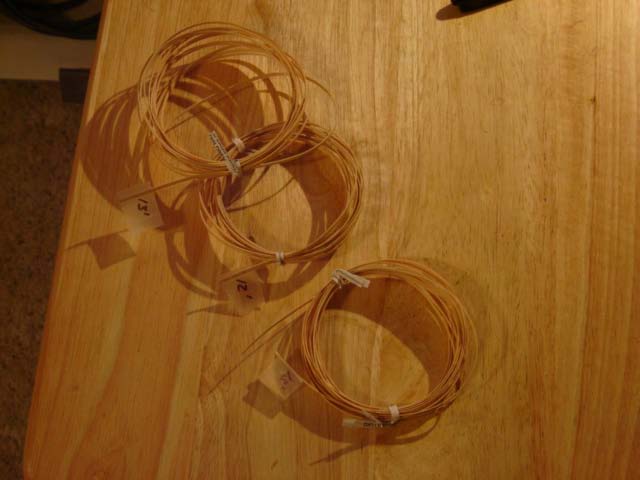
Storing: I roll up the individual strips after measuring length, use a twist tie to hold each one and put a pof scotch tape with the length marked on it. Similalengths go into big ziplock bags to make them easto navigate when needed.
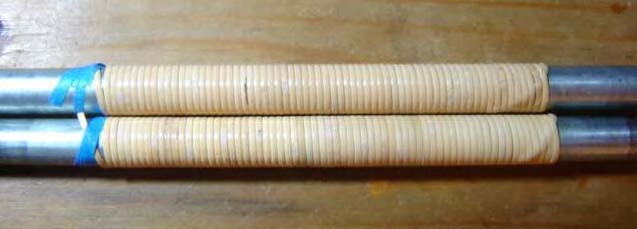
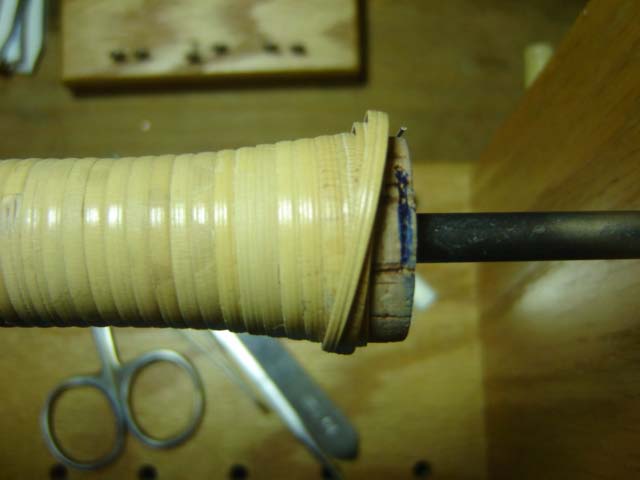
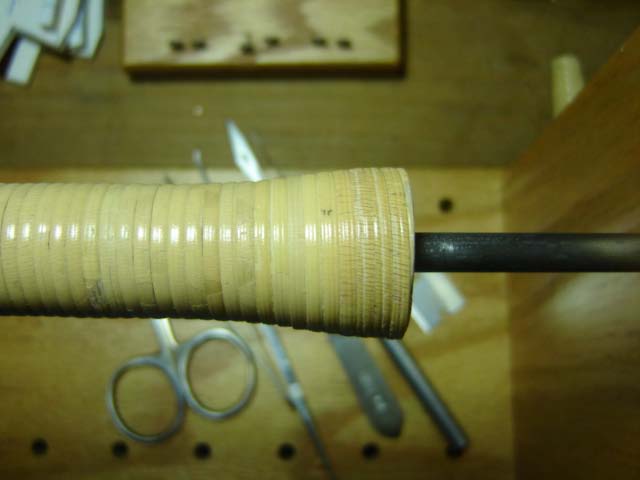
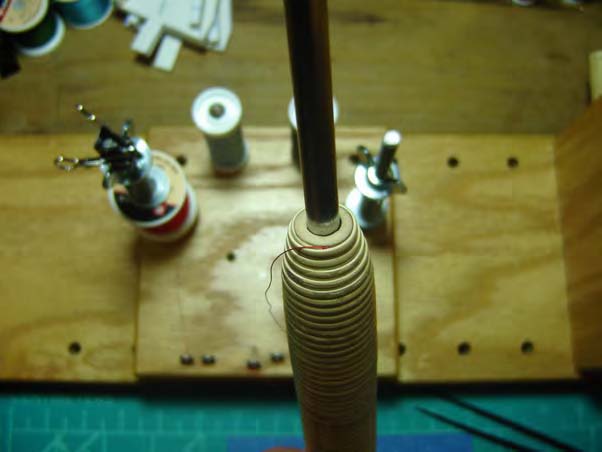
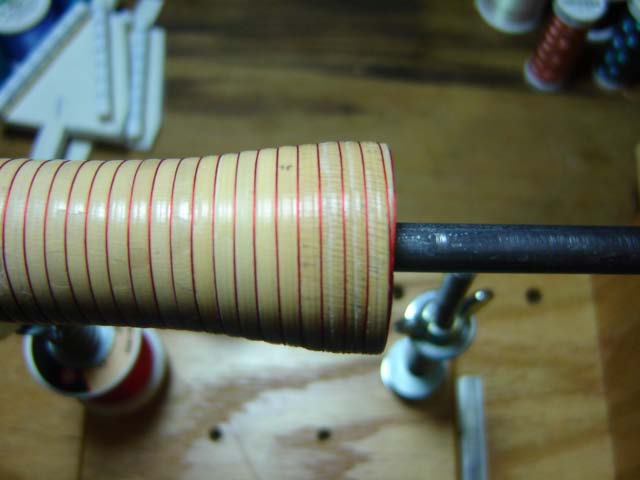
Getting Ready To Use: Place the rolls you will need into warm water and go drink a beer. Once soaked good, anywhere from 1/2 hour to an hour or so, take it out of the water. I wrap the strip onto a piece of 1/2 inch thin wall conduit to let it dry out for a day or two. Avoid using wood dowels as they will retain the moisture, which is supposed to be leaving, unless they have a few more days to dry out. I wrap the Rattan onto the handle from Left to Right. Notice the Rattan on the conduit. It is wrapped onto the conduit the opposite direction. This allows the Rattan to wrap onto the handle much easier most of the time.
Shaving Rattan Thickness: In order to get the Rattan to wrap over itself smoother at the beginning and during splices, the strips can be shaved to a bevel in the area required. An inch or a bit less is all that is required. The material is taken off of the flat side, which will be toward the cork. The round side is the outer bark of the plant and being very similar to bamboo, it is tough to cut.
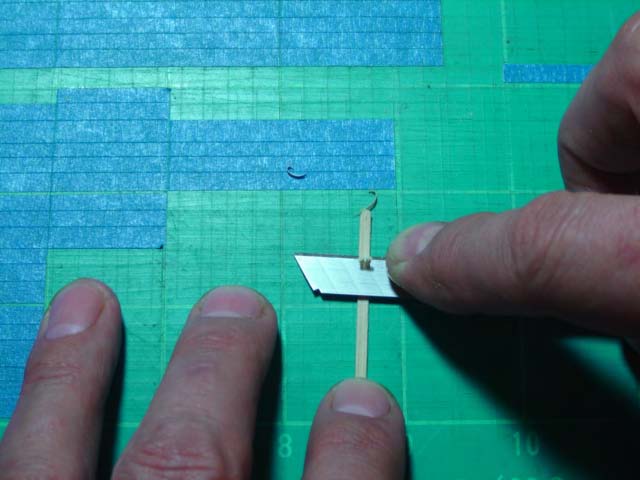
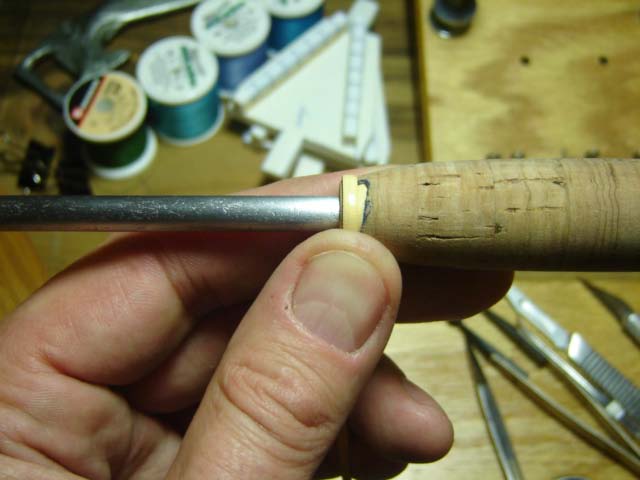
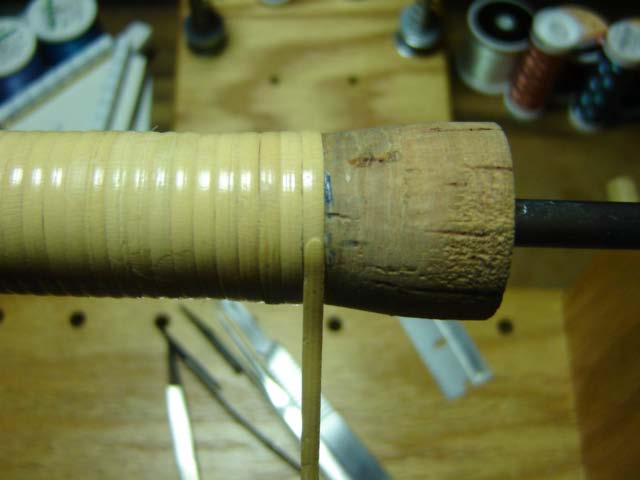
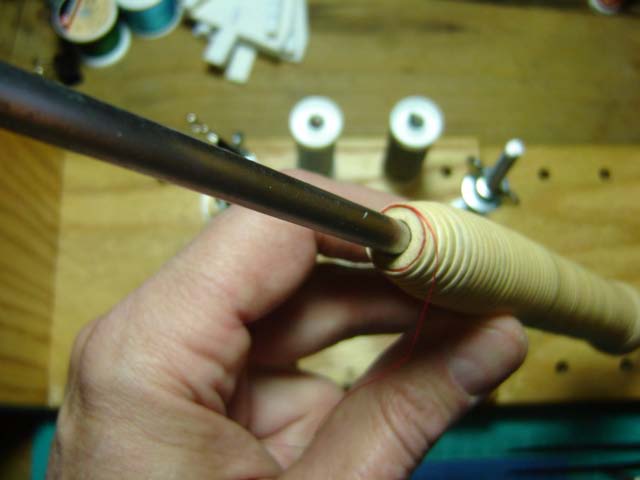
Starting Point Marking: Hold the beginning end of the strip similar to the picture at a slight angle toward the front end of the handle. Have a pen handy and trace around about a half inch of the strip. Extend the line on the right until it is about 1/16 inch from the end of the cork. From this point, draw a line, following around the end of the cork, until it meets the existing line from the right.
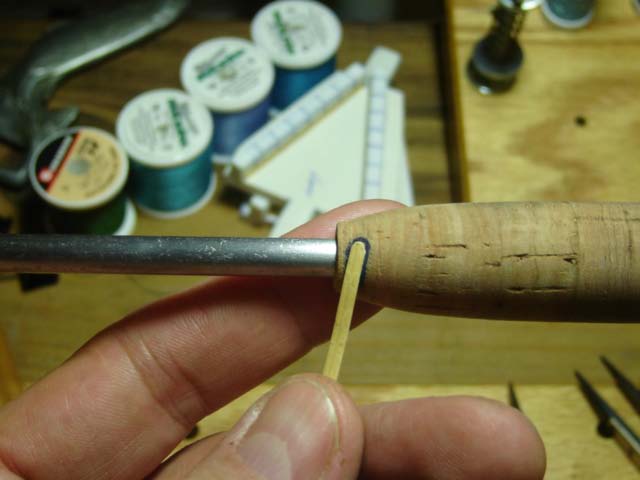
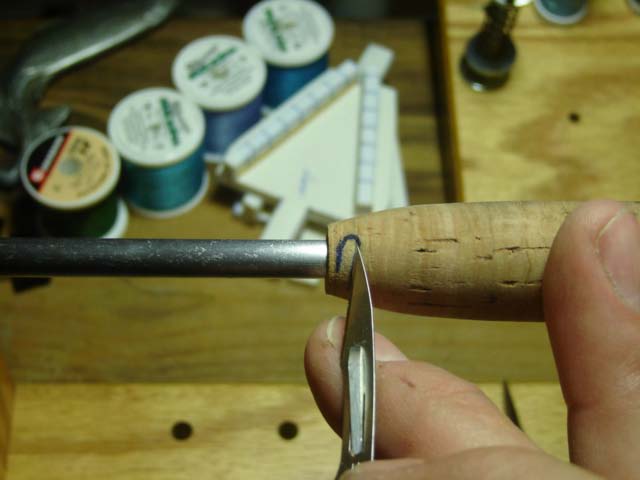
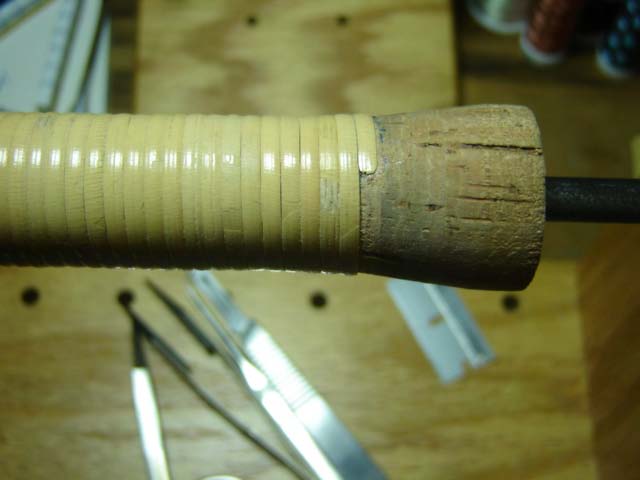
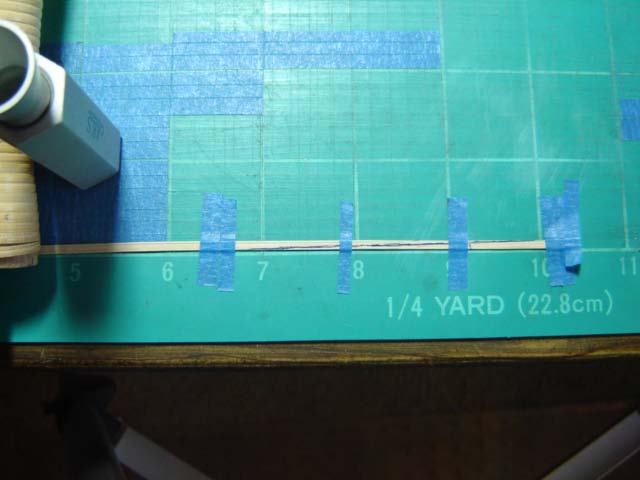
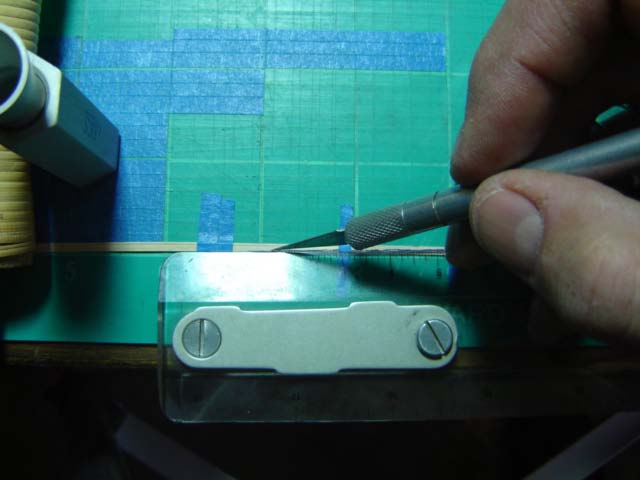
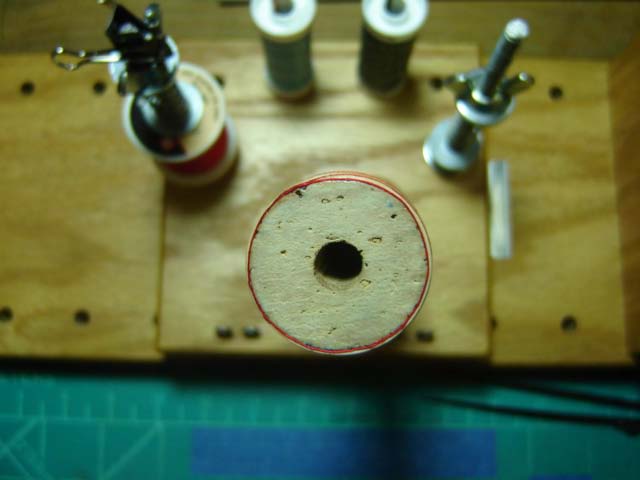
Cut In Recess: Using an Exacto Knife, Scalpel, Razor Blade, etc..., Cut a recess into the cork similar to the pictures below. The recessed areas are marked in blue. This only needs to be the depth matching the thickness of the Rattan strip. A bit + or - is not going to matter much, it is all covered up anyway.
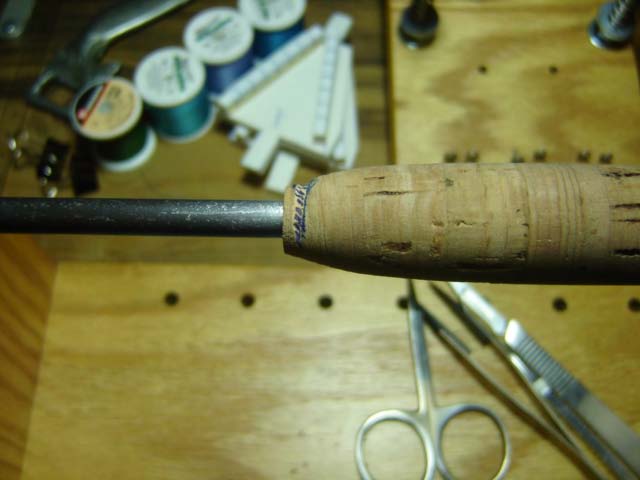
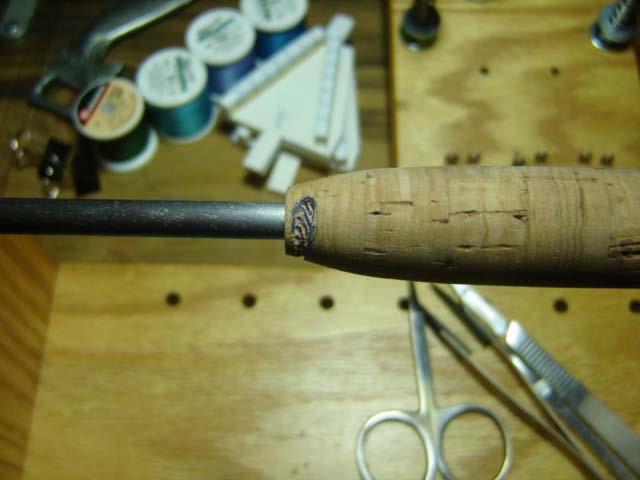
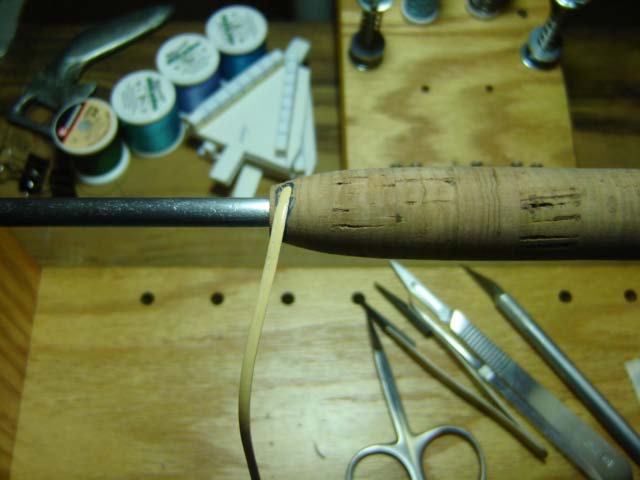
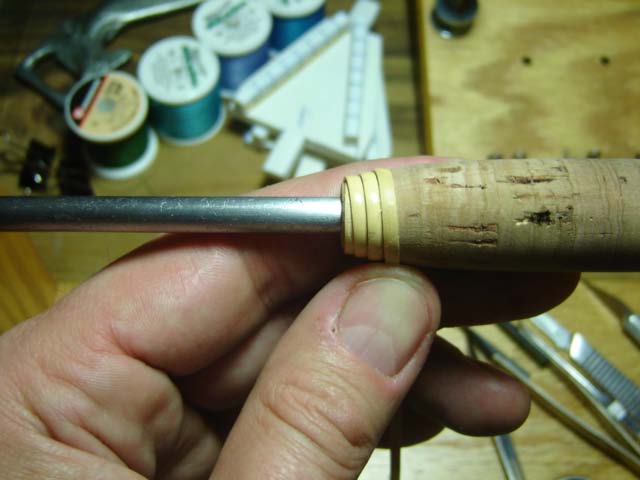
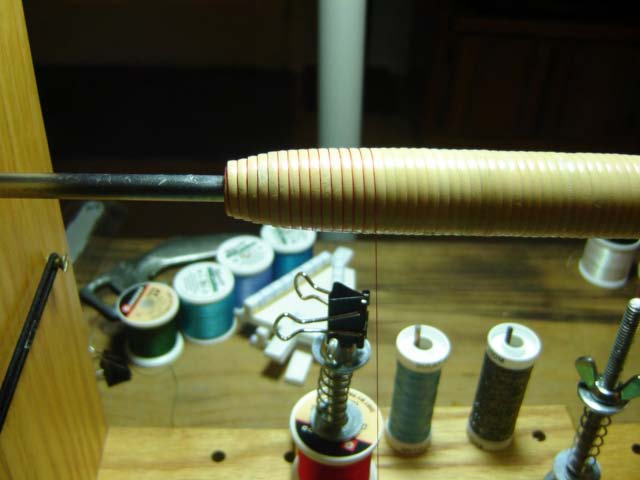
Starting Rattan Wrap: Glue the starting end of the Rattan into the recess. Super Glue works great for this. After the Super Glue sets up, it's time to start wrapping the handle. I use Titebond II, wrapping and gluing about an inch at a time. Wipe the glue onto the cork and start turning the handle. The Rattan will be at the end of the cork and will overlap the recessed end, locking it into place as shown in the pictures below. While wrapping, keep the strip tight to itself, just like wrapping thread. No gaps. After every glsection is wrapped, wipe over the Rattan in that section with a damp rag, paper towel, etc... to clean off the excess glue, which will push out between the wraps.

Rattan Handle Process - Section 2
Splicing: Find the general area the Rattan strip will run out and glue to about 6" of the end of the strip. Shave down the end of the strip as with the beginning of the wrap. Glue to a point about one half rotation from the end of the strip. Mark around the end of the strip so that a recess can be cut into the cork to help with a smooth transition of the splice. Cut the recess into the cork and glue the remainder of the strip into place. Once again, Super glue is the ticket. Shave down the next strip to be spliced in, and using Super Glue, set that strip in place, on top of and in line with the existing wrap. About 1/2 to 3/4 inch overlap should be OK, and with the recess cut into the cork, the level of the Rattan should be smooth. After sanding later on and finishing, the splice will only be noticeable if you really look for it.
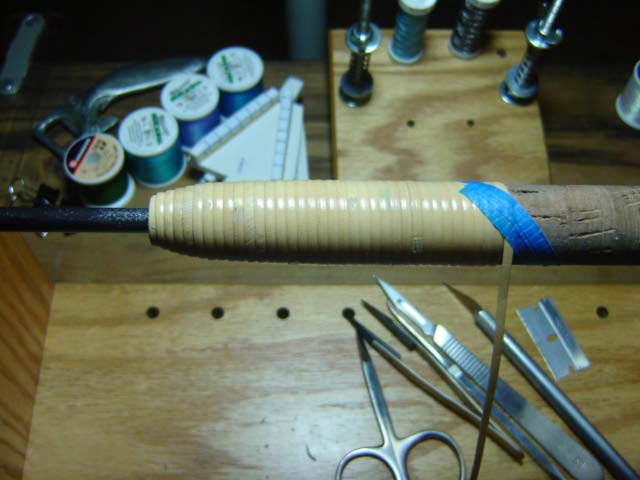
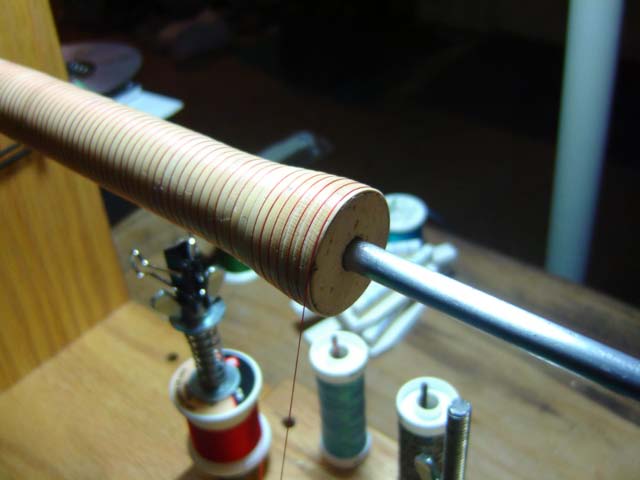
Final Wrap: When the Rattan is a couple of wraps from the end, let the glue cure so the finished end will be easier to work with. Wrap past the end of the handle and cut the strip so there is an inch or so left to work with. It will help in cutting the final taper. Once the glue is dry, dry wrap to the back of the handle so the strip wraps off of the end and hold in place. Use a pen, which will be easily seen when marking the back of the strip and trace onto the Rattan following the end of the cork. Tape the marked Rattan to a cutting board so the final taper can be cut with a straight edge and a very sharp, thin blade knife or razor blade. Practice diagonal cuts on a scrap piece first to get the hang of this type of cut. Rattan has a linear fiber, and a missed cut will leave the diagonal line and split straight through to the end of the strip. Leave a bit extra past the cut line, which will be sanded down for the final fit.
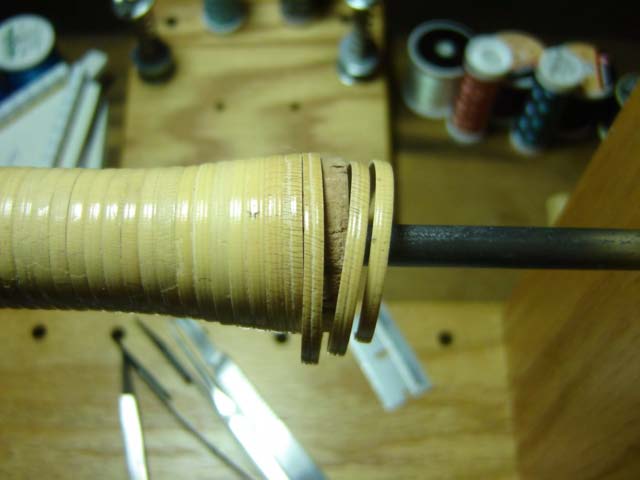
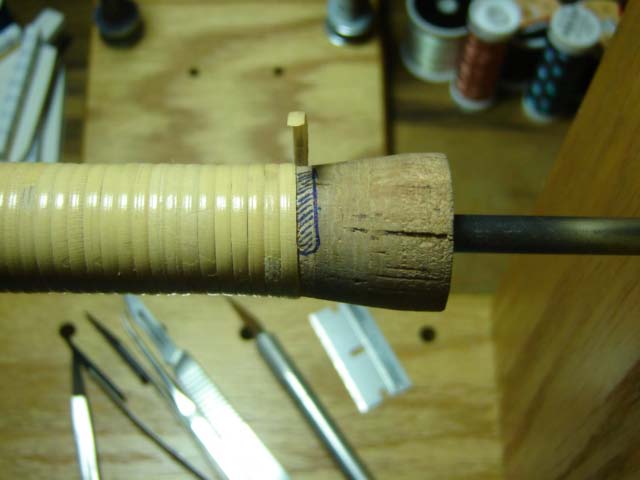
Final Fit: Sand the rattan down so that it will be just short of being flush with the end of the cork. A small sanding block can make this process a bit easier. This will allow just enough space for the thread to lie into. When sanding, leave a 1/2 inch extra length to the strip, which will tuck under and be secured by the final wrap. This will be a bit easier to work with if it does not form a point. Leave it squared off a bit. Don't sand too hard against the strip as it can break easily once it is tapered to small dimensions. Dry wrap to test for the final fit, then mark out and recess an area for the tag end to fit into under the final wrap. Place glue onto the remaining cork and wrap to the end. Leave the final wrap just a bit loose so that the tag end can be run under it and into the recessed area. Once the tag is in place, carefully twist the last wrap to tighten it down, while helping the tag end to settle into position. A toothpick or something similar can help keep the tag end pushed under the last wrap. Keep in mind that Titebond tends to get tacky fairly quick, so work fairly quickly with this last wrap. Next, look for any fibers that might be sticking out over the length of the handle. A razor blade will make quick work of them. A magnifying glass will help find them all. Now, sand the handle down to help take the glaze off of the Rattan and smooth things down a bit. I use Scotchbrite pads (Maroon, very fine), due to a fairly decent supply at home.

Rattan Handle Process - Section 3
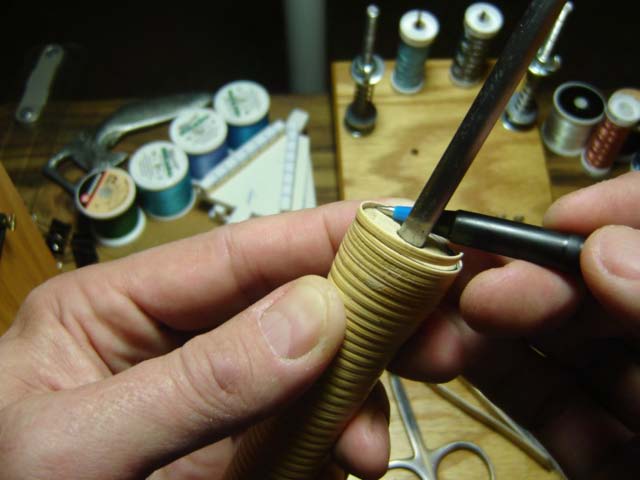
Thread Wrapping: Start the thread at the point that the first wrap overlaps itself. Super glue is used again. Continue the thread around the top of the Rattan, using Super Glue and a toothpick, working in small sections until getting back to the starting point. Wrap the Rattan the rest of the way down the handle and use Super glue to secure the thread at the point the last wrap intersects itself. Once again, Super Glue and a toothpick to wrap around the bottom of the handle.
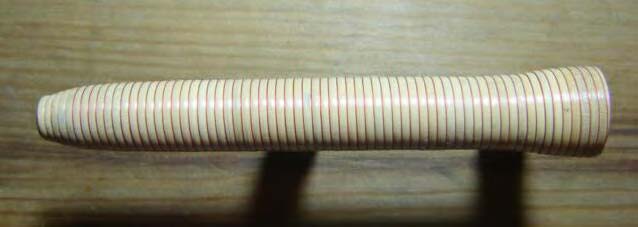
Finished: This is the completed handle (with no varnish), and a picture of some other handles. The Varnish I have used in the past is described next. Three or four coats seems to be OK. Scotchbrite between coats. Minwax Spar (Green Can), seems to bring out a great light gold/ yellow color on the Rattan. Varathane 900 Gloss is completely clear when finished. What you see is what you get. Man O' War 7509 Marine Spar (the Red Can) is a deeper, slightly darker gold/ yellow color, and is also the most durable and expensive of the three I have tried. It is what I have used on Bamboo restorations in the past.
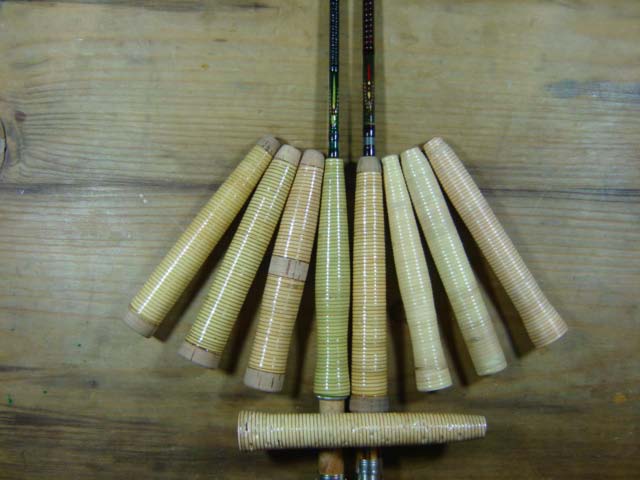
The handle on the right is the one from this tutorial. The two next to it have not been wrapped with thread yet. The one on the bottom was a chew toy for the dog for a couple of minutes while I was turning cork. This stuff can take anything.
Final thoughts
Please feel free to send this to anyone who you think might get something out of it. This material helps to use up all of that, so-so cork that lays around taking up space. Also, this technique has been used in our craft for well over a century, being an elite handle material on wood and bamboo rods beginning in the mid to late 1800's. I have seen rods from that era all but destroyed outside of the Rattan handles. It has had some popularity the last few decades, most often with a few Bamboo makers out there. Knife and sword handles have been wrapped with Rattan for centuries. To those who are using Rattan, thank you for helping to keep this part of our craft alive and kicking. To those who might use this in the future, I hope this helps out a bit and I have no doubt that you will come up with some outstanding ideas. Looking forward to seeing them.
Thanks for your time,
Lance Rogge
Denver, CO
lsrogge @ cs.com