
|
Tube Flies for the Warm Water Fly Fisher, Part 4
By Johnny (aka Hillfisher), Texas
Tube Fly that Work
Tube Muddler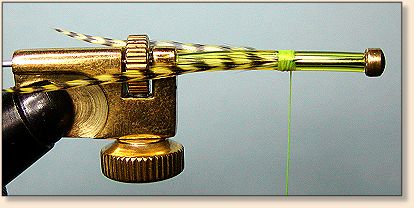 Step 1. Here I use a soft yellow translucent polyline. Tied halfway from head and rear are yellow barred hackle one tied on each side.
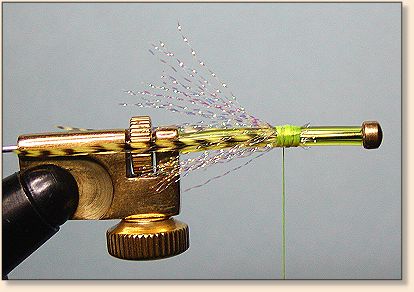 Step 2. Add some pearl crystal flash and the fly takes on highlights that gives that flash in the water that gets old bucket mouth bass interested.
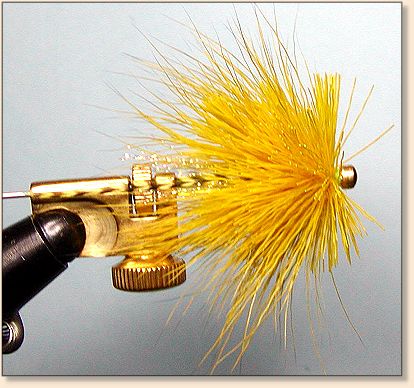 Step 3. Yep, we're stacking deer hair. Larger tubes equal more, much more deer hair. Use lots of hair and stack top and bottom. Continue to stack working forward till you have about an eighth of the tube left. At this point you should have a nice thick ball of hair.
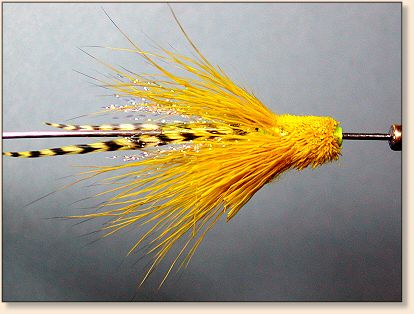 Step 4. Trim the hair to desired shape. Because the tube is already of a larger diameter than the typical hook shaft, you can trim the hair closely and get a really tight compact look with plenty of diameter left on the head. Another aspect of deer hair is it adds positive buoyancy to the tube. This fly is ready to fish and it does really well with the bass, small versions do exceptionally well with the large bluegills. Fixed or free style works well with this fly, however free style is recommended.
Shimmering Minnow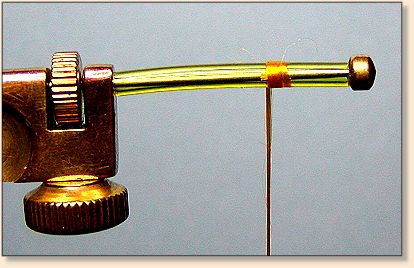 Step 1. Once again using a soft tube lay a few wraps of thread about two thirds up from the tail end of the tube. Also a tube body of a contrasting color to the material used is recommended.
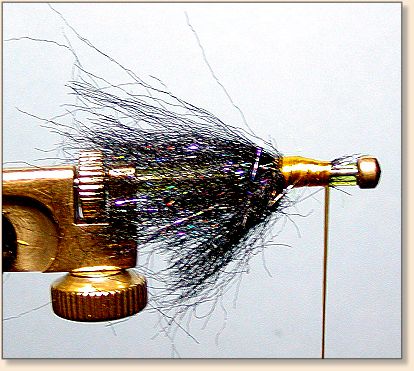 Step 2. For the first section of the body we are going to use Orvis Black Shimmer material. Cut it long enough to extend about one half inch beyond the tube rear. We are not stacking the material so cut enough to completely encircle the tube and tie in place.
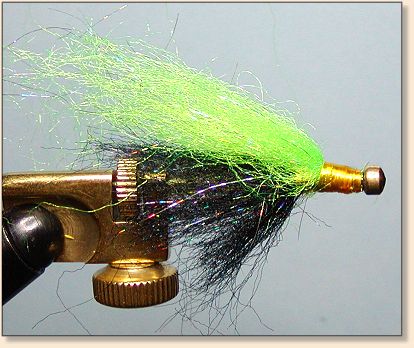 Step 3. Cut enough Orvis Chartreuse Shimmer material to extend a half inch beyond the Black Shimmer Material. This material is stacked on top with the chartreuse covering the top half diameter of the tube. This becomes the overwing. Tie this in place and whip finish.
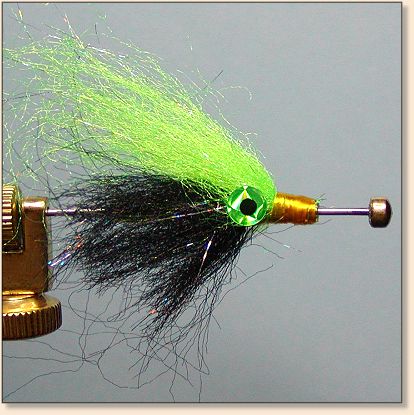 Step 4. Add eyes to give the live minnow look. It is stated by many that some species of predator fish target on the eyes so adding them can enhance your fishing. This fly is fished strictly fixed style. It is necessary to align the hook so that the tip is opposite the overwing. The hook acts as a keel to help keep the fly right side up.
|