
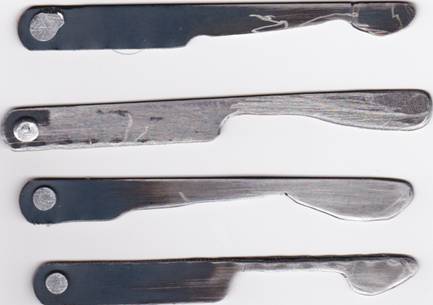
HOW TO MAKE A WING BURNER
1. - I made my set of wing burners out of cheap [$3.00] hack saw blades.
2. - Place two blades teeth together.
3. - Now pop rivet the blades together. Riveting the blades together keeps them together while you cut them out and once you have them cut out they are already together. Peen the rivets as this tightens them even more.
4. - Print the patterns on an Avery label sheet or on paper.Cut out the shapes, if you use Avery labels peel them off and place them on each end of the blade. If using paper then put some white glue on the blade and place on the blade. I have included full scale set of the burners I made. These are the ones I like and I'm sure I'll be making some more.
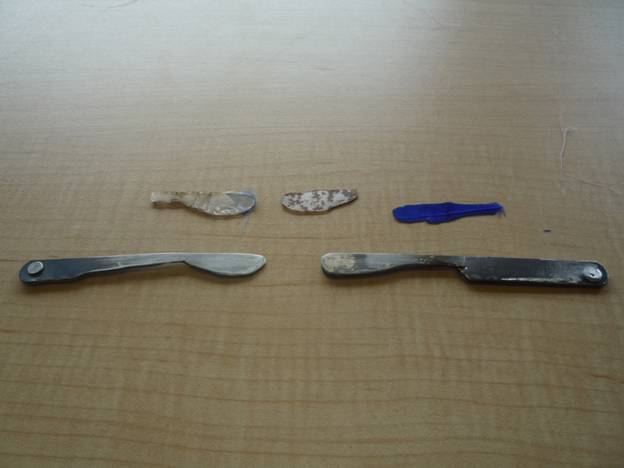
Left - Homemade Wing Material - Middle...MFC ETHA-WING (Purchased off the Internet) -
Right - Burnt Feather
5. - Now cut the shapes with a Dremel tool, use a grinding stone to round out and fine tune the burner tools. ALWAYS WEAR SAFETY GLASSES.
6. - Feel free to modify the shape of the blades to create the design of the wing you want.
7. - To make your own wing burning material use a fabric softener dryer sheet with each side covered with clear packing tape. I noticed that after burning the wing the edges get sealed holding a little trapped air in the wing, not so bad when you want your fly to float longer.
Have fun and happy tying