|
Al Campbell, who writes our Beginning Fly Tying series, (among
other articles) gave me a really bad time. All in good humor
of course, but the subject had to do with the fact I've never
learned how to use a Whip Finisher.
Al was working on the photos and instructions
for teaching how to use whip finishers, and felt I really should
know how to do that. Fair statement on his part, but on the
other hand, I've never been in a position where I could not get
the proper job done by hand.
So for those of you who never learned to do
it the "hard way" - listen up. It isn't the hard way at all.
It is the "original way!" And, believe it or not, some folks
still think doing things the 'original' or old traditional way
is the best. That ought to start an arguement or two.
With a lot of help from my friend
Harry Salmgren in Sweden, (he is Editor in Chief
of the Wilderness News/Vildmarks Nytt Magazine.
and you can also find him in Bignami
Fine Fishing Magazine as the Swedish Fly
Fishing Editor,) here are his photos and text from the
English translation of his
website.
Our sincere thanks to Harry.
"Some years ago, I had the pleasure of
being taught how to make that excellent
finishing knot, the Whip Finish, with just my
hands."
"For the avid fly fisherman
searching for the right knot to match the hatch,
this one tied just with the hands, is perfect.
No need for any hassle with too many tools while
stalking the trout. Even very small flies can be
finished with this finger trick. You don't have
to worry anymore about forgetting the traditional Whip
Finish Tool when you know this finishing
technique" says Harry Salmgren, inviting you to
try it for yourself."
Please note:
After a first read through, scroll down
to bring up the next photo in the sequence at
the speed of your choice. Viewed in this manner
the photos give a simulated movement to the fingers
tying the Finger Whip Finish.
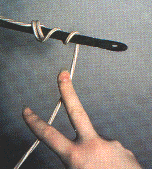
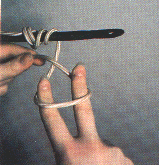
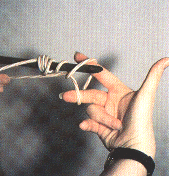
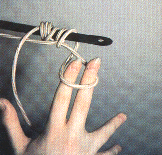
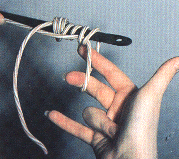
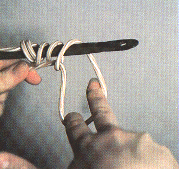
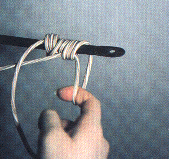
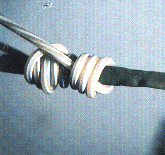
The photos from one to nine
show positions and finger settings for tying the whip
finish accompanied by descriptive text.
The sequence for tying the
Whip Finish using only the fingers, is illustrated
with photos below. To make the moves easier to see and
understand the hook and thread are oversize and
should be viewed in a flowing sequence.
|


