|
Have you ever wondered how some photographer's photos
can make a fly seem to float in the air? I'd like to
tell you it's magic, but that would be a lie even a flyfisher
couldn't get away with. There are several ways to create
that illusion. One involves a bit of software trickery,
and the other involves glass and lighting. It isn't that
hard to do if you know the tricks.
Probably the easiest way to suspend a fly in mid air in
a photo is to place it on a piece of glass that is suspended
over a colorful background, then take the picture. The clear
glass will allow the background to show up, but the fly will
appear suspended in the air on the final photo. At least
that's the way it's supposed to work.
This method has a couple of drawbacks that you need to be
aware of. First, there's the issue of reflection. It's
pretty hard to keep light reflection off the glass and out
of your photos. You'll need to turn off all the lights except
the lights illuminating your fly and the background if you want
to keep reflections out of your pictures. You'll also have to
work on the lighting you use to keep any reflections it generates
out of your photos. Don't forget the reflection of the camera
lens that will often show up in your photos.
Then there's the issue of keeping the fly on its side so you
can photograph it. Most flies want to allow gravity to work
on them. That means the weight of the hook bend will usually
tip the fly upright and ruin your beautiful side shot. Some
flies are flat enough on the sides that this isn't an issue,
but bushy flies with hackle will test your patience.
Next there's the issue of a fully and evenly lit background.
If your glass table is big enough, you can use the lights you
illuminate the fly with to light the background. You'll need
at least four lights at angles all around the fly to eliminate
shadows and fully illuminate the front of the fly and the
background.
Oops, I almost forgot the reflections of the fly itself.
You'll have to work that issue out too. Don't forget to
keep the glass spotlessly clean and throw it away if it
gets scratches on it. Any imperfection in the glass will
show up vividly in your photos, so consider that issue too.
I'm not trying to say this method is a bad method. I'm just
pointing out the things you need to consider and work on
when you use the suspended glass method.
If you're sending slides to a publisher somewhere, you'll
have to work on this method until you get what you want.
Don't forget to properly frame your subject and make sure
your focus is right. Some guys use fancy light tables and
such in their quest for perfect suspended flies. You'll
have to work out the details and your setup for yourself.
If you're using digital cameras or you're scanning your
pictures to use as electronic files or on the web, there's
another method. In fact, this is what I call trickery.
You use your graphics or photo software to remove the
stuff you don't want others to see. It's devious, but
then again, it works. Let me explain how it's done.
First, you need a good background. We've covered that,
so I won't go into detail here. I use the background behind
my fly vise. The real trick is how I make the fly levitate
in the air so I can take those lovely photos. Ok, maybe I
fudge a little. Maybe it's a trick or illusion. If that's
your guess, you're right.
Most of my suspended fly photos involve either a very fine
wire or fine monofilament line. I merely run the line or
wire through the eye of the hook or suspend the fly on the
line/wire by the hook bend. Then I take all the photos I
want, using the background and lighting I have at my fly
bench. The fly is actually suspended in the air; you just
don't see the wire/line in my photos.
Next I pull up my digital photo or scanned photo in one of
my photo managing programs and remove the wire or line. Even
the cheap software that comes with your digital camera or
scanner has the tools you need to get this right. Of course,
the more expensive software does it better, faster and without
as much work from you. As soon as you learn how to use your
photo manipulation software and get comfortable with it, this
is a simple task.
The first tool and the one I use most often is called a
clone tool. With that tool, I can replace any part of
the photo with another part of the photo. I merely select
a nearby section of the background and replace the wire/line
with that section of background. It's a lot easier to do if
you magnify the image to several times its normal screen size.
I merely remove the line/wire by cloning another part of the
background into its place in the image.
Another tool you can use is called a lasso tool. You simply
lasso the wire and remove it; then replace the area you removed
with a section of the background already in your image. If you
do it right, this method is faster than the clone tool. You'll
have to practice with both methods until you get it right, but
this is a less expensive method, and it takes less time to edit
the photo than it does to set up and control the image on a
sheet of suspended glass.
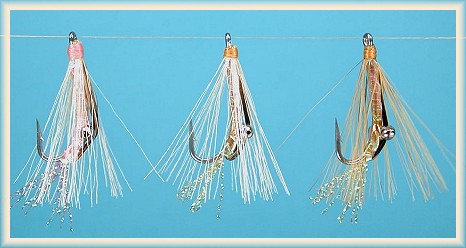
This photo clearly shows the wire that suspends the flies in mid air.
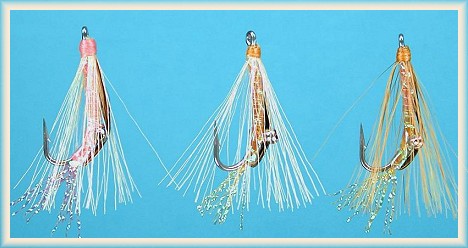
This is the same photo with the wire removed in my photo
management software.
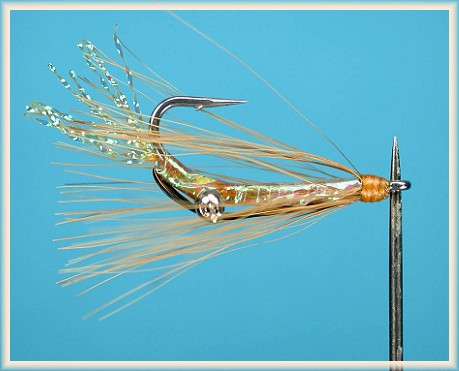
This photo shows a fly with a bodkin running through the eye of the hook.
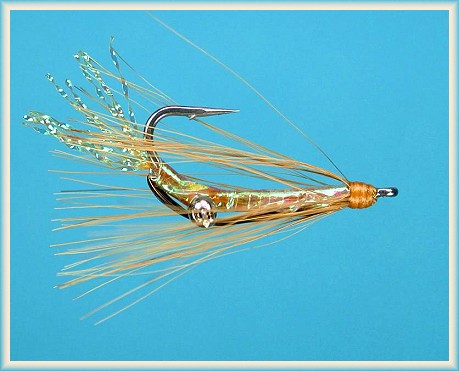
Here the bodkin has been electronically removed with photo imaging software.
Stuff happens. I don't like that fact, but liking or not
liking a fact doesn't change the idea that it's a fact I
have to deal with. If you don't want to take the same
picture over again, preserve the original image in a file
under a different name than the one you're manipulating.
If you don't, eventually you'll encounter the problem of
an edited image you don't like and a lost original image.
It's a lot easier to back up to the original digital image
than it is to back up to the beginning with the camera and
lighting setup. I usually label my original photos and add
an "a" or "b" to the file name for the image I'm manipulating.
Even if I like the results of my image editing, I rarely delete
an original image. As my skills improve, I may want to go
back to the original and edit it again.
I mentioned earlier that good software is important. If you
have good image management software you can adjust light,
contrast, hue, saturation, focus, size and more in any digital
image you have. The better stuff also has dust and scratch
removal tools, special effects, composite tools and more.
There's no end to the trickery you can perform if you have
the right tools.
We'll wrap this all up next week with a few final thoughts
and a couple more ideas. Until then, look back on what we
have already covered in the last month and see if you have
learned anything you can use. ~ AC
|