|
My basement-remodeling project is approaching the time
when I will be remodeling my fly tying room. However,
the fly tying room won't be done in the same décor as
the rest of the basement. That room will get the look
of a fly shop with pegboard walls and lots of shelves.
To this point, that room has been a mess of stored things
removed from other rooms so I could work on walls and such,
but that is about to change.
To start things out, I decided I needed a better fly tying
bench. I wanted one that was built for the purpose of taking
fly tying pictures as well as tying. The bench I've been using
has been modified to perform the picture-taking function, but
it wasn't designed with that purpose in mind; and it wasn't
very handy as far as tool storage was concerned.
Last weekend, after work on Sunday, I started building my new
bench. Nothing real fancy, and surely not made from exotic
wood or even hardwood. I'm focusing on function, not looks.
Everything is made from particleboard and pine, and nothing
is painted. I didn't even sand off the pencil marks I made
when I marked out hole spacing and such. My only goal is
function and organization.
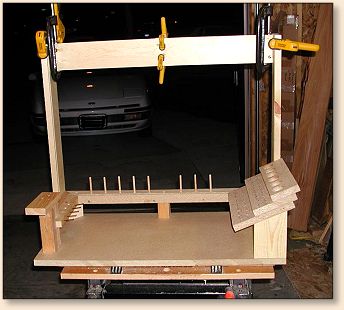
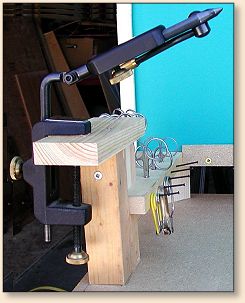
First I built the basic bench. I set the vise perch at 5 inches
above the bench, but lowered the support and tool arm to 2 ˝
inches so it wouldn't show up in pictures that require a wider
view than normal.
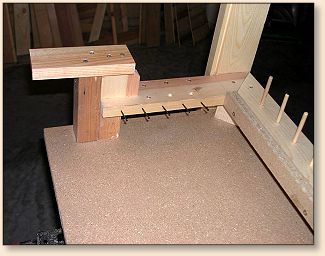
Next I made a tool stand that can hold a variety of bobbins,
tools and glues.
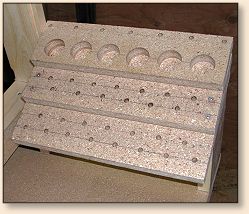
The stand consists of three layers of particle board climbing
toward the rear. I mounted it on supports cut at a 22-degree
angle so the tools would lean toward the center for easy access.
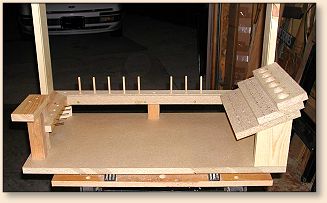
Then I added upright arms that have grooves in them to hold
colored matte board to use as a background for pictures.
The board across the top/back of the uprights keeps the spacing
of the uprights even and serves as a support for light mounts.
Everything is glued, screwed and clamped to keep it solid as a
rock. To add a photography background, simply drop the matte
board down the grooves.
Finally, I added pegs and finish nails to support a variety of
threads and materials.
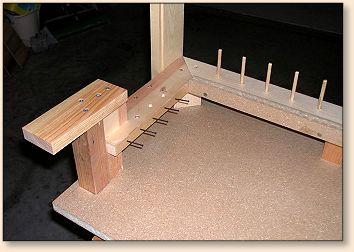
You can see the groove in the upright in this view. There is
also a groove in the piece of particleboard that supports the
bottom of the matte board.
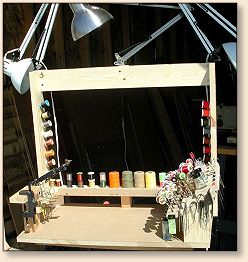
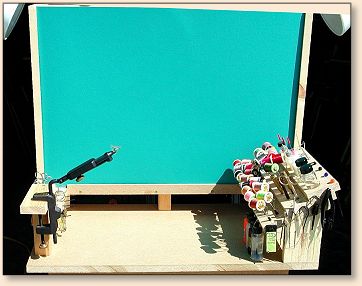
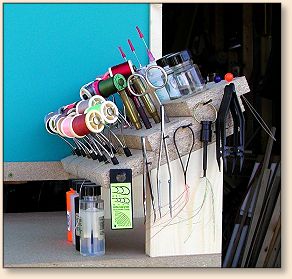
After adding lamps, tools, vise and thread, this is how it
looks without the matte board.
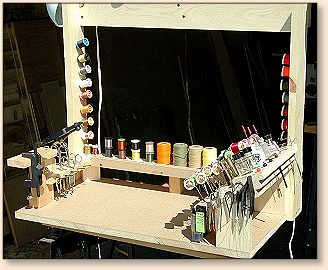
Add a background and it looks like this.
As you can see, my scissors and other tools are low enough
to stay out of the picture when I'm photographing flies.
The lamps can be moved into place to take photos,
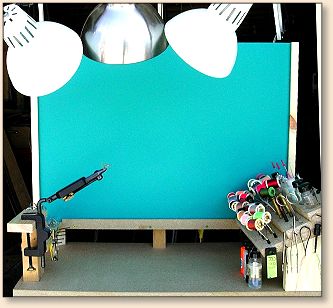
or the side lamps can be moved out of the way when not
in use.
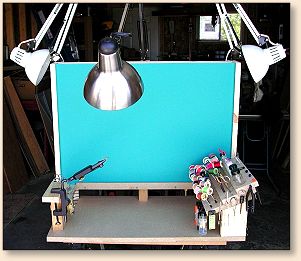
I have two additional lamps mounted on my desk that will
illuminate the fly from the bottom left and right. The
photo lamps are on a gang switch that turns all four of
them on with a single click. The main tying lamp is on
a separate switch.
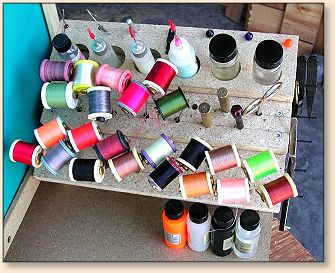
The tool rack looks like this from the front,
and this from the top.
The main purpose of this adventure is this.
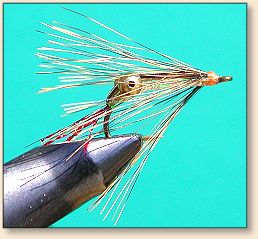
This photo was taken using natural sunlight before I moved
my new bench to its resting place on my fly tying desk.
Was it worth the effort? Yup, I needed to do something nice
for myself after all that work I've been doing on the house.
~ AC
|