
| ||
|
May 17th, 2004
Rock Chuck October Caddis #2 |

|
RCOC2 Materials:
Tying steps RCOC2: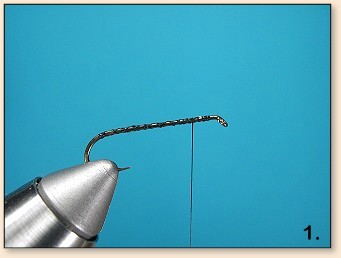 1. Start the thread.
 2. Cut about a five inch piece of orange punch embroidery yarn and tie both ends of the yarn to the hook.
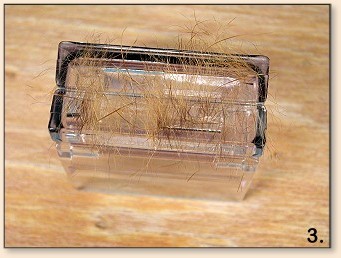 3. Cut a small patch of hair from the back of a rock chuck, remove the guard hairs and set them aside, then spread the under-fur over a Magic Tools table as shown.
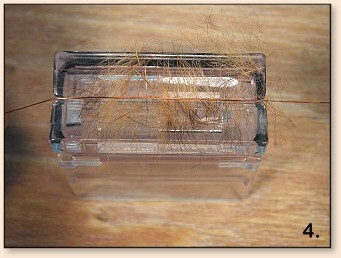 4. Place a wire on top of and across the hair on the table.
 5. Now, push the hair down into the table with the wire.
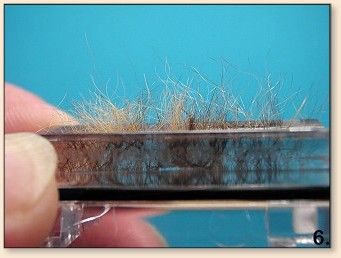 6. Your hair should look like this while it is in the table.
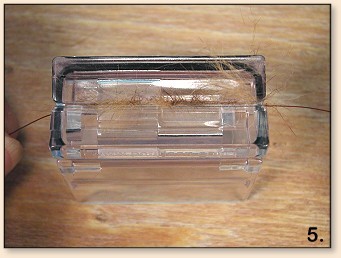
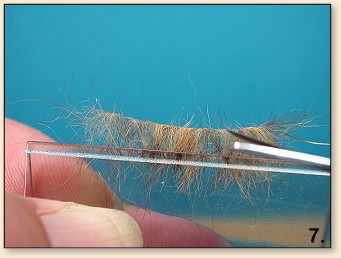 7. Use a Magic Tools clamp to remove the hair from the table, then trim the bends of the hairs with scissors.
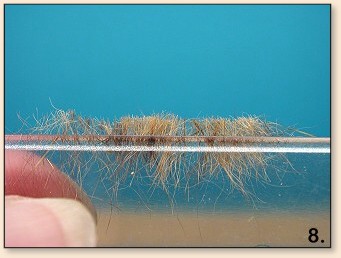 8. Now your hair should look like this.
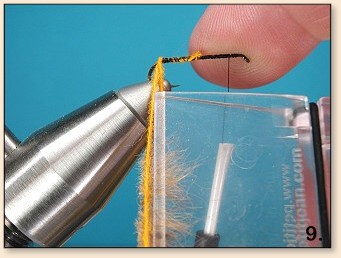 9. Insert the hair in the loop of yarn you made previously.
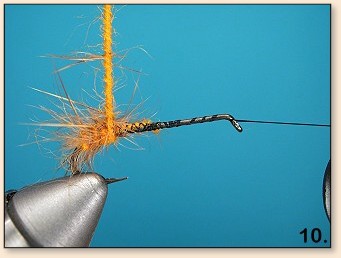 10. Now, twist the yarn and hair into a type of chenille and start wrapping it as a body.
 11. About a third of the way up the hook shank, the hair should be all used up, so tie off the yarn loop there.
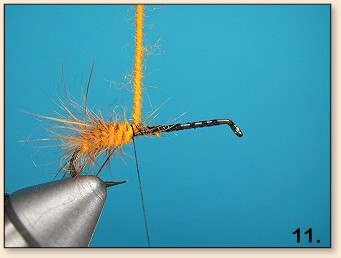
 12. Grab the guard hairs you set aside earlier and even the tips, then measure them for a wing.
 13. Tie them in as a rear wing as shown.
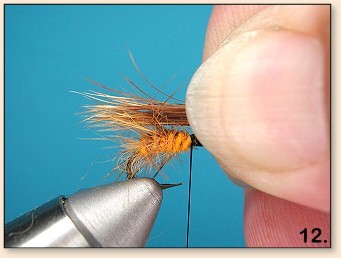
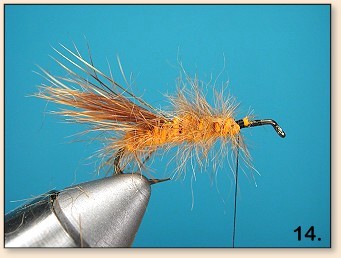 14. Repeat the body process again, leaving plenty of room for a hair head.
 15. Then add a second wing.
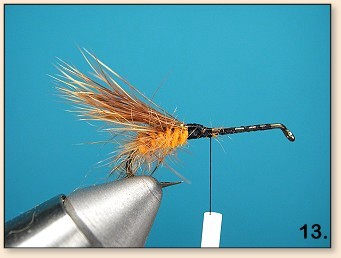
 16. Grab a small patch of deer hair, remove the under-fur and even the tips.
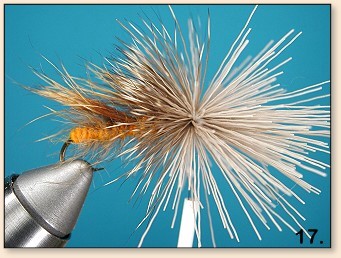 17. Spin a hair head. You may have to spin two patches of hair for a full head.
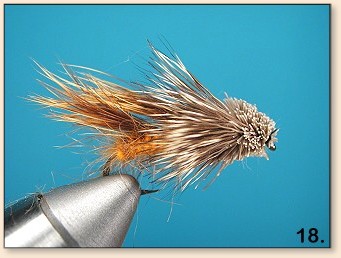 18. Whip finish, trim the hair into a small head, and cement. Your finished fly should look something like this.
|
