|
After my first "too simple" nymph, I didn't plan
to show this one. However, after I wrote the ten
points article of last week, I had more than two
dozen requests for the tying directions for my too
simple baetis nymph. I'm all about technique and
don't feel exact patterns are all that important,
but I see that many want or at least think they
need the exact pattern, so here it is.
Before I show you the steps though, I want to add
that this is one of my favorite patterns for the
Bighorn River in Montana when a baetis hatch is
happening. I have had some real productive days
on that river and elsewhere due to this very simple
nymph. In fact, I believe I could imitate almost
any nymph that was the same size and close to the
same color as this nymph, and do quite well fishing
it. Suggestion is often more attractive than an
exact reproduction.
Please, don't get caught up in the idea that you must
do everything exactly like I do. I tie these simple
patterns for several reasons, and none of those reasons
has anything to do with the idea that this fly has to
be tied the same way each time. If I suddenly discovered
that I didn't have punch embroidery yarn with me, I would
simply tie the same thing with dubbing or something similar.
The main point behind all of these patterns is simplicity
and speed in tying. That should be your goal more than
following my exact pattern.
Enough of that. Let's tie another fly that is so simple
I almost feel guilty when I tie and fish it. Note that
I said "almost." Actually, I feel no guilt when I
discover another way to make life more simple. That
includes my tying and fishing too.
Too Simple Baetis Nymph Materials:
- Hook - Any standard nymph hook, even cheap
ones will do. I'm using a size 18 Mustad 3399A hook.
- Tail - none.
- Body - Dark brown punch embroidery yarn.
- Legs - Dark brown punch embroidery yarn, (tag
from the body yarn).
- Thread - 6/0 dark brown or black Danville.
Tying steps:

1. Start the thread and build a head for your
fly right away.
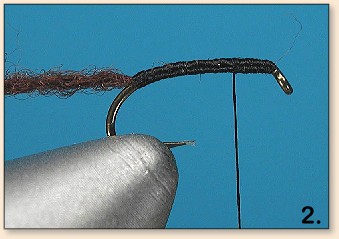
2. Tie on some punch embroidery yarn (as shown).
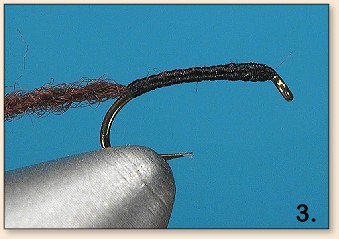
3. Whip finish the thread and trim. You won't
need the thread again for this fly.
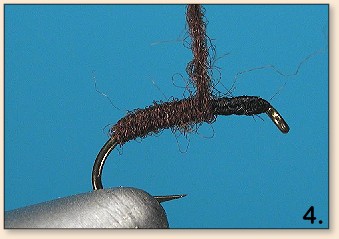
4. Wrap the yarn forward to just past the halfway point.
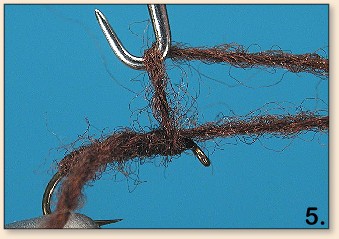
5. Use your whip finisher to make the last three or
four wraps of yarn.
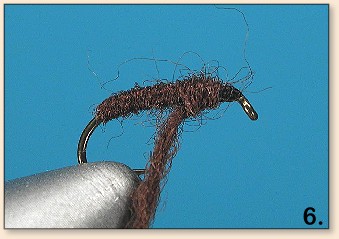
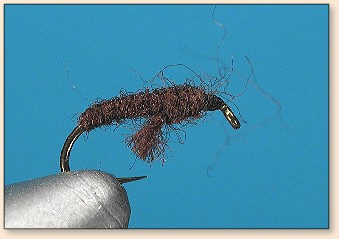
6. After you whip finish the last few wraps of yarn;
cinch the yarn tight (as shown).
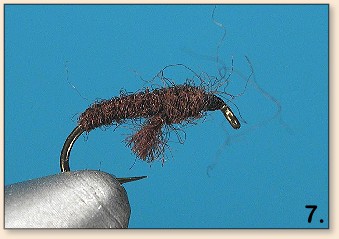
7. Slide the yarn tag to the bottom of the fly and
trim to resemble legs (sort of). Cement the head
and last two yarn wraps for a durable fly.
-
Does your fly look like mine? Do you think you could
use the same steps to create a fly that matches an
insect hatching near you? What size and color would
you use? It's your chance to "match the hatch" with
a simple creation of your own.
~ AC
|