|
How are you coming with those contest entries? This
is the last week you have to send in your entries. Remember,
one entry per person, so send me your best stuff.
Special trips with special friends need to be preserved
in a special manner. We have done that in several ways
during this series, and this week we'll do it again in
another way using different tools. We're going to get
a bit more creative too.
We're looking at a lot of tools, but we're only scratching
the surface of possibilities in this series. There are a
lot more creative effects you can apply to a photo if you
want to. With the right software you can add frames,
movement, stretch areas of the photo and much more. I
have only begun to experiment with the more radical effects
Photo Impact has to offer, and there is a lot more to learn
I can intensify the colors and add bubbles and fog to an
autumn scene to create an atmosphere.

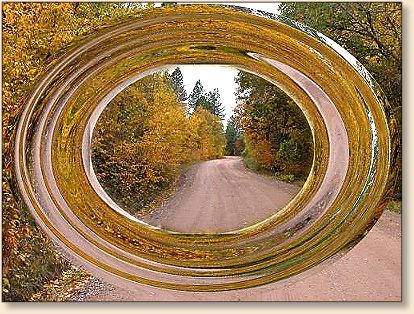
Or, I can swirl the picture with the whirlpool effect, cut
out the center and insert another picture so close to the
original that it looks like just one picture with a special
effect.
If you have a good imagination, there aren't many limitations
to the things you can create with the right software and photos.
Last week we played with bubbles using one special effect.
This week we're going to create bubbles using something
called a particle effect. These bubbles will be more
reflective. We're also going to resize the bubbles
using a different tool that allows you to see just
how big or small your object or bubble is. We have
a few more surprises to play with too. We might even
have some fun along the way.
Some of you may not see how this information can possibly
benefit you. Maybe it can't, but if you have a web site,
publish a newsletter for your club, church or office, or
just want to impress your family and friends with captured
memories of special events; this series can be useful to you.
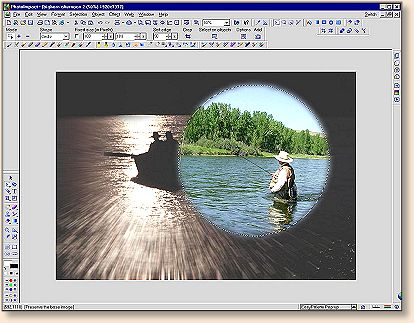
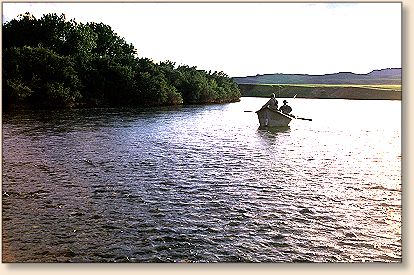
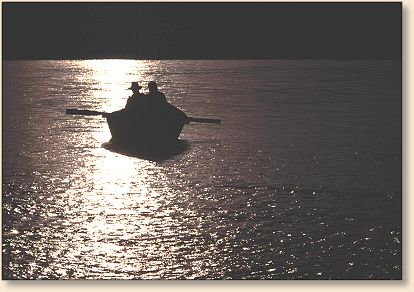
Getting started, this is a photo of two brothers I fish
the Bighorn River with every year.
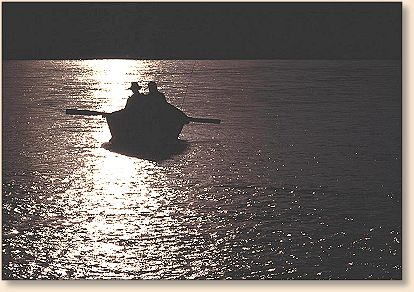
It's' a nice silhouette by itself, but why leave it alone?
Why not add other photos of the trip, especially since Jay
had his son along on this trip? We can turn a nice photo
into a nice photo full of memories.
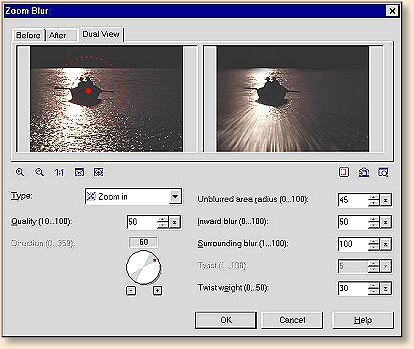
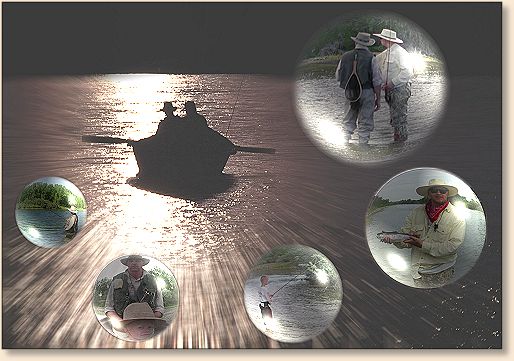
How about a special effect like the "zoom blur"? Using this
tool will focus your attention on the subject you choose to
center in the zoom. It also adds an impression of motion.
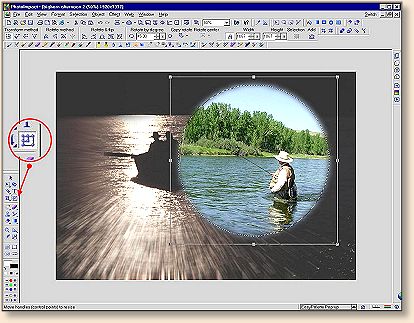
Next, let's start adding pictures of the people who participated
in this trip. You already know how to cut and paste a circular
portion of one image into another image, so I won't show that
again.
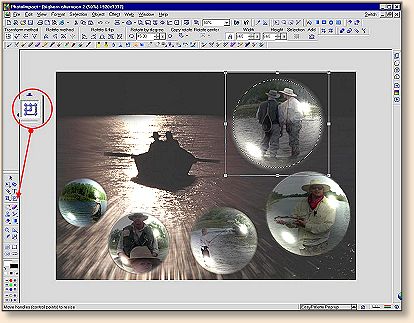
I can resize the cutout of Erik with the "transform tool".
Using the "particle effect," I can place the cutout of Erik
inside a bubble.
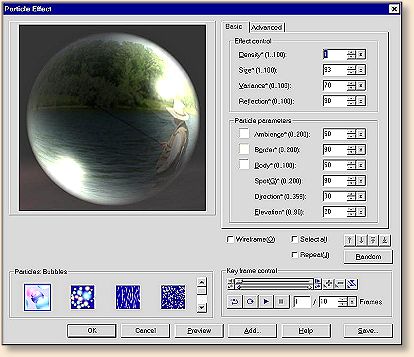
Then I can move it wherever I want to move it.
Using the same tools over, I can add as many pictures
in a bubble as I want, move them at will, and resize
them to the size that looks right.
If it doesn't look right, size it and move it until it does.
By the way, the "transform tool" is the only tool I have
found so far, that will allow you to resize the bubbles
without losing the special effects of the bubbles.
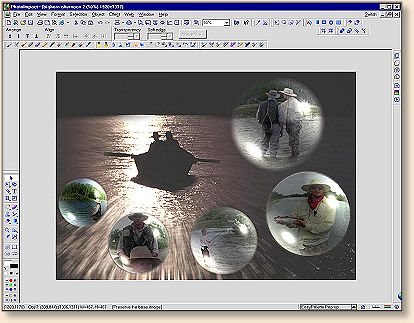
When I'm finally satisfied with my work, I can save it
and print it.
For all you photo buffs out there, in case you're wondering
how I captured the photo of the guys in the boat, here's
the scoop. We were fishing the Bighorn River and decided
to anchor on a shallow flat above a nice set of rapids so
we could fish the seam of water next to an island. Erik
and Jay went back to the boat to eat a bite while I fished
one more likely looking seam. As I neared the boat, this
is what I saw.
Looking at the scene, I noticed that I could get a great
silhouette by taking a few steps to the left and forward.
When the sun's refection was directly behind the boat,
I zoomed the camera lens in to concentrate on just the
boat and its riders. By zooming in, the silhouette
became almost entirely black and white. A picture is
only what you see through the viewfinder, but that vision
starts long before you look through the lens or snap the
shutter. It requires a vision of possibilities and a
view of details that make a good picture pop out of an
ordinary setting. This is the result.
Now, imagine you and a buddy are drifting down a river
far from the nearest boat landing, when the sky starts
to turn dark. Within minutes everything is dark except
for a distant, eerie light that seems to be getting closer.
But wait, the reason the light is getting closer is, your
boat is being pulled into that light. In fact, you're
moving toward that light at a high rate of speed. A fog
begins to develop and a sensation that someone or something
is watching you begins to feed your fears. It's almost
as if something or someone is getting ready to exact some
sort of revenge for past transgressions you committed in
another place and time.
You can feel something getting very close to you, but you
can't force your body to turn and look. That light has a
grip on your boat, your eyes and maybe your soul. You
know its only a matter of time before you're consumed by
the light or whatever is following you, but for some
reason you also know that time as we know it, no longer
exists. You just entered the "twilight zone."
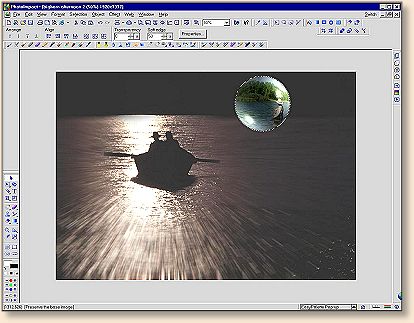
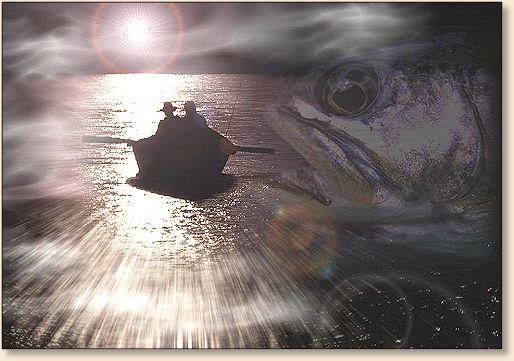
Let's put those words in a picture. We'll start with the
same silhouette and use the "zoom blur" feature to create
a feeling of motion.
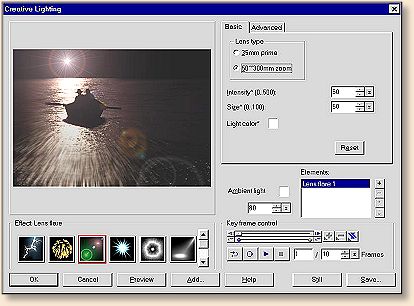
Then we'll use the "lens flare" feature in the "creative
lighting" effects gallery. I'll move it into position
over the light reflection so it looks like the source
of light that created the reflection.
Now, let's add a fish and size it so big that it looks
like it could eat the boat with one bite. We better
make it semi-transparent so it looks like a spirit or
ghost looking for revenge. (If you don't remember how
to add a picture or make it transparent, go back and
read this series again.)
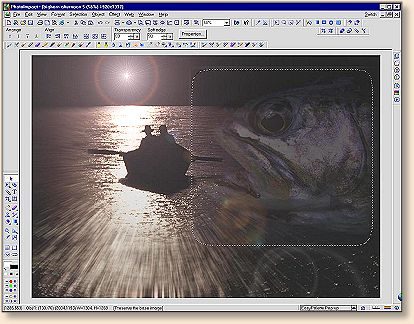
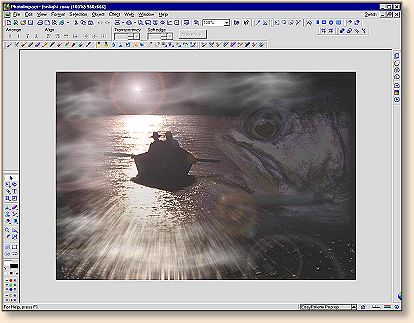
Before the next step, click on the main picture so the
fish isn't the active part of the picture.
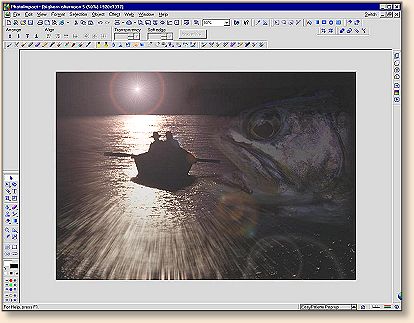
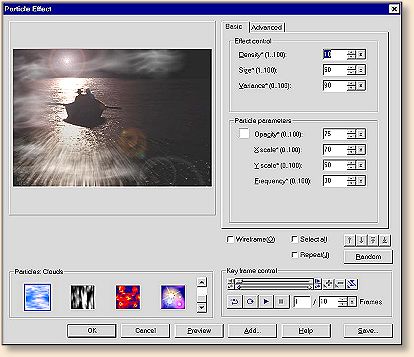
It just isn't scary enough without fog, so let's add some.
Using the particle effect pallet that held the bubble
effects, we click on the "clouds" effect and arrange
the clouds by clicking and dragging them into position
around the boat and where the fish is. Notice that the
fish doesn't appear in this view? The fish is an object
that is layered on top of the main picture, so it won't
appear unless we click on it to make it active, then
only the fish would appear. Anyway, add some clouds
in the right places to look like a fog.
If needed, you can still adjust the size and transparency
of the fish. Work on everything until you're happy with
the results.
When you're happy with your work, you can save it and
print it.
If you haven't started working on your contest entries yet,
you're running out of time. Please get them to me this week.
When Part 9 goes up, all the entries must be in to me so
I can look them over and select the best three entries.
See you next week.
~ AC
|