|
When it concerns flies and tying them, there
are few flies easier to tie than the San Juan
Worm. However, if you just need a few of these
and you need them fast, there is a workable
shortcut to an effective fly. I especially
like this pattern when I want to tie up a few
SJ worms in small sizes.
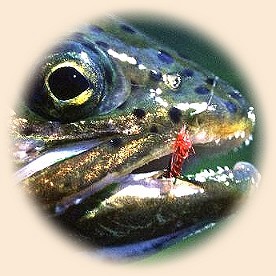
Contrary to popular opinion, the SJ worm does NOT
imitate a garden-variety worm. Instead, it is
supposed to represent an aquatic worm. For those
of you who have never observed an aquatic worm, I
encourage you to obtain a nymph net and do some
prospecting in a portion of a stream that has a
mixed sandy and muddy bottom. Odds are you'll find
a few of these small critters in your net if you do.
Some aquatic worms can grow to about the size of a
small garden worm.
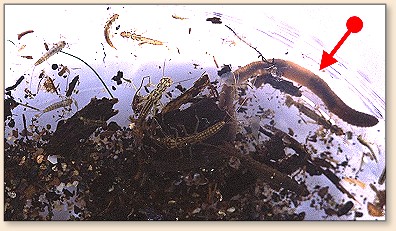
But most are small like the one pictured here that
is smaller than many scuds and sow bugs.
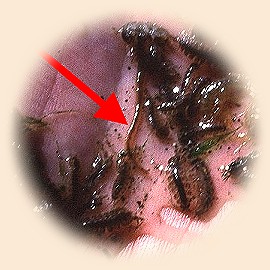
Like a garden worm, they have a pronounced band around
them near the fattest part of the worm. Sometimes that
band is rather thick, especially when they are in their
reproductive stages. Adding a rather large band to
your worm imitation can sometimes produce better
results than just an off-colored band. This pattern
produces an oversized band that I think sometimes
produces better results. It is also tied in small
sizes to imitate the most common sizes of aquatic
worms (small). Whether you prefer this tie or not,
you have to admit that it is very simple; maybe too
simple.
Too Simple Blood Worm:
List of materials:
- Hook: - Any standard nymph hook, even cheap
ones will do. I'm using a size 16 Mustad 3399A hook.
- Tail: - Same as body.
- Body: - Micro ultra chenille. I'm using
orange here, but shades of brown and red are also very
productive.
- Thread: - 6/0 Color isn't very important
because it will be buried under the body. I'm using
bright red.
- Cement: - None needed, but you can use
head cement if you want a more durable fly. Just apply
it directly to the band portion of the body.
Tying steps:
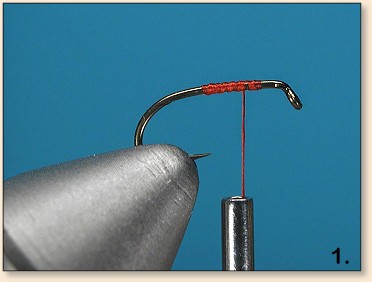
1. Start the thread.

2. Secure the micro ultra chenille to the hook.
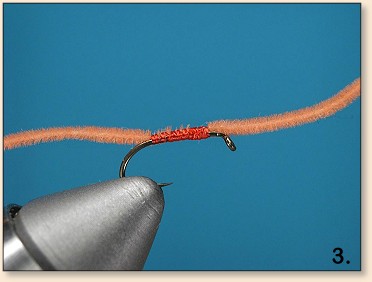
3. Tie off the thread and trim.
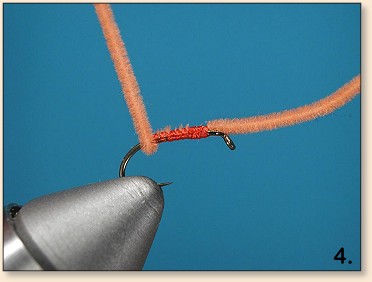
4. Make a half-wrap of ultra chenille.

5. Use a whip finisher to create the body by
whip knotting the ultra chenille. Use as little
tension as possible when you do this so it will be
easy to pull the ultra chenille body tight.
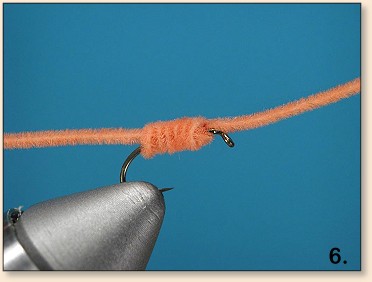
6. When you have completely covered your
thread base, remove the whip finisher and pull
the whip knot tight. For you guys who whip
finish by hand, this should be an easy task.
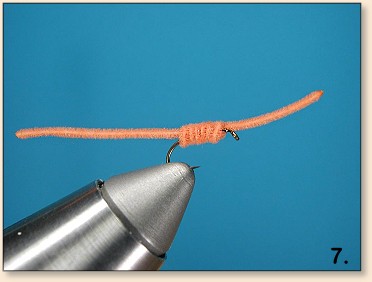
7. Use a lighter to melt the tips of the
ultra chenille by holding the flame close to
the tips. Your finished fly should look
something like this.
Too simple? Maybe you could use some more time
fishing and less time at the vise? This fly
can provide that extra time.
~ AC
|