|
Fishing trips offer special moments you often want
to capture on film. This is where you have a lot
of flexibility if you have some special memories
stored in digital format, and the digital imaging
software to make them come alive. In the next a
couple of weeks we'll be looking at ways to "capture
the moment" with special digital imaging techniques.
This is the time to learn and practice new ways to
transform a special moment into cherished memories
you can treasure for years to come.
The biggest problem I usually have when trying to find
ways to store and share those memories is deciding which
pictures I like the most. I often solve that problem by
combining portions of one or several pictures with one
special picture that captures the flavor of the day.
This week we'll take something from one picture and add
it to another picture to create a special memory that
tells a story. That story may be as simple as displaying
the fly that worked that day or the insect that was hatching,
and adding it to a picture of your fishing partner. Or,
you may want to show something completely different that
sets the mood of the day you want to remember. With the
right software and techniques, you're only limited by your
imagination and the pictures you have of that day.
Last week we spent most of our time with some techniques
involving the lasso tool. Let's start there and progress
a little further than we did last time.
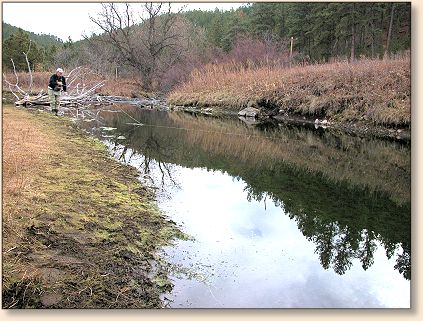
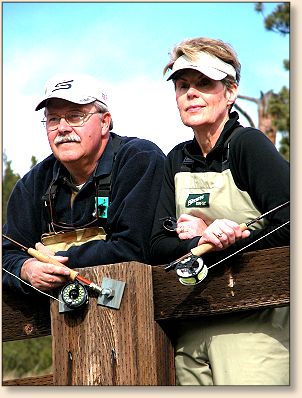
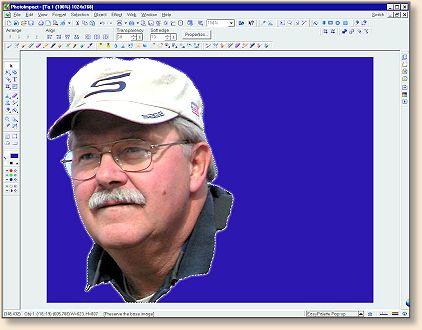
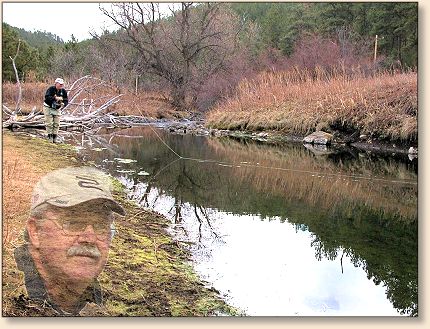
Here I have a photo of a friend and my Sage rep., Tom Anderson.
The first thing I want to do is crop out some of the
unnecessary parts of the picture to concentrate on the
better parts I want you to see.
Using a perspective crop tool, I select the portion of
the picture I want to keep and crop the rest.
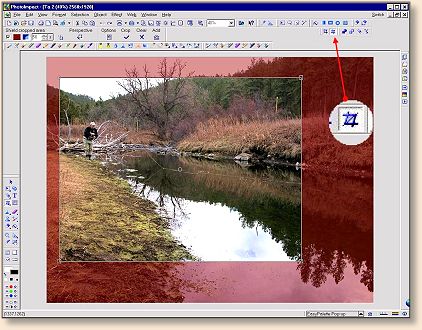
Now I have the image I want to keep.
Here is a picture of Tom and his wife looking at the
water from a bridge. It's a nice picture, but I want
to extract just the face of Tom to add to the other
picture.
I can do that with the lasso tool. Since
I've already shown you how that tool works, I'll just
say I captured Tom's face with the lasso tool and pasted
onto a blank blue page for later use.
Next, I copy the active image of Tom's face and paste
it onto the first picture.
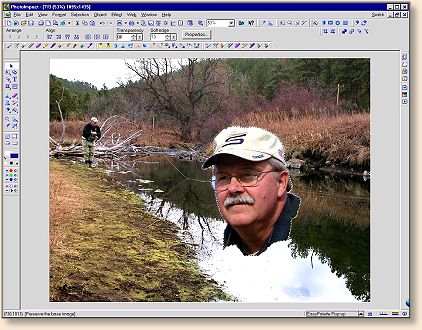
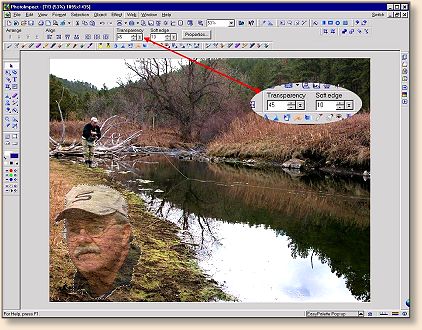
Then I move it to where I want it, size it to fit,
make it transparent and soften the edges so it blends
into the first picture well.
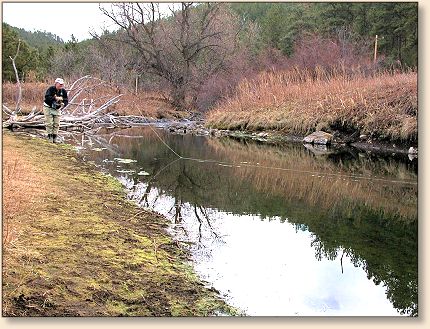
Here is the finished image.
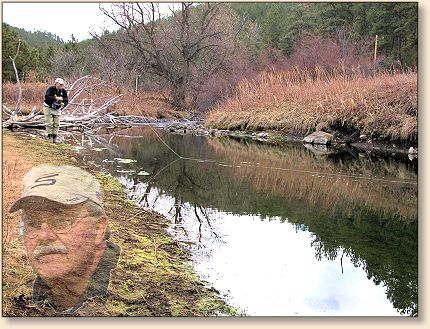
If I want to, or if it looks better, I can flip the
face horizontally.
Anytime I work on a project like this, I save the
final image in the format that is native to the
program I'm working with. For instance, in ULead
Photo Impact, the native format is UFO. So, instead
of (Tom Anderson.JPG) it would be (Tom Anderson.UFO).
By saving the image that way, I can come back to it
later and use each object I have inserted into the
picture, and change the picture at will without having
to do all that work again.
Maybe I want to use the picture of Tom's face in another
photo. All I have to do is open this picture in the UFO
file format, click on the image of Tom's face to make it
active, copy it, and insert it into the other picture.
Then I can manipulate it in that picture at will without
altering it in the original picture. Not all programs
have file formats that save the image in its active form
for later manipulation. That is another reason I chose
Photo Impact over the other programs I removed from my
computer.
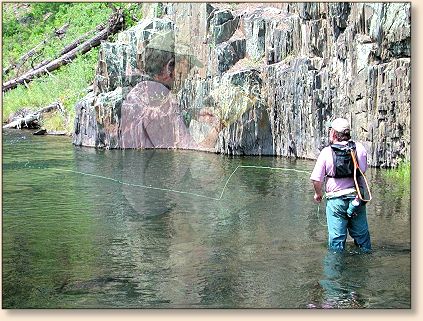
Let's try to create another memory. Here I have a picture
of Paul Dieter that I took on a trip we shared last summer.
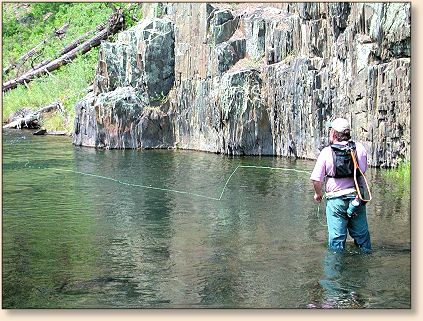
And here I have a picture of Paul looking at all
the flies he has in that beautiful custom fly box
he made.
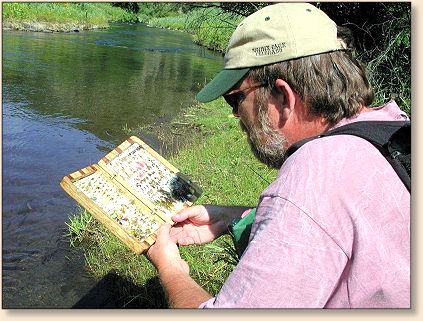
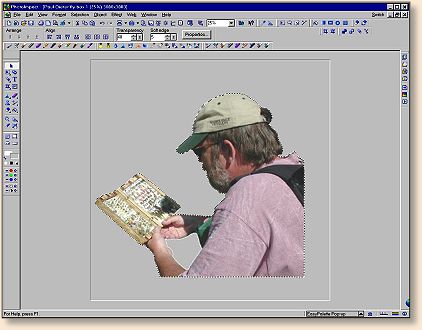
The first thing I do is use the lasso tool to capture
Paul looking at his fly box. Then I paste in onto a
gray page, lasso the area between his arms and make
it gray. Merge the gray area between the arms with
the image of Paul, and save the results as a new file.
Next, I copy the image of Paul, paste it into the
other picture of Paul in the stream, and resize it
to the size I want.
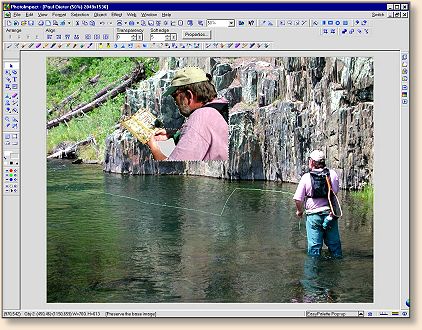
Then I flip it horizontally, move it into position
near the water line, and make it semi-transparent.
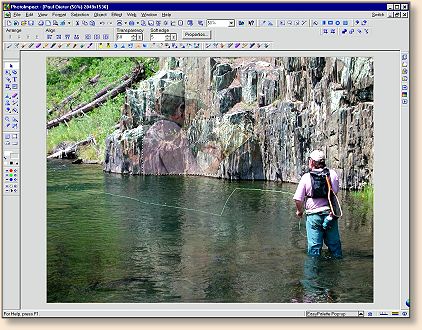
Now, I need a reflection of Paul looking into his fly
box. So, I copy the active image of Paul on the rock
wall, flip it vertically, move it into position below
the other image of him on the wall, and make it more
transparent so it will look like a reflection.
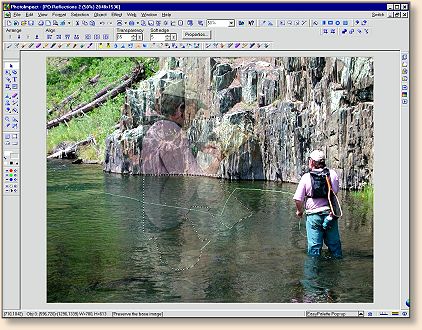
This is the final image I will save and print.
When I'm satisfied with the image I've created, I
save it as a UFO file, a TIFF file, and a JPEG file.
If the digital imaging software you're using has a
native file format, save your photos in the native
format and either a TIFF or JPEG file format or both.
The reason I save the image as a TIFF file is so I
won't lose any of the clarity and characteristics
of the image. The reason I save the image as a JPEG
is so that I can share it with you and others. That's
the reason I'm doing this series in the first place.
We'll dig even deeper into this stuff next time. It's
getting more complex as we move along, but with practice
and some experimentation, you can handle it. Work on
it this week and we'll try something new next week.
~ AC
|