|
A while back I did a series of articles on close-up
photography. That inspired a couple of people to buy
new digital cameras. In fact, my e-mail was fairly active
with questions about cameras and features. Then, people
started asking questions about how to manipulate their
images and get the most out of their photography. In
other words, one thing led to another, and that other
is a new series on digital imaging.
I don't claim to be a great expert on digital imaging, but
I do know enough about the subject to improve the looks of
most digital images fresh from a camera or scanner. I also
know a few tricks that can make your web site, family photos
or public presentations look better. It's all in the way
you handle that image after you save it on your hard drive
as a digital file. To do that, you need a few tools.
Let's look at those tools first.
First, you need a computer. Since you all seem to have
one of those at your disposal (it takes one of those to
read this), I'll specify a little more. You need a computer
with a good monitor to view your pictures. You need enough
random access memory (RAM) to handle those digital files
without locking up your computer (the more the better,
but at least 128 to 256 meg). You need a hard drive big
enough to store all those pictures (at least 20 gig is a
starting point). Finally, your computer needs to be fast
enough to handle the image; at least the Pentium two class,
but faster is better.
Next you could use (but don't absolutely need) a few other
things. A color printer that does a good job printing photos
would be nice. A CD burner to store and share those pictures
would be a nice touch too. Also nice is a camera or scanner
that will produce images big enough to print well. So many
cheap cameras and scanners produce images too small to print
well, so shop wisely for cameras and scanners that will at
least produce a 1024 X 768 pixel or bigger image (2048 X 1536
is much better).
The next thing you must have is some sort of imaging
software. The software that comes bundled with your
scanner or digital camera is usually good enough to
handle basic imaging tasks, and it is often faster
and less complicated than other programs, but it
usually lacks the better tools that allow you the
freedom to really work that picture over. As this
series progresses, we'll look at several brands of
software, and the reasons I like them more than, or
don't like them as much as other types of software
for certain uses.
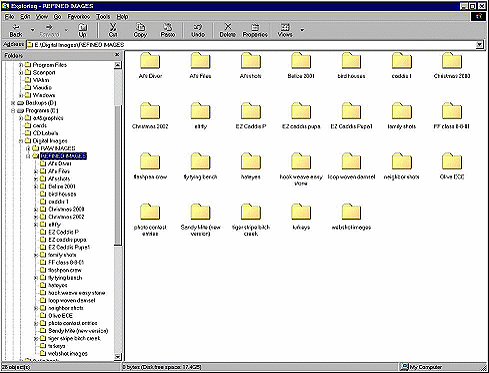
One thing you should remember is that you never want
to destroy the original image you are working on. For
each set of images, I have a folder called "Raw Images"
where I store the original images in folders that I can
identify for later use. As I work on each image, it
is stored in a different folder that is stored in a
larger folder called "Refined Images." That way I can
keep the original image as it was to begin with, and I
can keep the "refined" image in another location where
it can be easily retrieved. If anything goes wrong with
the image I'm working on, I still have the original image,
so I can start over.
I usually have several folders inside other folders so
I can keep things well organized. Think of it like an
electronic or digital file cabinet. I have a file cabinet
called "digital images" and another called "photo files"
and yet another called "magazine articles". In each
cabinet I have drawers with labels like "Raw Images"
and "Refined Images" on the drawers. Inside the drawers
I have hanging folders with labels like "Belize 2001" or
Al's Files."
I have other folders inside those hanging folders with
labels like "El Pescador" and "Robert's Grove."
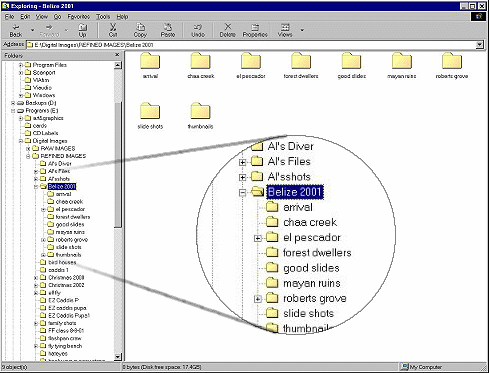
Eventually I get down to the image files I'm working with.
I do it all electronically, but that's the way I try to
keep everything organized so I can quickly and easily find
a specific picture among the thousands of pictures I have
stored on my hard drives.
Once I have my images stored in the right files, I need
to do a few things to them to make them look right.
Like it or not, photos direct from a scanner or digital
camera are almost never ready to use without some
manipulation. That manipulation is called "Digital
Imaging." First, I need to choose the program I want
to use to do that manipulation. If you only have one
program for digital imaging, your choice is fairly easy,
but I have several, and each has its strong and weak
points. We'll look at several programs in the next
few weeks, and observe how they work best.
This week I'll pick on the simplest program I have for
digital imaging. It came bundled with my flatbed scanner
and it's the program I use most often because it's small,
simple and fast. It doesn't do a lot of complex tasks,
but it does all the basis tasks with ease and it does
them fast. That program is from U-Lead and is called
"iPhoto Plus" (version 4). The program that came with
your digital camera or scanner will probably do the same
things, and it is likely much faster to use than the
complex programs that cost hundreds of dollars more.
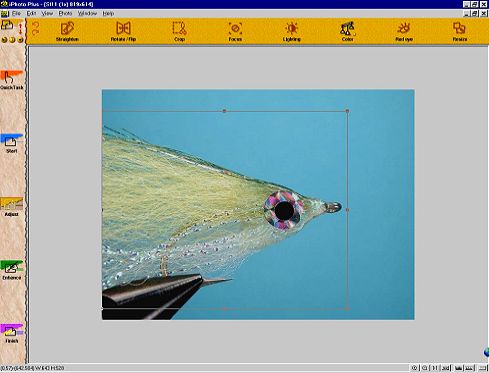
The first thing I usually do to a picture is crop it to
only show what I want to show. That is done with a crop tool.
I simply outline the part I want to save and crop the rest out
of the picture.
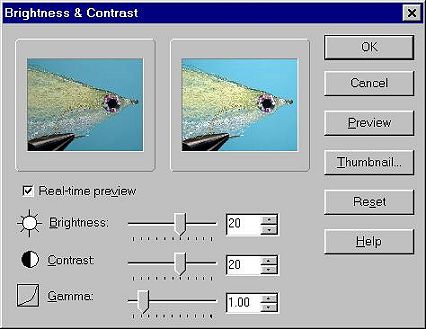
Next, I adjust the brightness and contrast to produce a
picture that's pleasant to look at. In some cases I may
need to darken the picture a little, in others I might
need to lighten it some. Increasing the contrast makes
dark colors darker and bright colors brighter. Work a
few notches at a time and use the preview feature to look
at the results until you get it just the way you want it
to look.
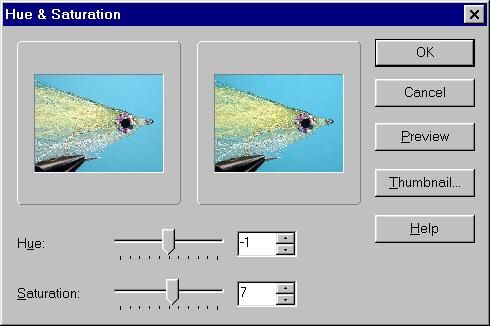
The next thing I do is adjust the saturation and hue until
the image on the screen has the same vivid colors and hue
as the subject I took the picture of. This is the tool
you can use to compensate for slight (very slight) changes
in hue due to artificial lighting. With practice and a
little work, you can adjust the image to look very close
to the original item, and save your work for later use.
I might also adjust the focus a little if it needs to be
adjusted.
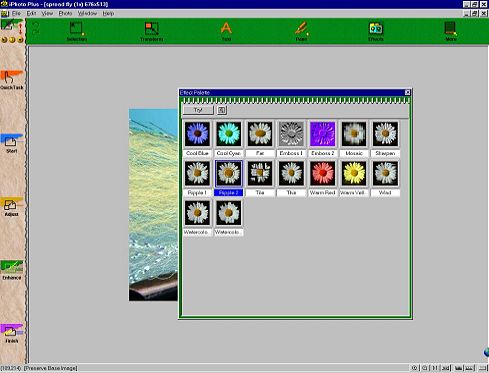
Depending on the software you use, you'll probably have
a few other features like color pallets, erasers, clone
tools and text tools. The basic software that comes with
your camera or scanner won't usually have a lot of complex
tools. However, it will almost always have enough tools
to make that picture you just scanned or captured on your
digital camera look a lot better than it did before you
adjusted the image.
The last thing I want to show you this week is a couple
of before and after pictures I captured off a web site
owned by one of our readers. With his permission I'll
show you how big an impact minor adjustments to brightness,
contrast, saturation and focus can have on a photo. All
those adjustments are considered basic tools that are found
in virtually every digital imaging software package you can
buy. Those tools will also be available in the software
that came with your camera or scanner.
The photos on the left are the way they looked before I
adjusted a few basic elements. The photos on the right
show the same picture after some basic adjustments of
brightness, contrast, saturation and focus.
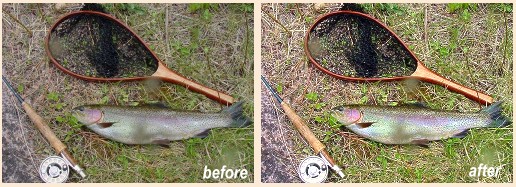

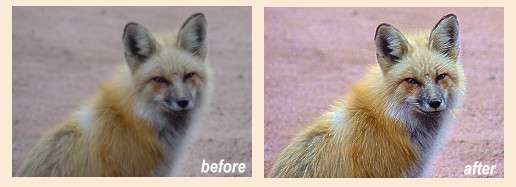
Can you see the difference? This week we're looking at basic software
and basic tools. We'll dig a little deeper into this subject
next week.
~ AC
|