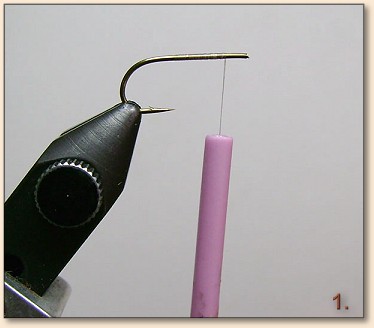
1. Select the desired size dry fly hook, cover it
with 17/0 thread and trim the eye.
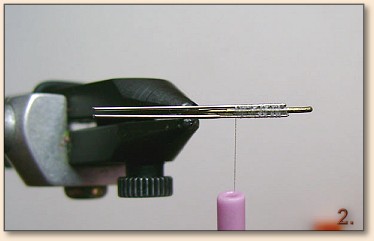
2. Cut two pieces of stainless steel wire, the size
of the abdomen plus the thorax, and attach them on
the sides leaving enough room for the head.

3. Turn hook in the vise and cover neatly all the wire,
making sure the wire pieces are exactly side by side so
it won't deform the final shape of the body.
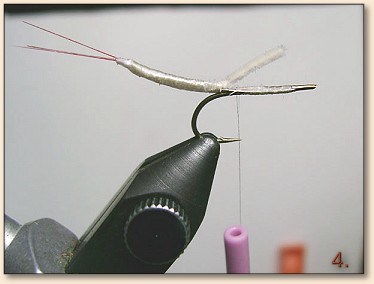
4. Now tie in the 3 tails, two to the sides and one on
top of the wire, and then start building up the under
body using micro chenille, make sure not to use too much
or your fly will look fat and also burn the point of the
chenille pieces to get a tapered finish.

5. Now print a 1:1 scale image of a mayfly, so you can
compare your underbody's shape and get the right proportions.
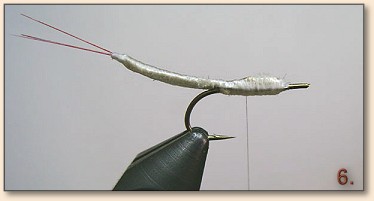
6. Turn the hook again on the vise and continue to build
the thorax area underbody with chenille, once you are done,
cover completely with thread leaving no bumps because this
will be visible on the finished fly, once you are satisfied
with the look, apply a light coat of varnish or CA glue.
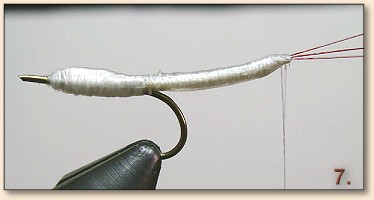
7. Turn the hook once more and do the same thread covering
and then apply varnish or CA glue.
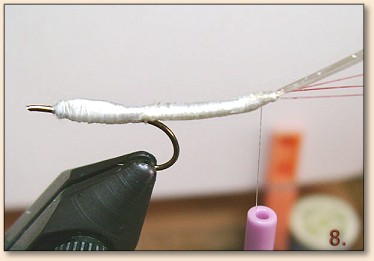
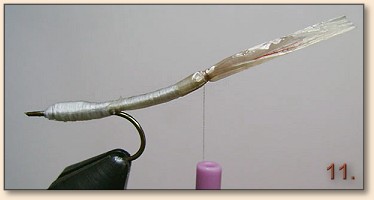
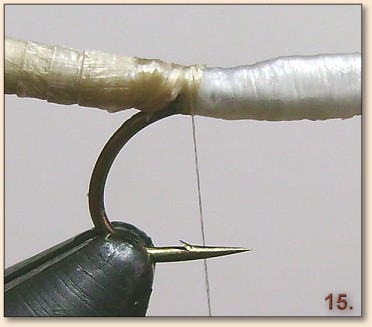
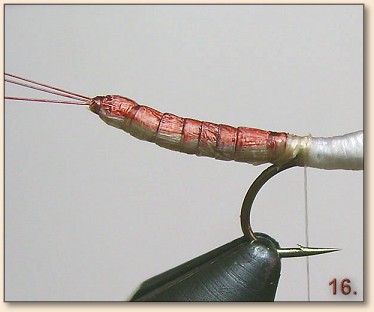
8. Cut a 2x10 mm raffia strip and tie it down where the
tails begin, use as few turns as you can to attach materials.
9. Wrap the point of the abdomen with this raffia strip
to create the first segment of the abdomen, and color it
using alcohol based (permanent) markers.
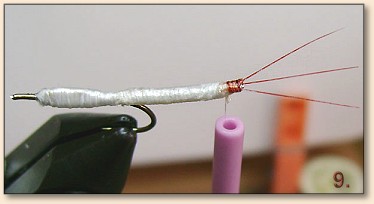
10. Now you have to cut a 15x8 mm raffia strip, this
will be the second abdominal segment.
11. Tie the raffia around the underbody, making sure
it covers all of it using as few wraps as you can.
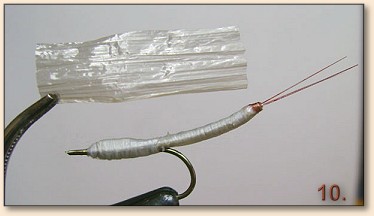
12. Moisten the raffia, pull it as if it was a glove
over the underbody and tie it down at the approximate
length here the next segment will begin, again use few
thread wraps.
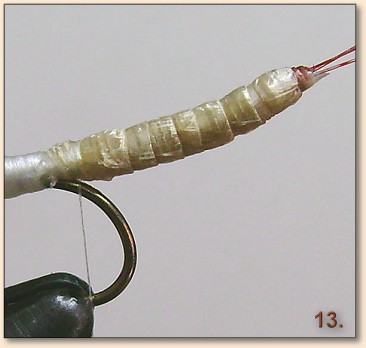
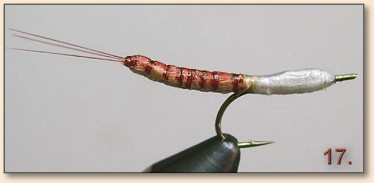
13. Continue building all of the abdominal segments
using this method.

14. Cut another 2x10mm raffia strip and tie it down
where the abdominal segments finish.
15. Moisten the raffia and wrap it covering all
thread and making a smooth connection with the thorax area.
16. Color the abdomen with the alcohol based markers.
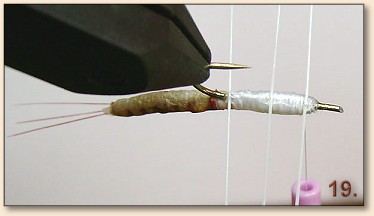
17. Coat the entire fly with varnish or CA glue and let it dry.

18. While you wait for the fly to dry, you can
start coloring and trimming the wings.
19. Once the fly is dry, tie in the legs, trying to
place them according to your 1:1 drawing, remember to
use few thread turns.

20. Now cut and tie a 4x10mm and a 2x15mm raffia strips
and wrap the 2mm strip covering the space between the rear
and middle legs.
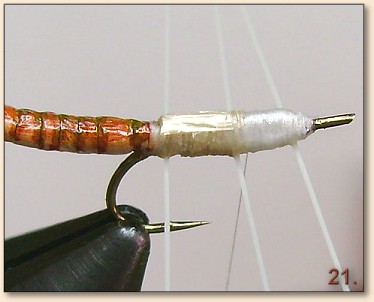
21. Fold the 4mm strip to cover the top of your fly,
and tie it down where the middle legs start.
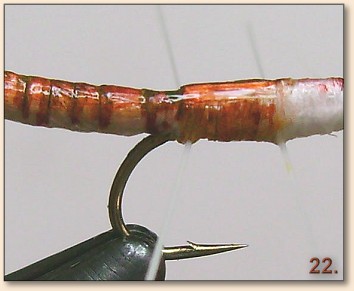
22. Now color this section using markers and coat it with varnish.
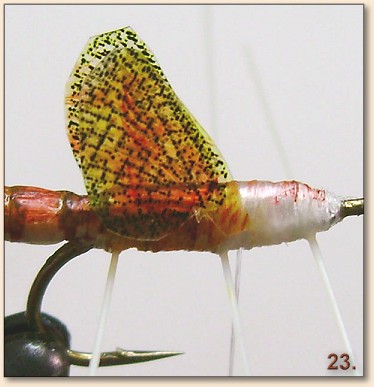
23. Now tie the first set of wings taking care to place
them according to your drawing.
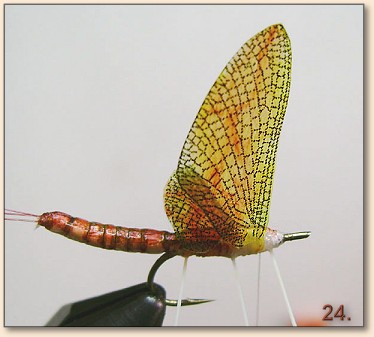
24. Cut a 2x10mm raffia strip and tie it where the first
set of wings was tied, and after moistening it wrap to
cover the tie in point of your wings and advance it to
the mid point between the middle and front legs and there
you tie your second set of wings.
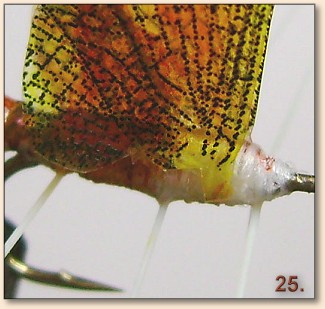
25. Using another 2mm raffia strip cover the tying point
of the second wings and also wrap it around the legs.
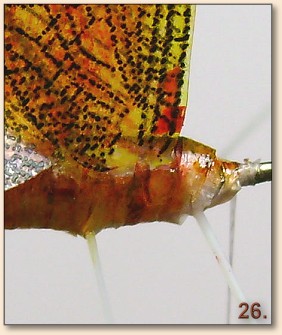
26. Color this section and varnish it.
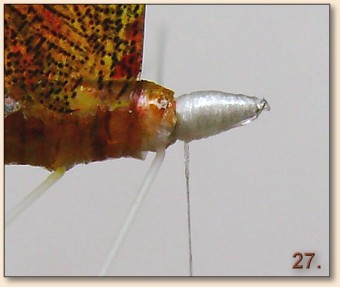
27. Now using the same method used to form the underbody,
build the head, remembering to burn the tips of the chenille,
cover it perfectly with thread and varnish it.
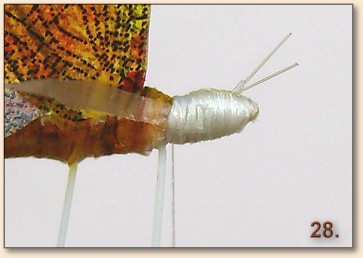
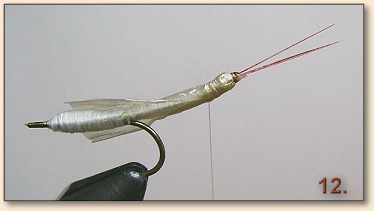
28. Tie the antenna making sure they are placed symmetrically,
when you are satisfied with the location use a drop of CA
glue on stem so they won't move, and then tie another 2x15
mm raffia strip.
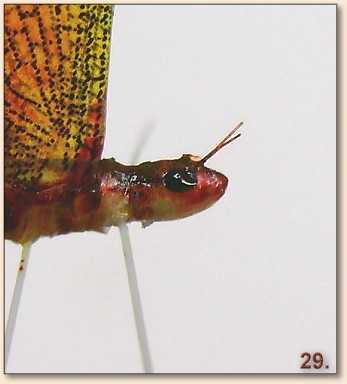
29. Cover the head completely with the raffia strip, color
it, varnish it and when completely dry apply two drops of 5
minute epoxy tinted black and let it dry, when completely dry,
varnish it again.
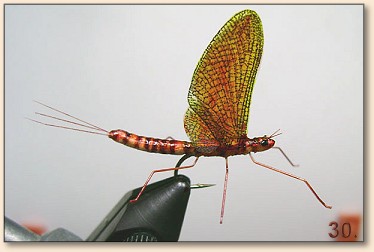
30. Bend the legs accordingly to your drawing, fix any
coloring details and viola it's done.
Hope you enjoy tying this fly. ~ Xavier Molina