
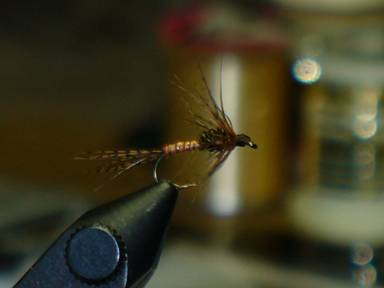
KB SOFT HACKLE
I developed these flies many years ago while working on a new emerger pattern. As a young man many years ago I was mainly a dry fly fisherman. There weren’t many books out at that time that dealt with fly fishing patterns. Most of them at that time were wet flies. Funny thing about these old classic pattern they all caught fish. This is what made me think about revisiting soft hackle flies. Now this fly isn’t my main go to fly every time I fly fish but it is one that will most likely give a try when the time is right. My best time to fish this fly is on the old standard wet fly swing when there is a hatch out. I will match the color and size of the fly to whatever species happen to be hatching at that time. I really like to use this fly when the wind blows and the water is choppy. You swing this fly past a trout and chances are you will hook up. Trout at that time are concentrated on emergers and that is exactly what this fly imitates.
I tie this fly up in many colors and sizes. Brown in a size 14 being the most common size I use. The olive in a size 18 is the second most common size, followed by every color that I can get in turkey biots. Now I also use this fly as the lead fly in a tandem nymph rig. You will be surprised how many fish will hit the lead fly and or the nymph. Many times I had double hook ups on both flies. Now that is a lot of fun.
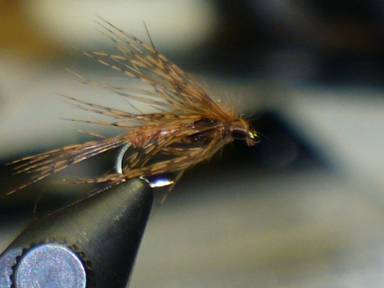
K B Brown
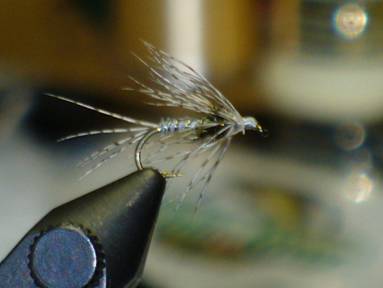
K B Grey
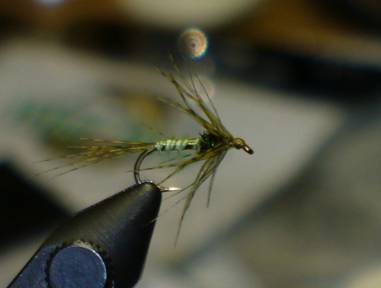
K B Olive

Materials:
- Hungarian Partridge die in Brown, Olive, Rust, Natural and Bleached
- Turkey Biots in every color
- Hook: Any size 14 or smaller wet fly hook
- Thread: Color to match the fly, normally size 6/0
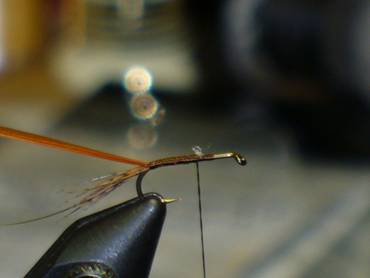
- Tail: 4 to 5 fibers from a partridge feather
- Body: Turkey Biot
- Ribbing: Fine wire in gold and silver
- Thorax: Peacock Herl in natural, and died
- Hackle: Partridge
Step 1:
Start by tying on your thread to the hook I generally start in the middle and work my way back to the bend. Next tie in your tail fibers followed by the wire and then the biot. You want to have the “U” shape of the biot facing you for that nice rib look.
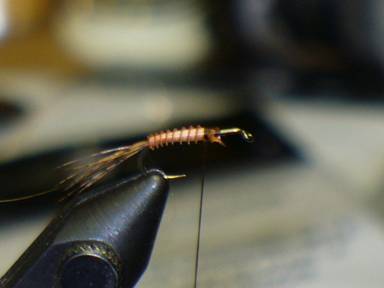
Step 2:
Wrap the biot up two thirds of the hook and tie it off.
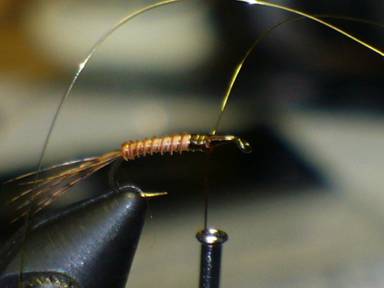
Step 3:
Wrap the wire between the ribs of the biot. This will help make the fly a little strong and hopefully last thru a few more fish.
Step 4: Tie in the peacock herl and wrap about 3 to 4 turns.
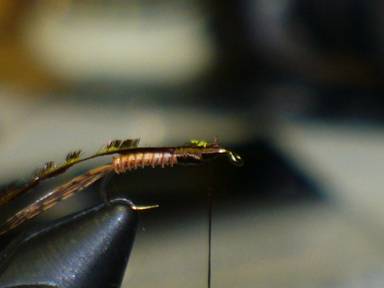
Step 5:
Tie the partridge by the tip and wrap two to turns max for the hackle. It helps to fold the hackle back towards the bard while wraping. This way the hackle will sway back while you wrap it. You could also wet the hackle to help keep it flowing back towards the bard while you tie it in.
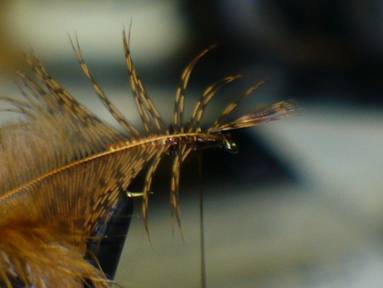
Step 6:
Finish off the fly with a nice whip finish and go fish!
For more great info, check out:
Beginning Fly Tying | Intermediate Fly Tying | Advanced Fly Tying.