This Pattern was featured in the summer 2004 Edition
of Southwest Fly Fishing Magazine. It includes
step-by-step tying instructions with full color photos
of each step.
*Just a note for those that tie this pattern without
the Lead Weight, the ADH material is non-porous and
after a few false casts are completed it will want to
float on top of the water. I have had fish strike at
the fly while it's floating on the surface and completely
miss getting hooked. John Rohmer says "He now ties all
his flies with the weight installed" unless he specifically
wants a streamer without weight.
Materials for the Shad Pattern, Diamond Hair Streamer:
Hook: Gamakatsu SC15 #1-2/0 (It Very Important
to use this specific hook when tying this pattern, it
is the right weight and has the required short shank
to avoid the material from wrapping around and fowling
the fly).
Thread: 6/0 Uni White.
Bottom: ADH Pearl/Green (ADH = Arizona Diamond Hair)
Top: Successive layers of ADH Silver Minnow, ADH
Light Silver, ADH Peacock.
Eyes: 3D Holographic Silver, Red or Yellow (#2 hook
use 2.5mm size eye, & #1/0 hook use a 3mm eye).
Weight: 15 wraps of lead (appropriate size for hook)
covered with Mylar.
Tying Instruction for the Shad Pattern, Diamond Hair Streamer:
This fly is tied with all materials tied in and
pointing towards the hook eye. After tying in all
the material, it is then pulled back over the hook
shank and super glued down.
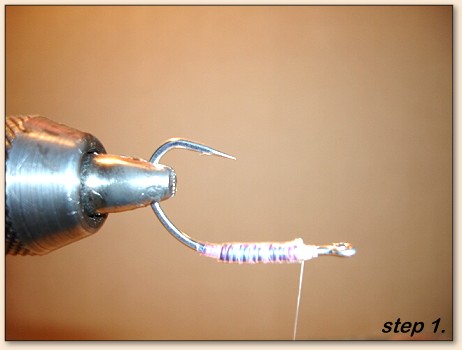
1.Install 15 wraps of lead (Lead Size: Appropriate for
hook size), cover lead wraps with Mylar. Attach thread
behind hook eye and turn hook upside down. Bring thread
back 1/4".
2.Separate a small pinch of ADH Pearl/Green. The material
will be tied down in the middle of the clump, then pulled
back over itself and tied down. At this point you need
to cut the material to a suitable length for the size
of hook you're using.

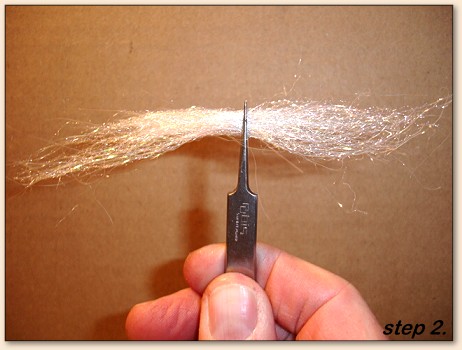
3.Pull the fibers between your thumb and first finger
to align them laying in the same direction. This is a
little unruly at first but becomes easier after some
ractice. Any stray fibers can be cut and put back in
the pile. Nothing is wasted.
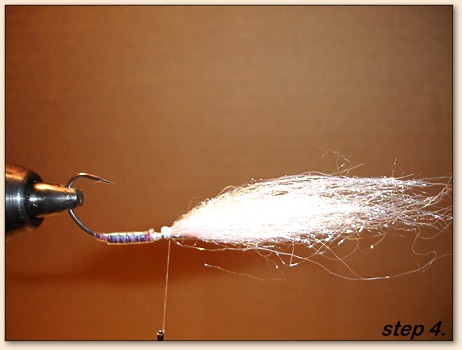
4.As I mentioned above, tie the material in the middle
up behind the eye of the hook. Fold the rearward facing
clump forward over itself and tie down so all the tips
are facing over the eye of the hook.
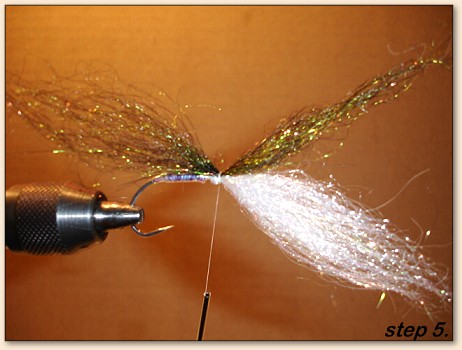
5.Turn hook over to do the top. Bring thread back a bit
and tie in a small clump of Peacock ADH in the middle
with the tips facing forward over the eye of the hook.
Fold it over itself and tie it down again.
6.Bring thread back and tie in a small clump ofĀLight.
Silver ADH. Fold material back over itself and tie
down again.
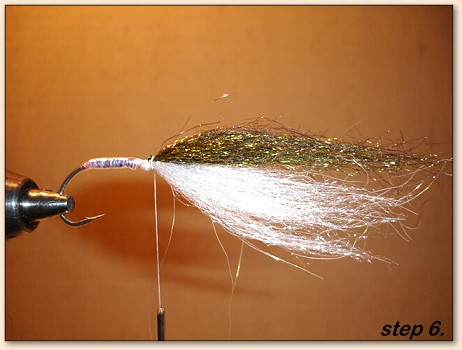
7.Bring thread back and tie in a slightly larger clump
of Silver Minnow ADH. Bring clump back over itself and
tie down again. Do not tie off. Just add a drop of
super glue and trim the thread.
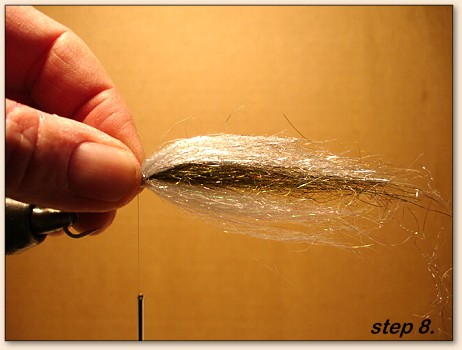
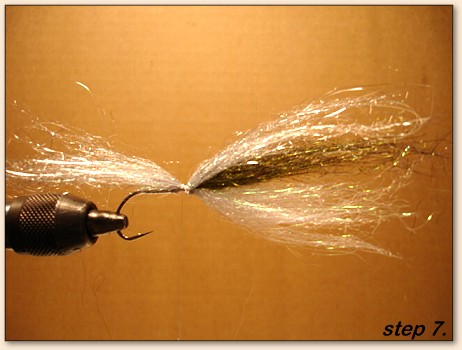
8.At this point all the materials are tied down with
the tips facing forward. There is one color below
and three colors above.
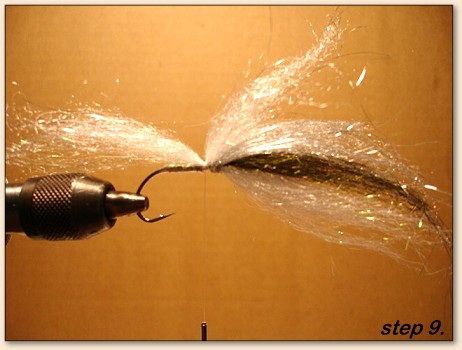
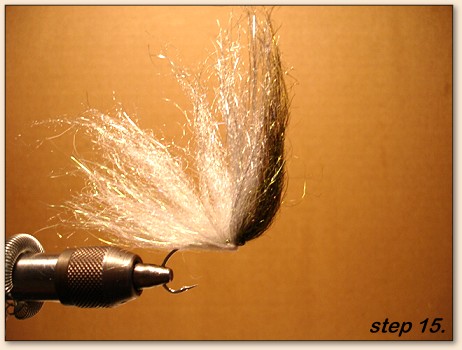
9.Pull the fibers back over the hook shank. It is
easy to separate the colors because the Peacock is
next to the Pearl/Green. Material is now pointing
in the proper direction to finish the fly.
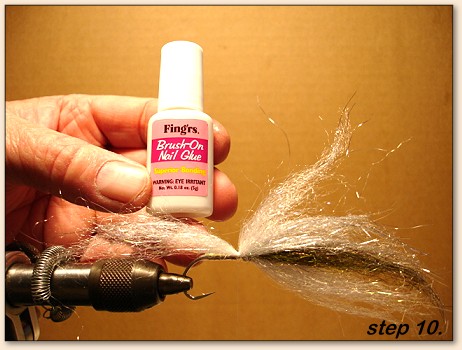
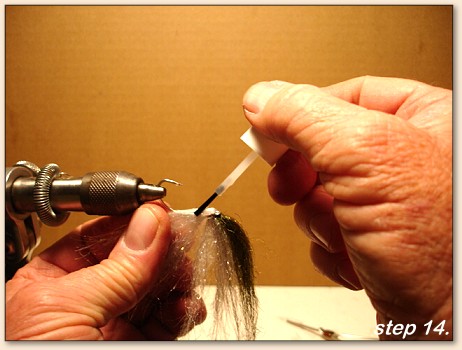
10.At this point adjust the fibers to the shape head
you desire and apply a thin coat of 5 second fingernail
glue with the brush applicator. I do the bottom first,
pulling the fibers back and then gluing it right to the
hook shank. This keeps the fiber below the fly from
fouling the hook when casting.
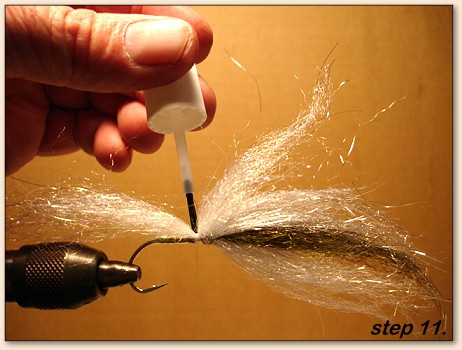
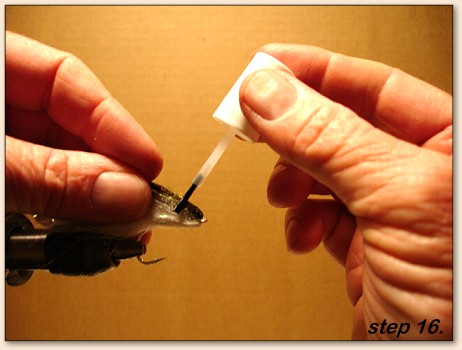
11.Turn the fly over and form the head shape you desire
and apply nail glue.
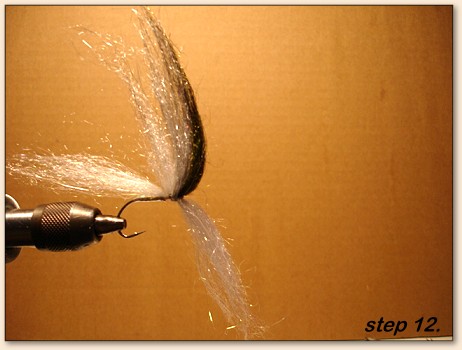
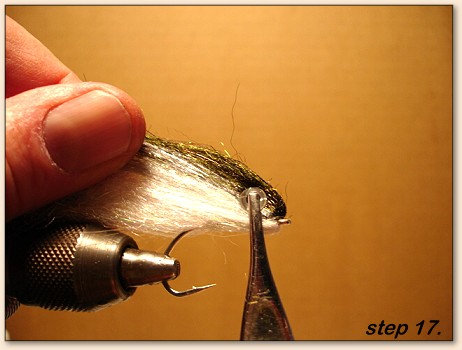
12.Attach 3D molded eyes to the side of the fly with
tweezers and re-coat with nail glue again.
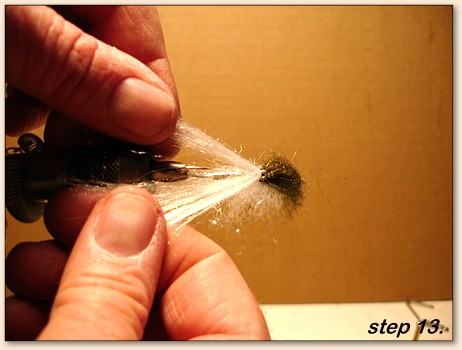
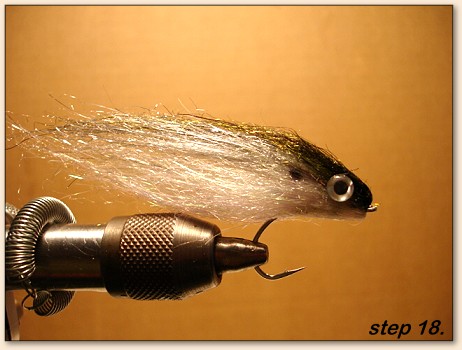
13.Apply a small Shoulder Spot (Black Dot) 1/2" behind
and slightly above center of the eye with a Permanent
Black Marker (Sharpie).
The following is a list of additional fly pattern
colors and the ADH material required to tie them.
ADH colors are listed from TOP to BOTTOM of the
fly...fly is tied with three colors on top and one below.
SILVER:
Silver eyes.
ADH Colors,
Peacock
Shad
Silver Minnow
Pearl/Green
GOLDEN:
Gold eyes. Use Gold Mylar to wrap the lead,
if weight is used.
ADH Colors,Gold eyes. Use Gold Mylar to
wrap the lead,
Olive/Tan
Tan
Golden Shiner
Pearl Gold
CHARTREUSE:
Yellow eyes.
ADH Colors,
Green Chartreuse
Green Chartreuse
Pearl Green
Pearl Gold
WHITE:
Silver eyes.
ADH Colors,
Silver Minnow
Starlight
Starlight
Pearl Green
SILVER HOLO:
Yellow eyes.
ADH Colors,
Gunmetal
Silver Holo
Light Silver Holo
Starlight
SARDINA:
Gold eyes.
ADH Colors,
Tan
Light Silver Holo
Silver Minnow
Starlight ~ akalooker

