+ Reply to Thread
Results 1 to 8 of 8

Thread: Redoing a rod

  1. #1
    Join Date
    Mar 2008
    Location
    Dublin, NH
    Posts
    1,049

    Default Redoing a rod

    Okay, now that I'm done to a crutch sometimes, I need/want to get going on my rod rebuild. Thanks to you folks, I soaked the butt end, in a baggie, in hot water and was able to get the reel seat off in good order. I did find that waiting about 10 minutes after soaking helped. A little, I say little, twisting helped also. So, now:
    A. To replace guides - single or double foot?

    B. Take off a guide and then replace, one at at time?

    C. Can I redo the rod blank? That is, change the color, spiff it up a bit?

    D. Tip top, leave it or try to remove it and out another on?

    Thanks all, I promise to post pictures as I go along.

    Mike

  2. #2
    Join Date
    Jan 2007
    Location
    Portage, PA
    Posts
    2,908

    Default

    Quote Originally Posted by melk View Post
    Okay, now that I'm done to a crutch sometimes, I need/want to get going on my rod rebuild. Thanks to you folks, I soaked the butt end, in a baggie, in hot water and was able to get the reel seat off in good order. I did find that waiting about 10 minutes after soaking helped. A little, I say little, twisting helped also. So, now:
    A. To replace guides - single or double foot?

    B. Take off a guide and then replace, one at at time?

    C. Can I redo the rod blank? That is, change the color, spiff it up a bit?

    D. Tip top, leave it or try to remove it and out another on?

    Thanks all, I promise to post pictures as I go along.

    Mike
    My preference is for double-foot guides, but it matters little, single or double.
    If I'm going to replace one guide I'd replace them all. You may as well do it all on the first go.
    I always use large loop tip top guides because I prefer them.
    As far as painting a rod, I've never done it, but there are guys who have and can advise you as to the process.

  3. #3
    Join Date
    Mar 2008
    Location
    Dublin, NH
    Posts
    1,049

    Default

    Thanks Lastchance. Yes, I'm going to replace all the guides. I wasn't clear, I'll do one at a time. Any thoughts on changing the tip top? Do I "boil" it like I did the reel seat?
    Thanks,
    Mike

  4. #4
    Join Date
    Nov 2008
    Location
    Southwest Florida
    Posts
    597

    Default

    You can use a heat gun or an open flame to remove a tip top.

    Also, you can measure where each guide is on the blank.

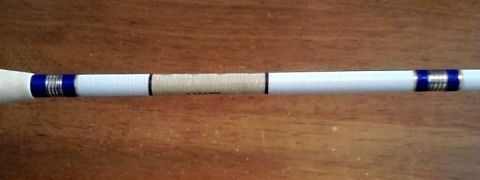
    I've used Krylon to "re-paint" a rod, but it was never intended to be fished... you can see the original finish of the rod before I cleaned it up.

  5. #5
    Join Date
    Sep 2006
    Location
    Borger, Texas
    Posts
    912

    Default

    Hi Mike,

    Use caution when heating the rod tip top to get the tip top off, as it can be overdone and injure the rod material, so go slow and be careful to use the minimum amount of heat.

    With regard to the guides, I would string up the rod now, as is, and put a bend in it by tying the line to something and pulling on it. You want to have the object you are pulling on setting on the ground, and hold the fly line with your rod hand at the location of the reel seat.

    You want to bend the rod a bit like you were trying to lift a small fish out of the water with the rod, while holding the rod with your rod hand at the grip and pinching the fly line to the grip with your rod hand. What you are looking for is to see if the curve of the rod and the track of the line match. If you have a place where the rod bends well away from the line you need to adjust the guides locations so that such does not happen.

    On the other hand, if you can get buy with less guides, and still have the curve of the rod and the track of the fly line track closely, then you need to use the new smaller number of guides for better casting performance.

    What I am trying to get at is that you need to check to see if the current guide location is pretty much optimal, or if you can do better.

    If you haven't already done so, be sure to look at the rod building section that Al Campbell wrote up here on FAOL. There are 12 parts that total to cover each step of building a rod. You can find it under the Rod Building section under the "Features" section of the main menu, so go to the "main menu", then "features", then "rod building", then "graphite rod building". It is good stuff.

    I have also found several videos on rod building on Youtube, some of them are excellent.

    Regards,

    Gandolf
    Last edited by Gandolf; 05-11-2013 at 02:40 PM.

  6. #6
    Join Date
    May 2013
    Location
    Murray County, GA
    Posts
    2

    Default

    Hi Mike,

    I havehad to refinish "glass" rods that took a beating from the surf or the rocks, and the results have been very very good. Start by removing all the guides, as you do, WRITE DOWN the exact location of each, starting from the tip. This works for any type of rod:
    1st from tip = 3 3/8
    2ond= XX
    3rd=YY
    and so on. You will have the exact placement memorialized. (that is if the rod is the way you liked it to begin with.) there are many resources for guide placement. Mud Hole and other rob building supply company websites have this information available )

    Moving on, the next thing- depending on the degree of damage- either LIGHTLY sand with fine grit "wet/dry" auto body sand paper. if there are no big chipped areas, or fill in the bad areas with a coat or two of grey primer paint. but just the area that needs it. the object is to smooth everything out so the chip wont show later. I use a auto body primer used for plastic/fiberglass bumpers. its not expensive and if done in a few lighter coats, can make the final outcome much nicer. Sand the entire blank, you are only trying to make the new paint a surface to stick to well, I try not to use garnet style paper of the "cheap stuff" - it tends to cut into the finish too much. after sanding first wipe the entire blank with a clean soft rag, then "wash" the blank with Denatured Alcohol. this will remove any oils from your hand and any dust left behind. DO THIS OUTSIDE AWAY FROM FLAMES AND SPARKS. allow the rod to dry over night.

    NEXT- (and this is a minor debatable step. so decide which way you want to go): either wrap the grips with plastic wrap and mask off with painter's "blue tape" OR use a 300 or finer sandpaper, gently rub the grips first until they look new again -works well for cork or EVA, then mask it off- some guys feel its better to paint before sanding to keep any boo boo off the grip- I don't want anything to possible get on that new finish, I clean everything first. either way, once the grips are cleaned go over them with some tack cloth.

    FINALLY- the new finish... I use Krylon's FUSION. it paints well, and used properly, covers wonderful and is very durable. I refinished a rod of mine, had set it on a rail of a chain link fence at a fishing area, it slid off, expecting the worse, I did not see anything other than a slight scratch.

    I do the first coat, very thin. you will get everything covered, so being careful to apply a thin coat is much more important than a few "light spots." after each coat, i "buff" lightly with 600 grit wet dry sandpaper. it will remove any spray "dots" and gives enough treatment for the next coat to adhere well. usually, 2 coats are enough. if its going to be used in tougher conditions- Like Jetty Jocking, mountain boulder area, I will do a 3rd coat. after the final coat, buff once more to smooth it out and finish with a coat of Krylon Clear Fusion for a nice gloss if you want a more subdued finish, I have found a "Satin" style. the key to success for me is TIME. Don't rush the painting. allow at least a full 24 hours ,48 if possible before each coat. after the clear coat, if used. I place the rod someplace where no one will disturb it and allow 2-3 days to cure and set. from there, You can wrap as usual.

    Hope this will help!

    Drew McCarsky
    Chatsworth, GA

  7. #7

    Default

    I have one of these to do and have ordered the Minima4 Guides to do it.

    Another paint that works well is Rustoleum plastic paint. I'll use either White or Claret Wine for this one.

    http://www.rustoleum.com/CBGProduct.asp?pid=118

    It may have already been mentioned but after painting hang it up too dry and cure for a week before wrapping the guide. Otherwise the paint may be still soft and the thread can penetrate the soft surface of the paint.

  8. #8
    Join Date
    Mar 2008
    Location
    Dublin, NH
    Posts
    1,049

    Default

    Thanks to all! I just got back from a soggy camping trip, thank heavens for the camper van, and am trying to catch up on emails. I'll be working on the rod soon! And I promise updates!
    Mike

+ Reply to Thread

Posting Permissions

  • You may not post new threads
  • You may not post replies
  • You may not post attachments
  • You may not edit your posts