+ Reply to Thread
Page 4 of 5 FirstFirst ... 2345 LastLast
Results 31 to 40 of 46

Thread: Switch Rod - Step by Step Build

  1. #31
    Join Date
    Dec 2004
    Location
    Mt Pleasant, MI USA
    Posts
    193

    Default

    Thanks Steve! I'm getting real anxious to get this baby out on the river!

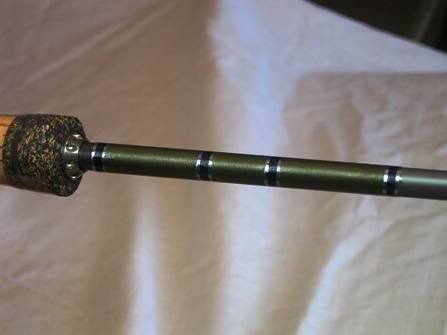
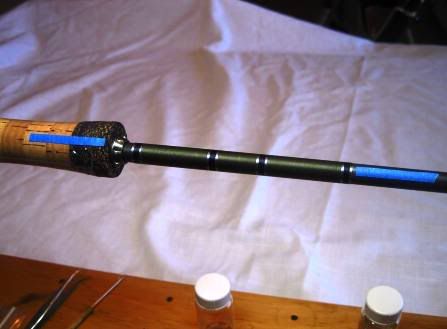
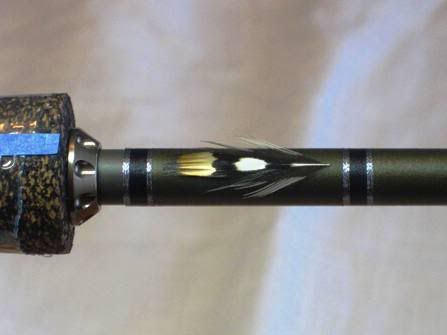
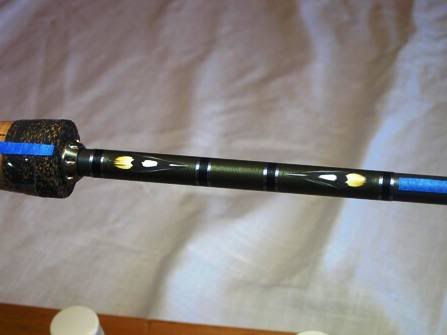
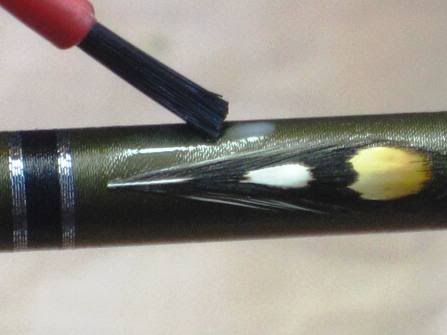
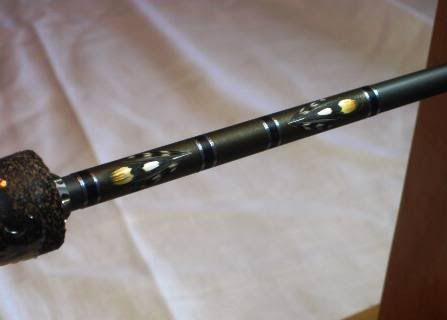
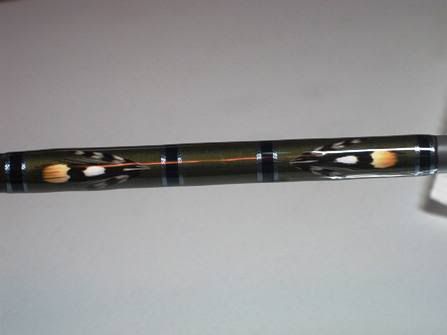
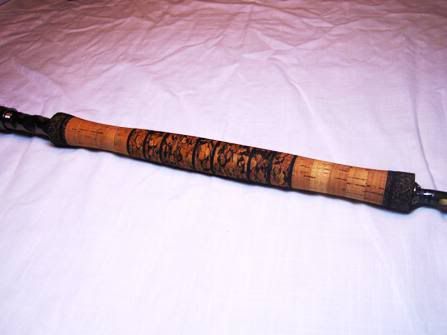
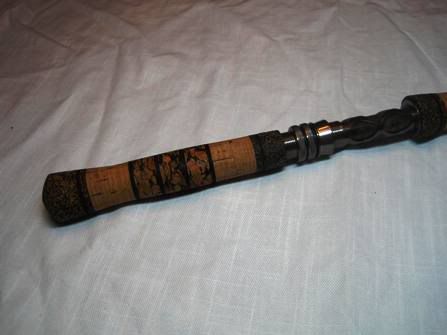
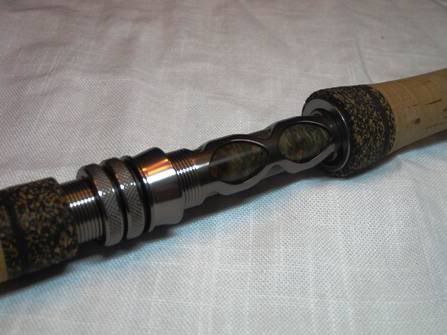
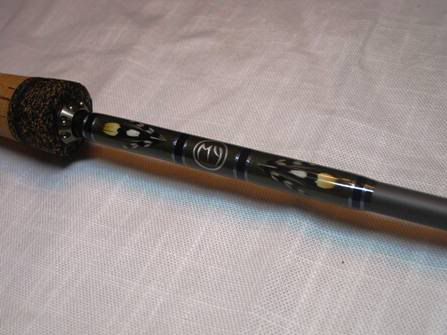
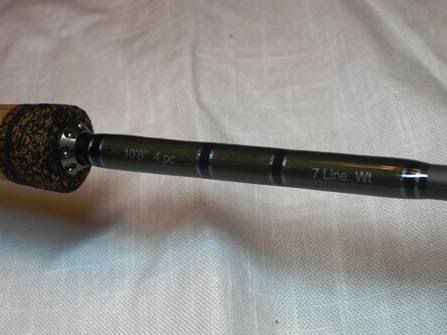
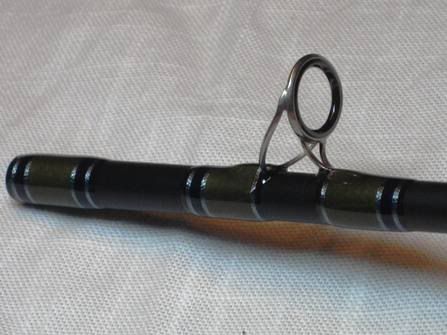
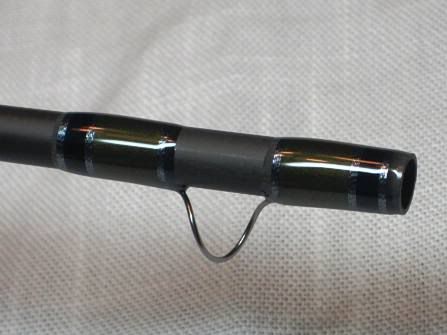
    Thread colors will be olive green, navy blue and Metallic Steel Blue (I think it looks more like a Titanium color if you use it in small trim bands). The reel seat has a bit of the olive/navy shade in it so I wanted to mimic that. There should be an example of the wrap on page one at the bottom, without finish though.

    Yonks

  2. #32
    Join Date
    Dec 2004
    Location
    Mt Pleasant, MI USA
    Posts
    193

    Default

    Ok. Back with another installment......

    I am a big fan of decorative wraps on my rods. Typically I do a Chevron wrap matching the color of my guide wraps. These wraps are typically fairly long and arent a problem when using a normal handle. Since this two handed handle system is so long the space between the front of the grip and the first ferrule and guide was shorter than would be typical. I thought a large chevron would be too much here and seem too crowded. I decided then that I would go with a feather in-lay. The following is the process I used for doing the inlay.

    I did a test inlay to practice the pattern with but I wont show you that here as it will ruin the suspense...

    First I layed down my background wrap. This layout may seem strange at first but I promise it will all come together in the end.


    Since this wrap will be centered on the top axis of the rod I layed out tape lines to help me make sure everything was in line while I was laying up the feathers.


    Heres the pile of components I used for the inlay. I noticed after this photo that I didnt have a bodkin and tweezers in the photo so just pretend those are there as well.


    First step was to make a diluted solution of the color preserver. I used equal parts of color preserver and distilled water. You want to make sure you use distilled water not "spring water" as those contain minerals. Diluting will give a longer working time as well as allowing you to see what you are doing easier because of the less opaque solution. Also make for less "sheen" as you apply multiple layers.


    The focus of the feather in-lay is typical.....jungle cock eyes. They just look so good. Here I selected a pair and cut to equal lengths.


    I dipped the brush in distilled water and then give it a good tap to help remove any air bubbles in the brush....I then placed a dab of the CP solution on the wrap in the selected location and set the jugle cock in with tweezers.


    I applied CP to the top of the feather to sink it down onto the wrap and then after lots of painstaking work aligning and manipulating each piece of the feathers to the exact placement I wanted I ended up with this....


    I let this dry for about 2 hours and then proceeded. Next step was to cut the grizzly hackle to length....


    Again placed a drop of CP in the correct location to help set the feathers in place....


    It was a royal pain in the rear making sure all the spacing and alignment for the grizzly hackle was in the correct place but below is the final result. I think it was well worth the trouble.....


    I then recoated the entire wrap with a non-diluted sample of CP to lock everything in place real good.

    You may be wondering why the gap in the middle. This is where I will place my logo after the first coat of epoxy goes on. Oh and by the way this was the last step before epoxy. All the other guides are wrapped and CP'd. I hope to be doing epoxy tomorrow night as long as something else doesnt pop up in the schedule. I hope to have a completed rod by the weekend.

    Thanks for looking.

    Yonks

  3. #33

    Default

    Excellent tutorial. Thanks for your time and effort.

    Dana

  4. #34
    Join Date
    Dec 2004
    Location
    Mt Pleasant, MI USA
    Posts
    193

    Default Epoxy Work

    Ok so I am back for more. Was able to completely finish the rod this weekend. This post will show the epoxy work and then I will post again quickly with the finished rod photos.

    For the epoxy on this rod I chose to use threadmaster lite. I typically use Flex-coat lite with great results, but figured I would try the threadmaster since lots of people seem to like it. One thing I noticed was that is was very easy to eliminate any bubbles with the threadmaster. I like the viscosity of the flex-coat better though. I would certainly use the threadmaster again, but I wouldnt say I found it to be much different than what I am used to.

    Ok so here is the rod all set up in the turner. You'll see that I have it taped down. This is because these things slighly vibrate as they run and since I run these overnight while I am sleeping I figure its best to tape them in place and not have to worry about any movement. Oh and also since this rod is so long, I did it in halfs. So since I use two coats of epoxy that equals 4 nights of epoxy work......glad to be done


    Next step is measuring the resin and hardener. I highly recommend using syringes for this. I use 3 mL of each component even for small work to ensure proper stoichiometry. Notice the air bubbles in the syringe. Its important to let these migrate to the top and then push them out.


    I mix my epoxy in 20mL glass vials with a stainless steel ball. Here is what the epoxy looks like all marbled up as you first begin to mix. I mix by just rolling the flask around and around. The steel ball will do the mixing.


    After a couple minutes of mixing the epoxy will have no marbeling and is ready to go. I scraped off the sides and mixed with a plastic rod to ensure everything was mixed well which resulted in the bubbles in this photo. Probably unnecessary but I wanted to be sure. The bubbles are no problem. They will go away soon.....


    I then pour the epoxy out onto an aluminum foil pan which spreads the epoxy thin and dissipates the bubbles.


    I didnt take any photos while epoxying because....well my hands were occupied. But you can imagine the process. I use a brush to apply my epoxy.

    Here is the butt wrap with a coat of epoxy on it.


    The butt wrap was then to receive decals so after 24 hours I applied these decals after trimming to size with a razor blade. You will be able to see the results in the next post....


    I then applied a second coat of epoxy in the same way as the first.

    Ok thats it for now. Next post has finished photos.......

    Yonks

  5. #35
    Join Date
    Dec 2004
    Location
    Mt Pleasant, MI USA
    Posts
    193

    Default Switch rod completed!!

    The switch rod is done! Finally! I cant wait to get this baby out and chase some steelhead with it. Turned out pretty well I think. I hope that this tuturiol was helpful and entertaining. It was a bit of work doing all the photos and write ups but I'm glad I did it. I hoped it proved useful to both beginners and experienced rod builders. Sometimes its just nice to see the way that others do things. I certainly know that there are probably better ways to do some of the things that I did in this build, but the methods worked for me and the final product looks pretty good. Sorry these photos arent the best quality. I hope to take some good "glamour" shots next to the river when I get out. Thanks for following along.

    Front Grip.....


    Rear Grip.....


    Reel Seat.....


    Butt Wrap/Inlay - Top......


    Butt Wrap - Bottom.......


    Stripping Guide......


    Snake Guide......


    Take care,
    Yonks

  6. #36

    Thumbs up

    Very nicely done, Yonks.

    Thanks.

    John
    The fish are always right.

  7. #37
    Join Date
    Nov 2005
    Location
    Liberty Lake, Washington
    Posts
    3,568

    Default

    yonks,
    I can't begin to match your craftsmanship but I'm getting ready to build my own switch rod. Same blank, only in the 5 weight. I hope it turns out at least half as nice as yours. Your work is an inspiration to me. Thanks.
    Where you go is less important than how you take the steps.
    Fish with a Friend,
    Lotech Joe


  8. #38
    Join Date
    Nov 2001
    Location
    Sandpoint,Idaho ,USA
    Posts
    154

    Default

    Yonks,
    Well done! I am not usually a big fan of feather inlays but yours is very nice. The entire rod came out beautiful! Thanks for the work it was fun to watch it progress.

  9. #39
    Join Date
    Sep 2006
    Location
    South Wales, UK
    Posts
    272

    Default

    Yonks,

    Beautiful rod! Many thanks for the very interesting an educational effort - your skill and artistry are an inspiration!

    Cliff

  10. #40

    Default

    Excellent job and tutorial. I especially liked your set-up for making the thin cork pieces that went into the handle and will try that on some future builds.

    I make some wood inserts like that by first cutting the wood to the thickness I want, then cutting with a hole saw.

    Dave

+ Reply to Thread

Similar Threads

  1. Pine Squirrel Cheater - Step by Step
    By JohnScott in forum Fly Tying
    Replies: 8
    Last Post: 04-13-2013, 01:50 PM
  2. Step by Step mayfly nymph pattern
    By fishtooth in forum Fly Tying
    Replies: 4
    Last Post: 01-20-2013, 07:44 PM
  3. Step by Step Prince Nymph
    By fishtooth in forum Fly Tying
    Replies: 13
    Last Post: 01-06-2013, 08:59 PM
  4. Step-by-Step of the usual
    By davidm in forum Fly Tying
    Replies: 1
    Last Post: 04-27-2008, 08:22 PM
  5. Wooly Bugger Step By Step
    By Flyguy5910 in forum Fly Tying
    Replies: 14
    Last Post: 09-17-2007, 12:05 PM

Posting Permissions

  • You may not post new threads
  • You may not post replies
  • You may not post attachments
  • You may not edit your posts