Originally Posted by
ausable_ny

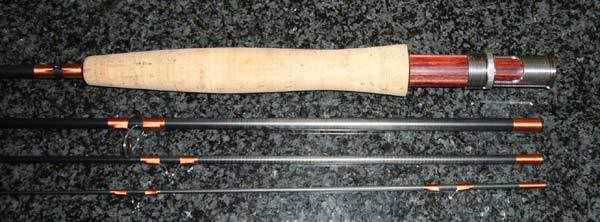
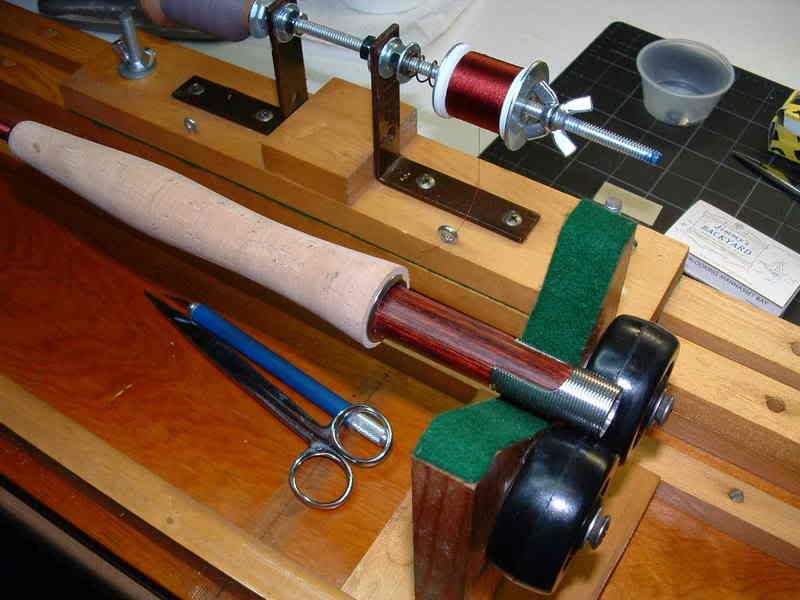
The first has to do with splining the sections. I know how to spline longer rods, but am having a hell of a time with these short sections. I highly doubt if splining the bottom two (heaviest) sections is even possible, given how firm they are. The other two sections are really giving me trouble. Is it even necessary to spline these sections?
I don't spline anymore. I don't think today's rods need it. Like Joe, I'd rather wrap along the curve of the rod (if there is one) so it doesn't look like your rod is bent.
Originally Posted by
ausable_ny
Second question has to do with thread size. Can I get away with using a 'C' size thread? The reason i ask is because I have a spool of 'C' thread that almost perfectly matches the gunmetal color of the Orvis Battenkill Disc I plan putting on this rod. The closest rod building retailer to me is approx 30 miles...I guess I'm just too lazy to make the drive

. I've always used Flex-Coat products, so that's not an issue.
I agree with Joe--I wouldn't because I think C is too big for the rod aethetically and will add extra bulk (and weight) on your wraps. If you are interested in metallic, look for Sulky metallic thread at any of your local fabric stores. I would be cautious of other brands/types, because some have silicone in them, and will give your finish quite a bit of problems.
Originally Posted by
ausable_ny
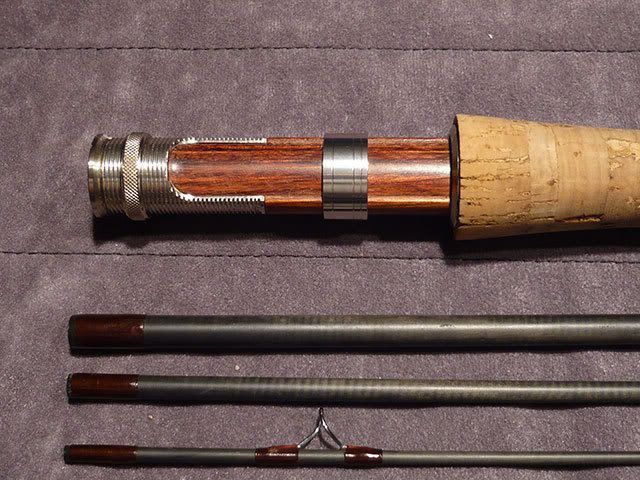
Would it be prudent to "knock-off" the sharp edge of the grip that is right above the reel seat. Seems like a few licks of sandpaper would alleviate a potential chipping problem.
It wouldn't hurt. I've used cork sealer from U40 lately, and it seems to help against chipping to some extent, too, as well as making the grip easier to clean.
Originally Posted by
ausable_ny
P.S. Where is a good source for a serrated winding check? I use Mudhole sometimes but was wondering if there is a place that caters to fly-rod builders?
Look at Schneiders Rod Shop. They are nice folks and have good pricing. I do a lot of business with them, and they carry most of the Batson line and have knurled checks by Batson and PacBay, and some smooth ones from Struble and Batson.
Last edited by ol' blue; 12-27-2007 at 08:18 PM.
Better to be an active environmentalist than and environmental activist.
FFMIRSWTNBOF (Full Fledged Member in Raunchy Standing-Within The NBOF)


). The first has to do with splining the sections. I know how to spline longer rods, but am having a hell of a time with these short sections. I highly doubt if splining the bottom two (heaviest) sections is even possible, given how firm they are. The other two sections are really giving me trouble. Is it even necessary to spline these sections? Second question has to do with thread size. Can I get away with using a 'C' size thread? The reason i ask is because I have a spool of 'C' thread that almost perfectly matches the gunmetal color of the Orvis Battenkill Disc I plan putting on this rod. The closest rod building retailer to me is approx 30 miles...I guess I'm just too lazy to make the drive
 Reply With Quote