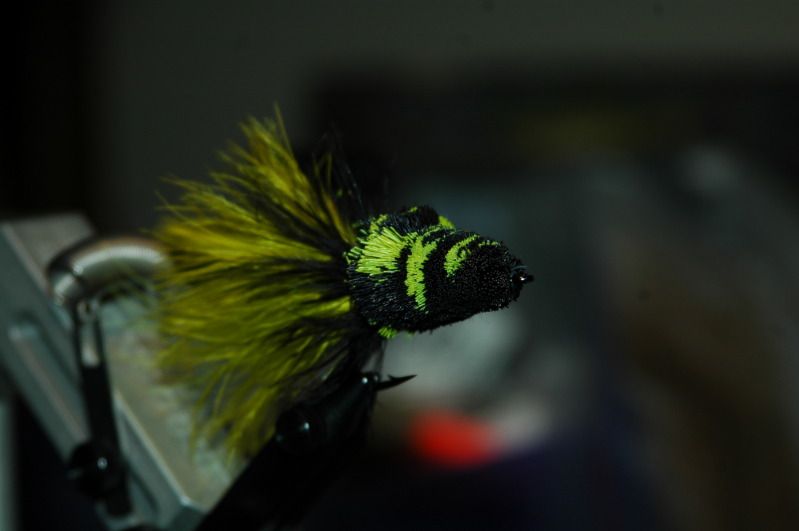
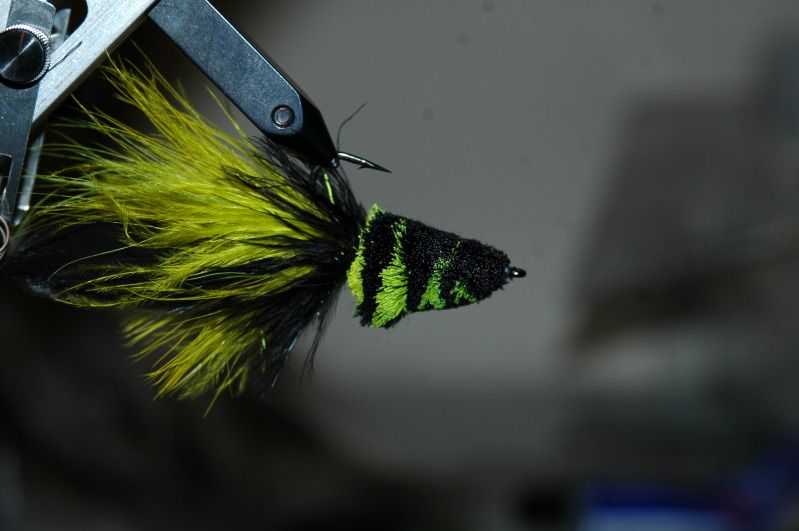
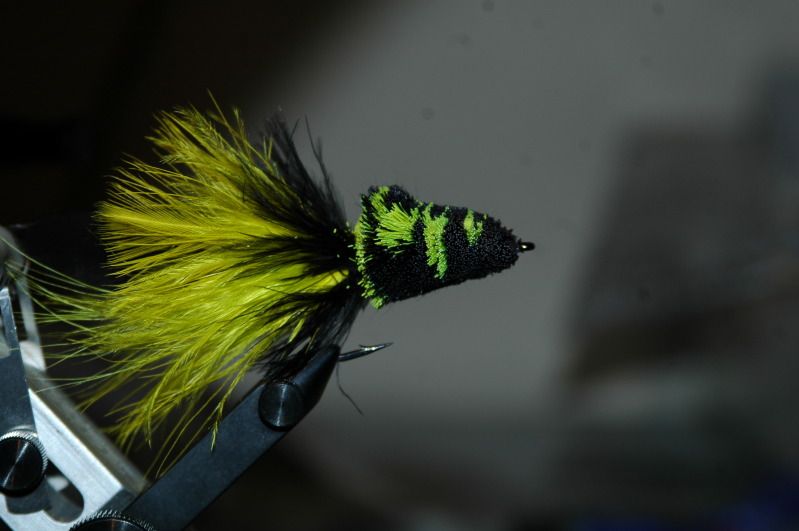
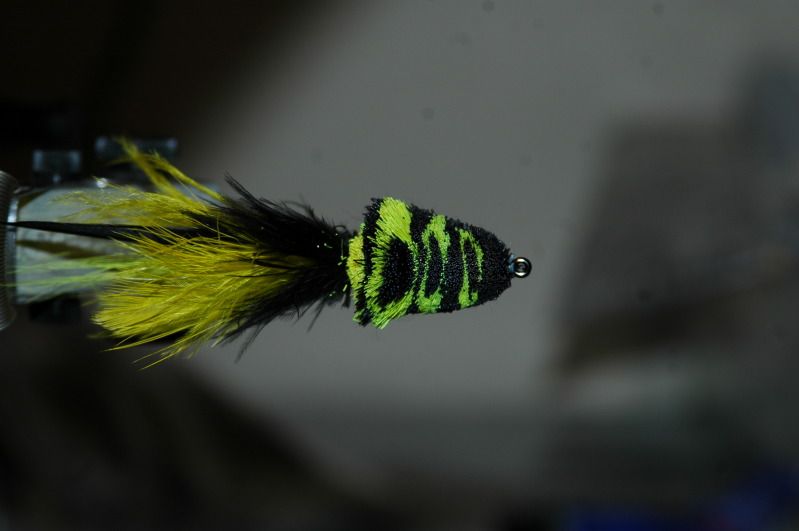
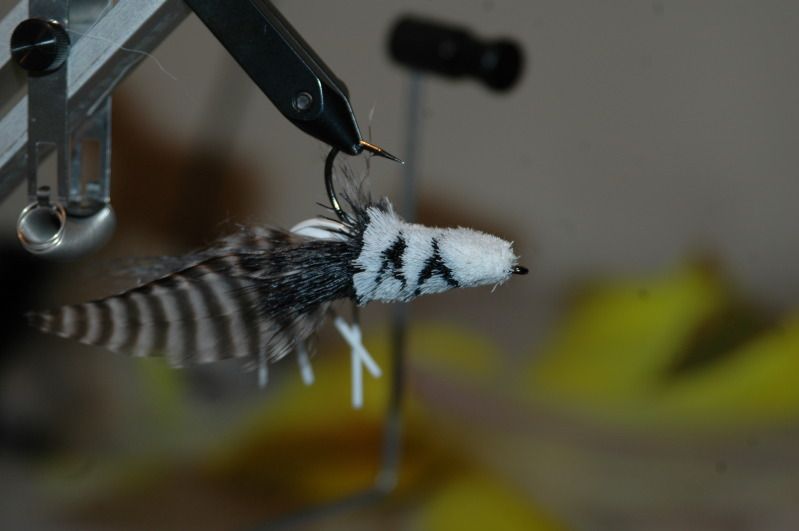
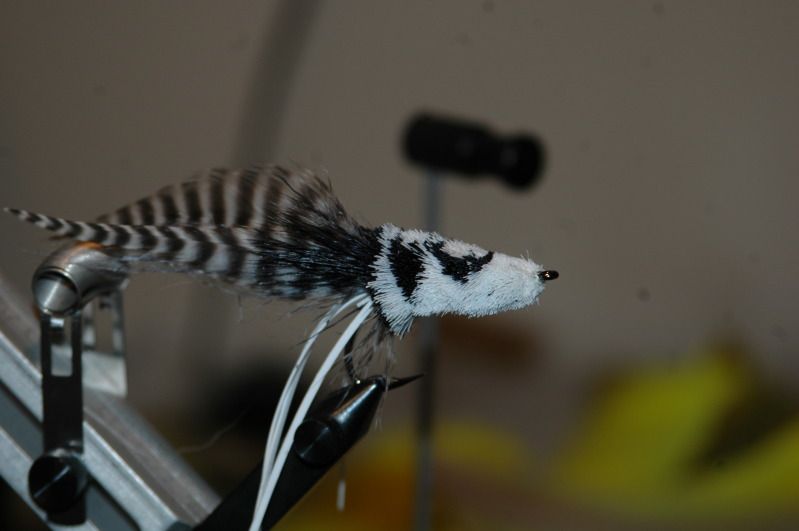
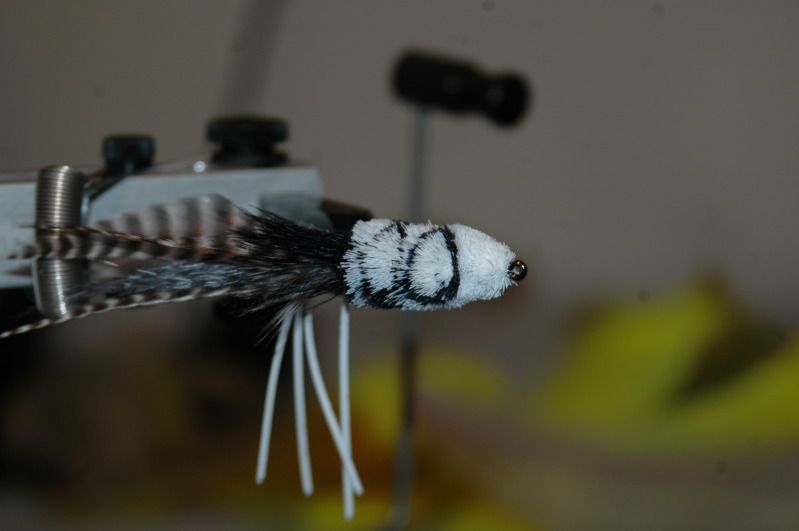
+ Reply to Thread
Page 1 of 2 12 LastLast
Results 1 to 10 of 11

Thread: First try at stacked deer hair

  1. #1
    Join Date
    Sep 2006
    Location
    Lincolnton, NC
    Posts
    189

    Default First try at stacked deer hair

    Lessons learned:

    1. Don't pull so hard that you break the Kevlar thread(it makes a mess of things).
    2. Don't pull so hard that you cut the stacked hair for a color spot (it makes a mess of things also).
    3. The second spot doesn't need as much hair.
    4. You can gain a lot of hook space when you pack the hair hard.

    All in all not bad for my first one. Will still fish it and probably catch fish on it. Couple more to try later this week. Will try and post pictures.

    What do you think?


  2. #2

    Default

    You are real close...

    First, if you look at your bug, you'll notice that the hair in most of the bodylooks like it is angled back. That means you didn't use enough hair and/or didn't flare it enough or pack it tight enough. A common problem with Kevlar thread is that it will cut the hair before it has flared completely. If you use enough hair it will look like it's at right angles to the shank (what actually happens is that half tends back and half tends forwards. When you pack it the hairs 'mix' so that the outside looks like the ends of the hair, not the 'sides').

    Try using more hair in your first bunch, then decrease it as you add the markings/contrasts/spots. You want to put as much hair as you possibly can onto the hook. It will be denser and float better that way.

    Where you trim the bottom of the fly is oftten a matter of preference, but if you want that fly to dive when you twitch/pull/activate it, it will do that better if you trim it flatter and closer to the hook.

    Before trimming the hair to shape, try holding the hair portion in the steam from a kettle. This will cause the hair to flare more and make it trim easier.

    Great first effort. I wish my first ones had looked that good.

    Buddy
    Attached Images Attached Images
    It Just Doesn't Matter....

  3. #3
    Join Date
    May 2009
    Location
    Katy, Texas (Houston is our biggest suburb!)
    Posts
    528
    Blog Entries
    1

    Default

    Not bad for the very first one. The obvious 'shortcomings' have already been pointed out, and great suggestions for correction have been given.

    I will add only the following; my assessment is that the backwards sloping hair is due to inadequate packing. Be sure to take 3-4 tight turns of thread in front of each "batch" before packing, and pack as tight as you possibly can ("batch" includes the bunch on the bottom side of the shank and it's counterpart on top of the shank). This will both force the hair to stand up, and the front wraps will hold it in place.

    One critical tip that is seldom, if ever, pointed out about stacking is that the amount of hair used on top of the hook should very closely approximate the amount used on the bottom of the shank, regardless of how many colors for spots, are used on top. To do otherwise will produce a 'finished' bug (to which no more hair can be added to the hook) that has a sloped face; either 'out front' (too much on top), or to the rear (too much on the bottom). Think of this as like a two-layered cake with both layers of equal thickness; but, with several different layers of color in the top layer. This is what you should strive for to get a nice flat vertical face to such a big.

    I do disagree with one point Buddy made; the size of the bunch simply determines how many bunches are required to complete the bug; NOT how dense it will be, as well as how long it takes to 'build' the bug. Why do in six steps what can be done in three, and get the same result?

    Keep up the good work!

    Frank

  4. #4
    Join Date
    Sep 2006
    Location
    Fort Worth, TX
    Posts
    263

    Default

    Nice job for the first one! Mine looked like it had been hit by an RPG! I will say ditto to the comments of the first two Seniors... although it looks like your hair got tighter as you got closer to the eye of the hook! So... maybe you was getting the hang of it at the end of the fly! The hair is standing straighter and looks thicker so I'm going to say that was real good! Just make sure the whole fly looks like the hair at the front!

    Great job!

    Michael

  5. #5
    Join Date
    Sep 2006
    Location
    Lincolnton, NC
    Posts
    189

    Default

    First, thanks for all the tips and tricks.

    Here is try #2. I think it turned out a lot better than #1. It shaped up easier because the hair was much tighter. I didn't cut the hair this this time. The markings are a little more defined but could still use some cleaning up. It isn't real even from side to side.


  6. #6
    Join Date
    May 2009
    Location
    Katy, Texas (Houston is our biggest suburb!)
    Posts
    528
    Blog Entries
    1

    Default

    MUCH BETTER! I suggest cutting the bottom flat and parallel to the hook shank. This way, you can clearly see the densest part of the body, and use it some-what as a trimming guide.

    In an attempt to get good balance, use your scissors as a pair of dividers and 'mark off', by making a very shallow clip (no more than 1/8") at each 'corner' of the front of the bug that is equal to the hook gape. Use your scissors points to make this measurement. Using preferably curved scissor, proceed to trim along the sides from front to back. For a diver, simply 'eyeball' the cuts up and over the top to get you what you want. For a flat-faced bug, you can make the same measurement directly above the eye that you made on either side to establish a profile contour over both the sides and the front to follow as you trim.

    A little trick for a nice uniform trim of the diving collar is to force the funnel of a large hair stacker over the nose and all the way to the back, and to trim the hair flush with the funnel rim. This will produce a nice vertical cut, and even up all of the collar tips. Just be careful to not cut into the tail when making the vertical cut.

    Regards,
    Frank

  7. #7
    NewTyer 1 Guest

    Default

    Your flie looks cool. It looks like a Badger


    Quote Originally Posted by Wingsdlc View Post
    Lessons learned:

    1. Don't pull so hard that you break the Kevlar thread(it makes a mess of things).
    2. Don't pull so hard that you cut the stacked hair for a color spot (it makes a mess of things also).
    3. The second spot doesn't need as much hair.
    4. You can gain a lot of hook space when you pack the hair hard.

    All in all not bad for my first one. Will still fish it and probably catch fish on it. Couple more to try later this week. Will try and post pictures.

    What do you think?


  8. #8
    Join Date
    Feb 2012
    Location
    walnutport, pa
    Posts
    298

    Default

    defiantly improving... keep at it
    if every cast caught a fish, it would be called "catching" not "fishing"

  9. #9

    Default

    1st and 2nd try?! I think you may have found your niche! Nice job!

    Ralph

  10. #10
    Join Date
    Dec 2006
    Location
    South Louisiana
    Posts
    418

    Default

    When I first started with deer hair I was given this advice...

    Take a box of 100 hooks and a half of a tanned northern deer hide.

    Spin up 100 heads.
    Trim those 100 heads.
    Cut the hair off those 100 heads - back to the bare hooks.

    Spin up 100 heads.
    Trim those 100 heads.
    Cut the hair off those 100 heads -back to the bare hooks.

    Repeat several more times...

    At this stage don't worry so much about stacking, but rather concentrate on spinning evenly, packing (The hardest thing for beginners with hair to understand is that they need to pack even tighter), and learning the skills of cutting/trimming, as once ya' master those, stacking will come easily.

    The few folks that I know who have followed this advice all became excellent "hair men" in short order.

    I also always recommend that you spend some time at FFF Fly Fairs, including National, Council and club shows, learning from great "hairmen" (and women). The tyers at these events will show you so much in such a short period of time - you will be amazed! After all, if great tyers are willing to teach you all they know, then why wouldn't you take advantage of such an opportunity? The Federation of Fly Fishers web site's calendar is currently being loaded with council and club events for these events around the country: http://fedflyfishers.org/ Check back regularly to find events in your area.

    In addition, I am a huge fan of Billy Munn (i.e. the guy who taught Tim England and Chris Helms - two of the best hairmen who ever spin deer hair on a hook!). I have been fortunate enough to have spent many hours learning from this master tyer at FFF shows. A few years ago Billy made what I consider to be the very best CD on tying with deer hair, "Tying Hairbugs with Billy Munn"

    ... but then I do admit to being very biased. I just looked on line and found Billy's CD: http://www.trophyfishingvideos.com/v...illy-munn.html

    It will be the best money that ya' ever spend on tying... IMHO.

    Tight lines,

    Kyle

+ Reply to Thread

Similar Threads

  1. Mix of deer hair:calf hair for wings
    By Byron haugh in forum Fly Tying
    Replies: 2
    Last Post: 09-14-2020, 09:16 AM
  2. which deer hair?
    By fritz in forum Fly Tying
    Replies: 2
    Last Post: 01-15-2015, 06:45 PM
  3. anyone need deer hair?
    By spoof85 in forum Fly Tying
    Replies: 5
    Last Post: 06-25-2012, 11:20 PM
  4. mule deer hair
    By gqualls in forum Fly Tying
    Replies: 4
    Last Post: 09-27-2006, 09:19 PM
  5. spinning deer hair
    By sport in forum Fly Tying
    Replies: 12
    Last Post: 01-20-2006, 02:12 AM

Posting Permissions

  • You may not post new threads
  • You may not post replies
  • You may not post attachments
  • You may not edit your posts