|
Remember the last image we looked at in part 4 of
this series? If you recall, I created that overlay
with an imaging program from Microsoft called Picture
It Publishing Platinum. This time I want to start
with that program and show you how I created that picture.
Most digital imaging programs share some common features,
but accessing and applying those features often differs,
sometimes to a great degree. Another thing that often
differs is how each program applies its features to the
image. Some programs merge their features into one image
while others keep each layer separate and simply stack
each layer on top of the others. Those differences often
produce very different results in the final image.
Picture It Publishing (PIP) uses a more layered approach
to overlays than Photo Impact 8 (PI8), so the final images
usually look different, even though they started with the
same components. Also, each of those programs has features
not found in the other program, and each of them does
certain tasks easier than the other. Although PIP is
quite limited in the number of features it has compared
to PI8, using those features is more of an easy click
and drag game in PIP and a click the feature and apply
it game in PI8. Like I said several issues ago, they
both have their strong and weak points.
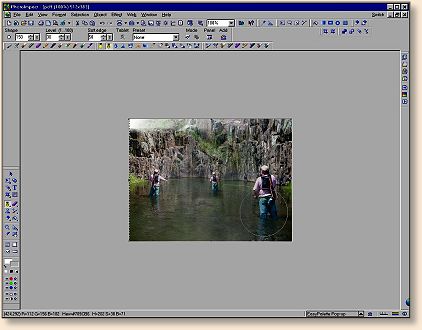
Enough comparing, let's do something fun. Starting with
a picture of my buddy Steve on a local stream, let's try
that overlay we saw last week.

Using the "cutouts and pictures" feature of PIP, we'll cut
the edges off this picture in an elliptical pattern.

Remember how many steps it took to do this in PI8? Here
we just stretch the circle to the edges and click when
we are done. We can create the cutout in many different
shapes too; many more than offered in PI8.

Next, we click on "edge effects"

and soften the edges to the desired level.

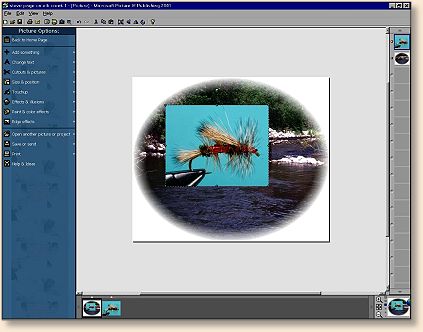
Now we take the same picture of the Royal Stimulator
that we used last time,

and drag it from the tray on top of the picture of Steve.
Sizing is as simple as clicking the corners of the
picture and stretching them until the top picture
completely covers the bottom picture.

Then we click on "effects and illusions" and use the
"transparent fade" tool to make the top picture transparent.

When we finally achieve the effects we want, we can save
it under its own name as a new picture.

This is the finished image.

Remember this picture of Paul Dieter? Do you think he'd
mind if we picked on him a little bit more?

Let's fade the picture on one side using a version of
the same "transparent fade" tool we used to fade the
fly picture in the last image. Only this time, we'll
fade the picture gradually instead of evenly.

Next we open another picture of Paul and flip it horizontally.

Then we fade that picture on the other side.

And drag the first picture on top of the second one.

Then we adjust the brightness of each picture so they match.

And then stretch the first picture to cover the second one.
Notice that the faded area becomes transparent when placed
over another picture?

You can move each picture forward or backward in the stack
to achieve the look you want.

Next I drag the first picture from the right-hand bar,
on top of the composite picture we have been creating
and move it into the position I want.

Then I soften the edges of that picture and use the "even
transparent fade" tool to blend it into the picture a
little better. I also adjust the layers so the person
closest to me is on top and the one furthest from me is
on the bottom. It just wouldn't look right if the fly
line of the close person disappeared behind someone
farther away.

Once I have the layers situated the way I want them in PIP,
I save the whole image and open it in PI8. Then I can use
other tools that PIP doesn't have to further blend all the
images together into one picture.
Here I'm using the "burn tool" to darken areas of the picture.
If I need to, I can use the "dodge tool" (just left of the
burn tool on the tool bar), to lighten areas of the picture
as needed.

The end result is a picture created by using tools in two
programs to adjust several images and merge them into one
picture. How do you like the final result?

While most of the things we've been doing are just fun stuff
to look at, keep in mind that these are the same tools and
types of manipulations magazine publishers use to create
cover pages and advertisements for their magazines. You might
just want to have some fun, but somebody somewhere is using
these types of programs to make a living. Compared to their
skills, I'm probably a novice; but I'm having some fun, and
as I play I'm learning a skill that might someday make me some money.
~ AC
|